This week’s Crafty Friday tutorial is extra special as it’s also Laura’s birthday (yay! ?) birthdays – as well as Christmas – are the perfect excuse for making some fabulous handmade gifts.
You’ll find a number of handmade gift ideas in our Crafty Friday posts; including this one!
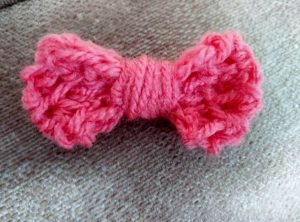
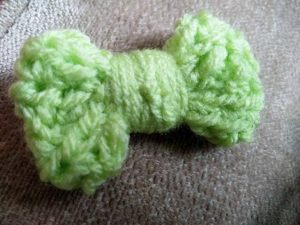
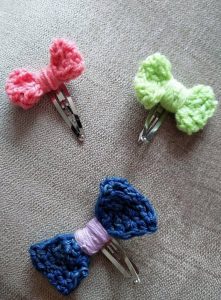
This week we wanted to show you how to make these beautiful Crochet Bow Hairclips. They are so easy to make – a perfect project for any crochet beginner – and they look super sweet! You make them using any left-over yarn, so the cost really is minimal.
For this tutorial you’ll need to know how to Chain Stitch (C) and Half Treble Crochet (Htr).
If you’re not sure, follow the tutorial below and refer to the images or look out for our handy Youtube tutorial coming soon to our Channel.
What You Will Need

- DK Yarn (a fair amount of Left-over yarn or 1 x new ball)
- You can use any type of yarn to make these we used both 100% Acrylic and 100% Cotton yarns.
- 5mm Crochet Hook
- Scissors
- Plain Curl Hair Clips
- Knitters (or Darning) Needle
- Hot Glue Gun (or Strong PVA Glue or Craft Glue)
How To Make A Crochet Bow Hairclip
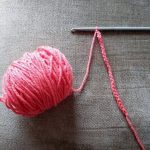
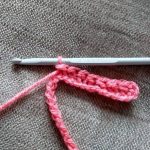

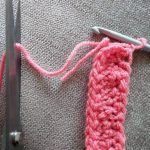

- Find the end of your yarn and in whichever way you prefer, make a Slip Stich on to your crochet hook.
- Chain Stitch for 25. You can do this by wrapping the ‘yarn over’ the hook, and pulling it through the loop you already have on your hook.
- You can make your bow bigger or smaller by adding or deducting to/from the number of chains.
- At the end of the chain, wrap the ‘yarn over’ your hook and Half Treble Crochet (Htr) in the third chain from your hook.
- With the yarn wrapped over the hook, push the hook through the third chain from the hook.
- Wrap the ‘yarn over’ again and pull through.
- Wrap the yarn over your hook again and pull it through all three stitches on your hook.
- Pull the yarn snug after each stitch.
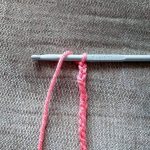
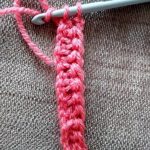
- Work along the chain, making a Htr in each chain until you reach the end.
- After your last Htr, Chain Stich 2.
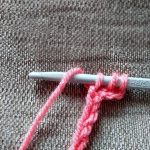
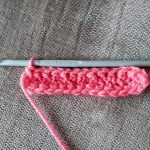
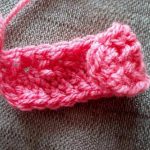
- Flip your completed row to the other side, and continue doing Htr down the other side of your row of Chain Stitching. Go into the first loop, don’t miss any.
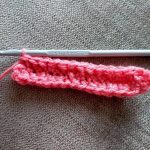
- Repeat for another two rows, one on either side, so you have a total of four Htr rows and one Chain row.
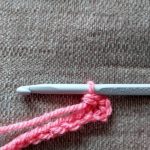
- At the end of the last row, chain one. Cut your yarn leaving a tail and pull completely through the chain, pull tight to knot.
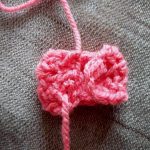
- Fold each end of your crochet piece in to the centre. Thread your Knitters (Darning) needle and stitch across the middle to hold in place.
- If you prefer to, you could just Glue the end to the centre. You’ll need to be careful not to apply too much.
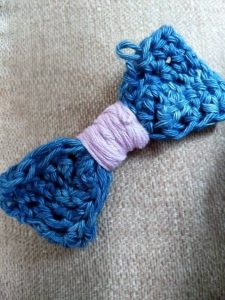
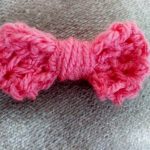
- Cut a length of the same or a contracting colour yarn (this will be for the middle of the bow.) Add a small amount of glue to the back of the bow and press the end of your new yarn to it.
- Wind the yarn around the middle, keeping it quite tight – finish whenever you’re happy with how it look, you can use as little or as much as you want to.
- When you’re happy, cut the yarn (if you need to) and glue it to the back of the bow. Glue the bow to your Hair Curl Clip. Ta-dah! You’re all done! 🙂
To make our Crochet Bow Hair Clips we used our New Fashion 100% Acrylic Yarn we also used Katia Cotton as well as True Blue Indigo Dyed Cotton.
We hope you enjoyed this little tutorial and (as always :-)) we’d love to see any that you have made too, so feel free to send those to us via social media or our email address karendelahunty@outlook.co.uk
Happy Crafting and Weekend-ing!