Our latest Window Display – which I’m sure you’ve all seen by now – sure has caught the eye of a number of people.
We’ve even had people just popping in to compliment us on it, which has been really rather lovely! One of the main attractions in our window has been the lovely handmade paper dresses garland.
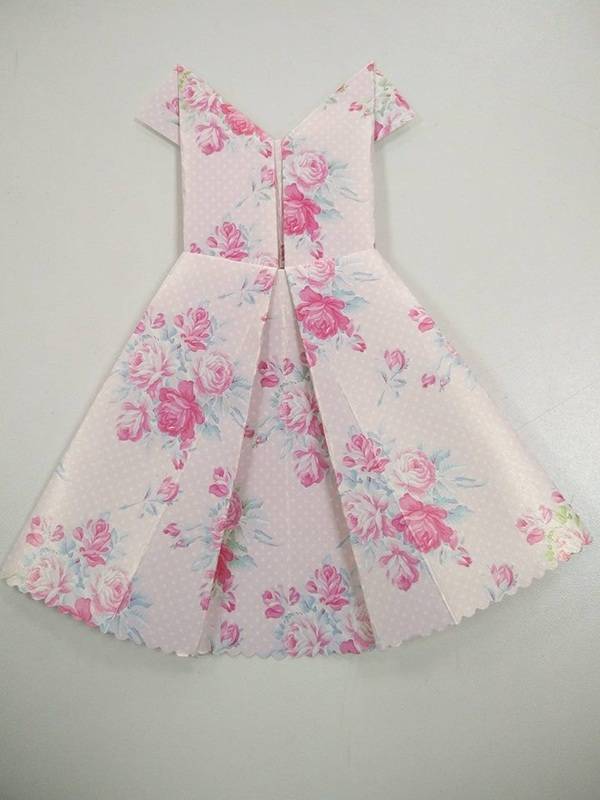
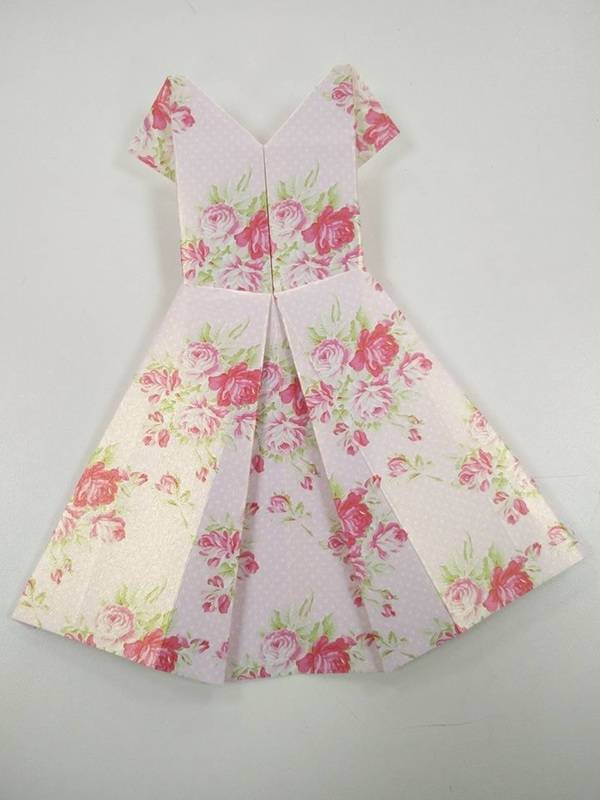

We’ve had a few people call in and ask us how we made them, so this week, I thought it would be nice – and before our display changes again – to show you how to make your own paper dresses. Once you’ve made one, you’ll see that they really are so simple to do and you’ll be able to make as many as you like with ease.
These would look really cute as a bedroom decoration for a child, or even as decoration in your craft/sewing room. I made all of mine different, but you could make you’re the same if you wanted; personally I quite liked the variety of different textures and styles.
What You’ll Need
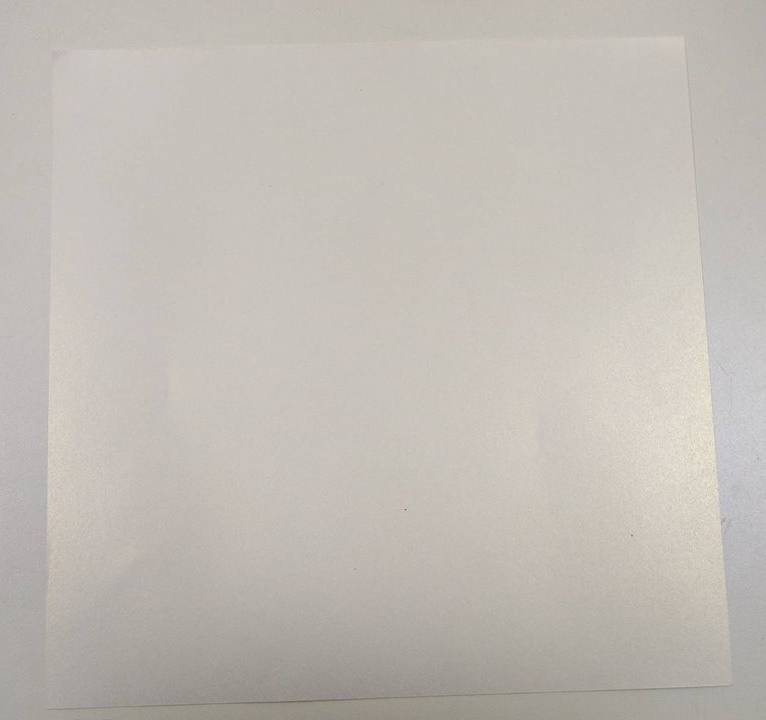
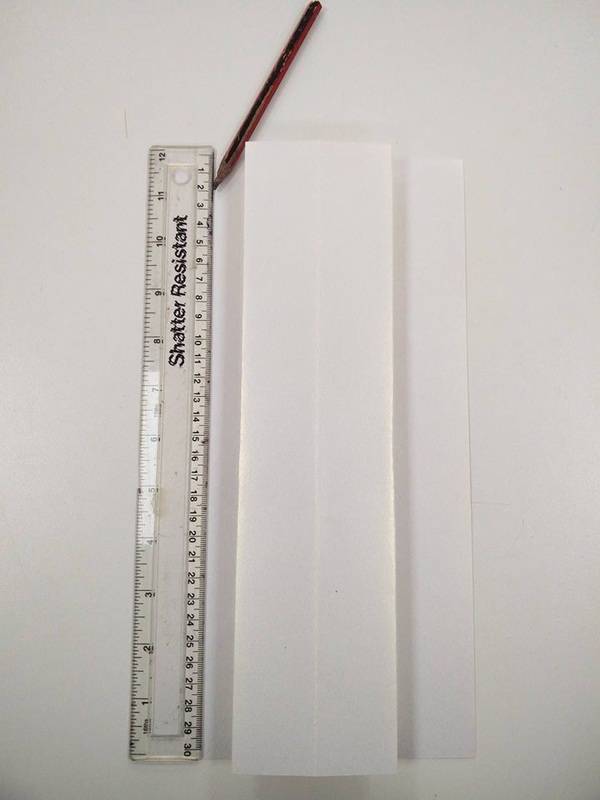
- 1 x Square of paper 30.5 cm x 30.5cm (12” x 12”)
- I used Tanya Whelan’s Floral Pavilion Fabric Textured Papers, but you could use any. You could even use plain and paint/print your own design to them.
- Scalloped Edge Scissors
- You don’t have to use these, but I found they gave a really nice finish to my dresses.
- Ruler
- Pencil
How to Make a Paper Dress
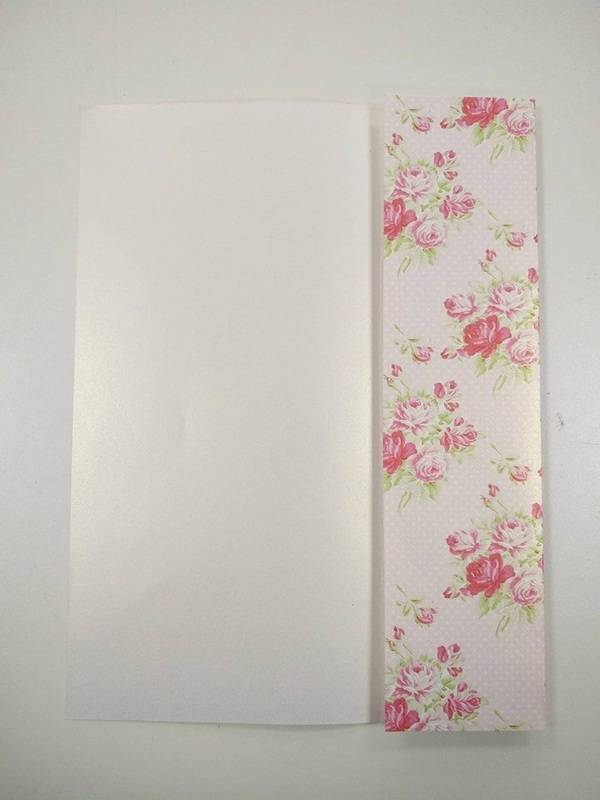
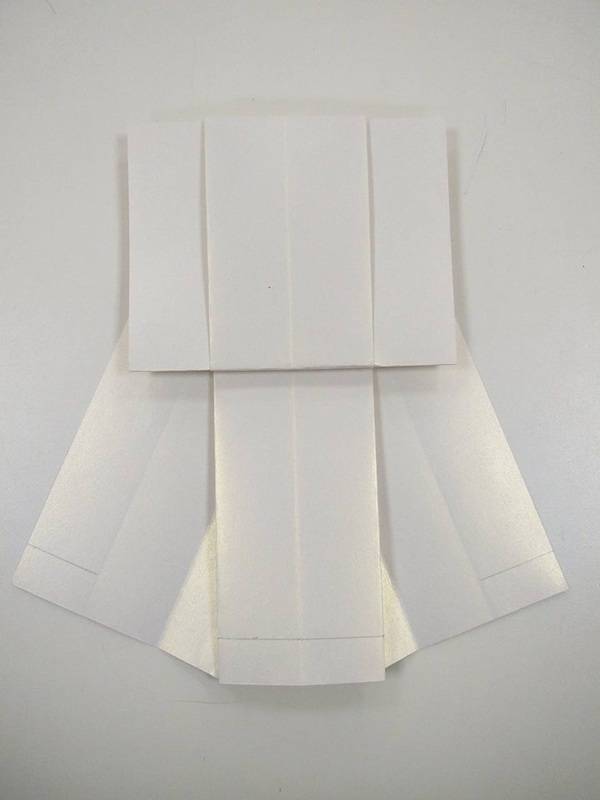
Start by placing your square of paper, pattern side down. You should have the plain side facing up toward you.
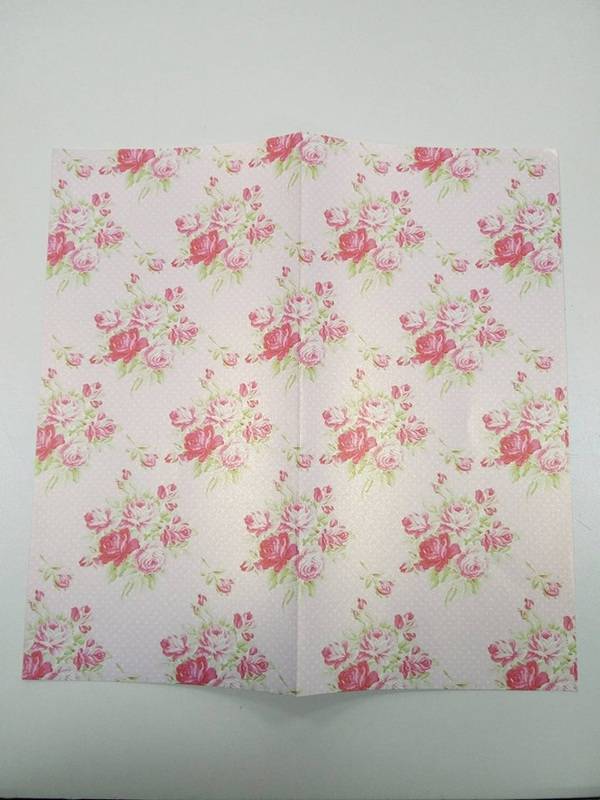
Fold the paper in half, vertically. Make sure you make the crease nice and strong, press it down a couple of times.

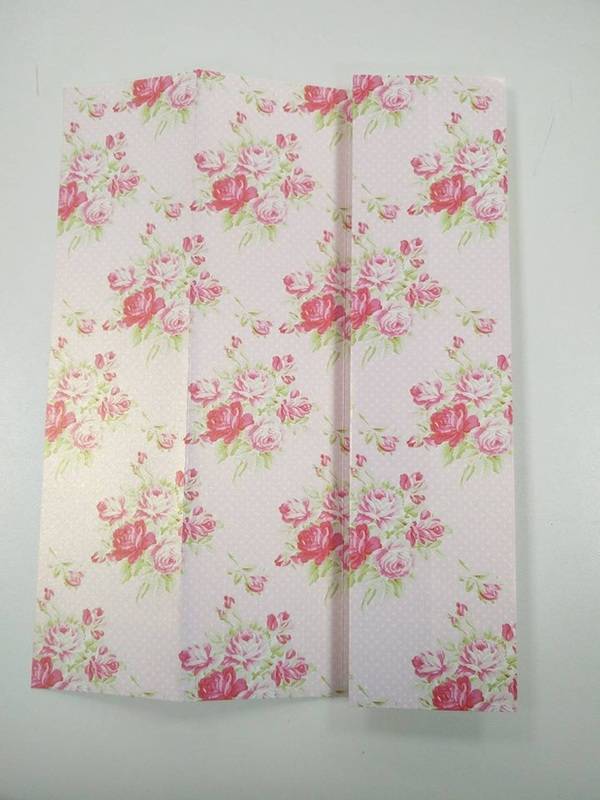
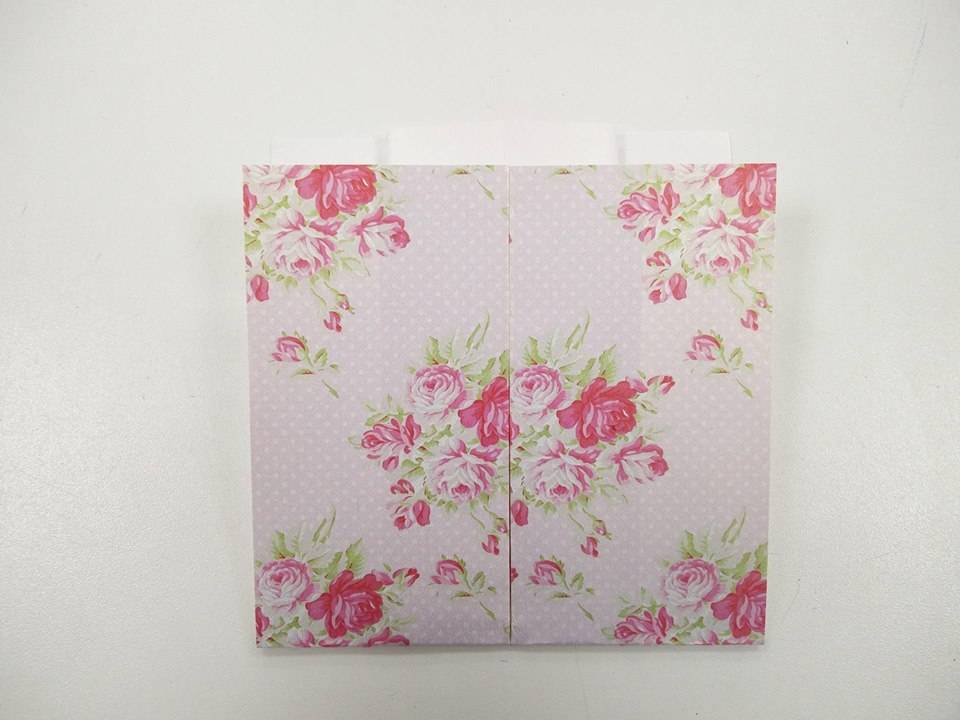
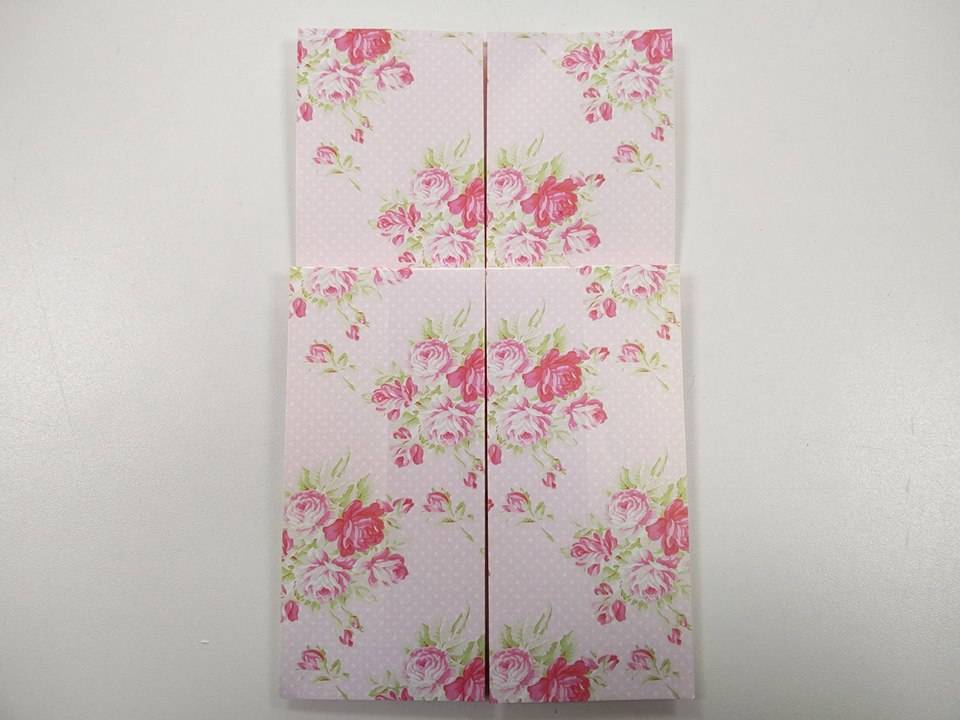
Open the crease you just made. Now, fold the square in to quarters, by folding the two outer sides in toward the middle fold.

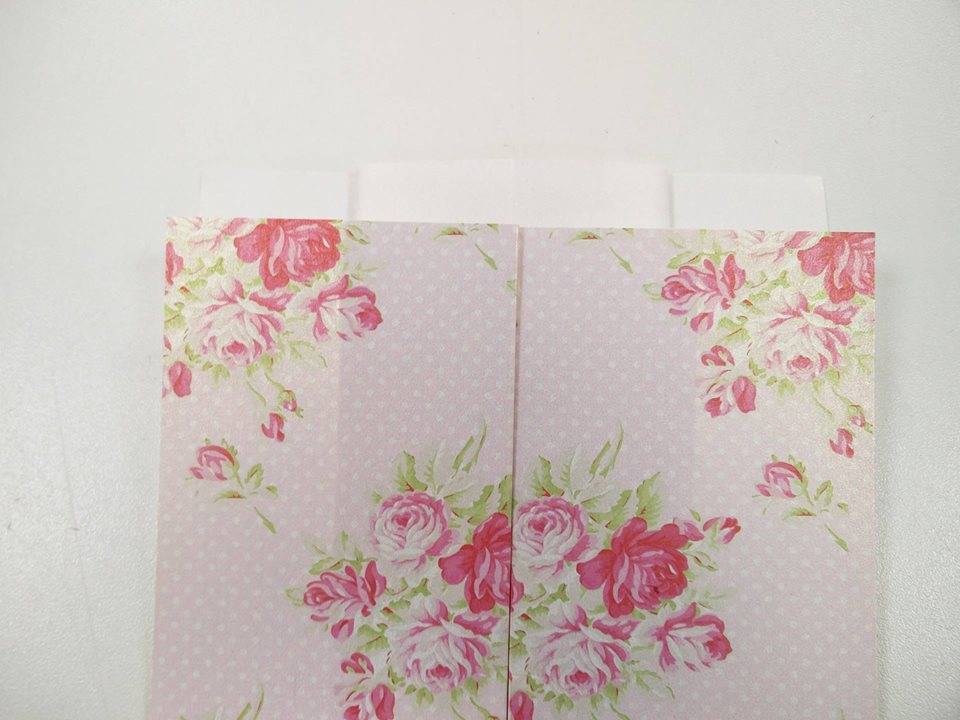
Open out all creases and flip the paper over so you now have the pattern facing up toward you. Find the creases you just made and fold those in to the center fold. The two folds should meet in the middle.

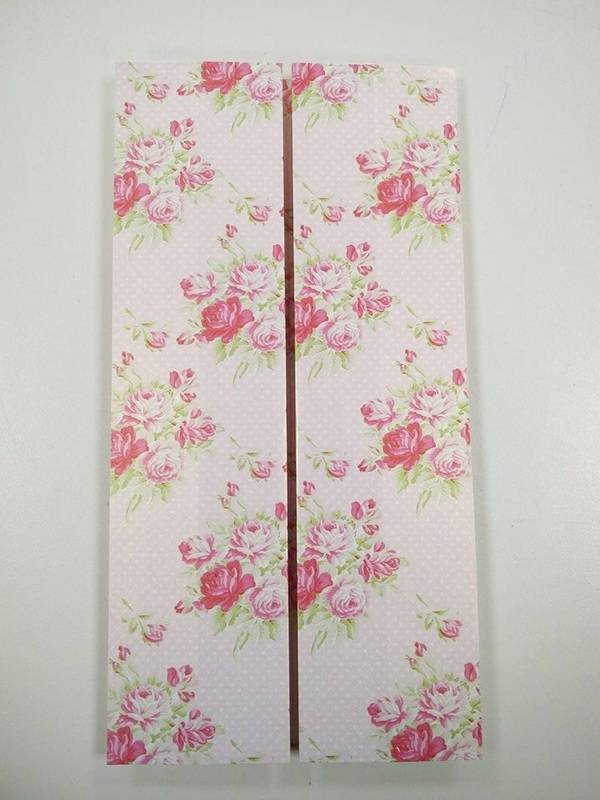

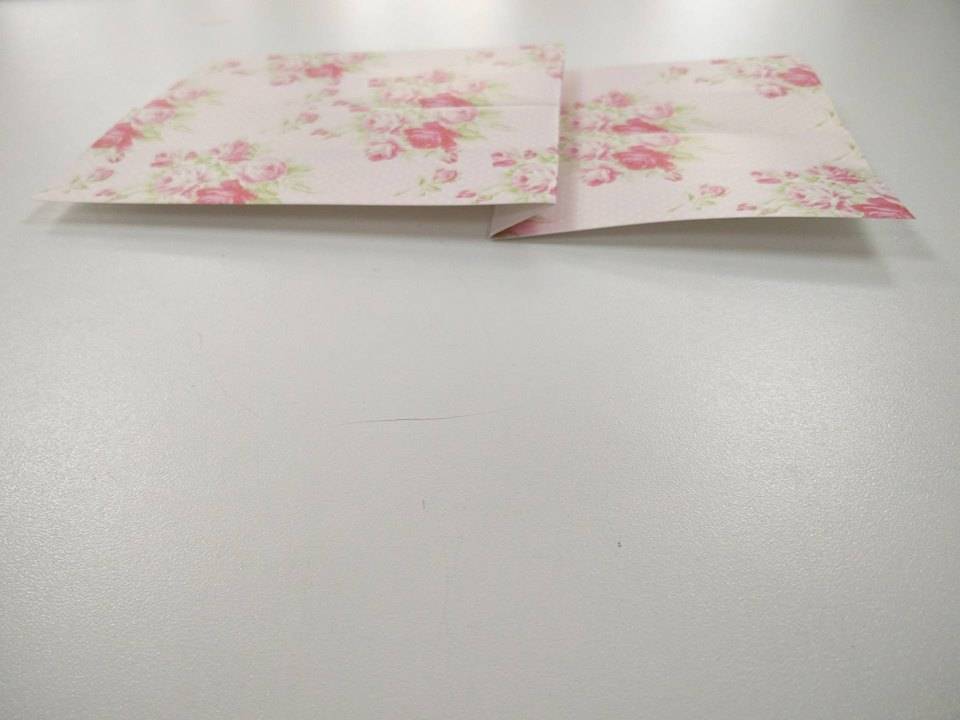
Flip the folded piece over, so again the plain side is facing up toward you and the pattern is facing down.
Using your ruler and pencil, mark a line 2 cm from the top. Drawn the line horizontally across the top.
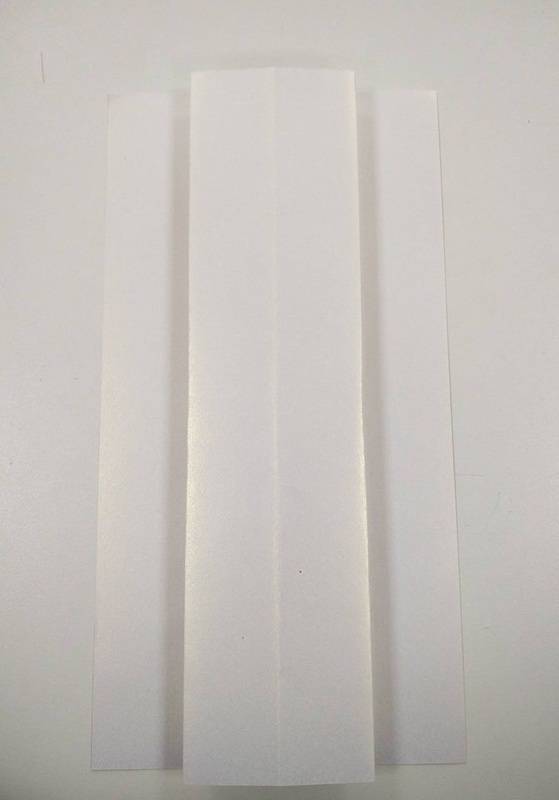

Fold from the bottom, to the line you’ve just drawn. Press firmly to create a strong crease.
Keeping the smaller part at the bottom, fold it in and then back on itself, to make about a 1 cm fold. This will become the waistband of your finished dress.
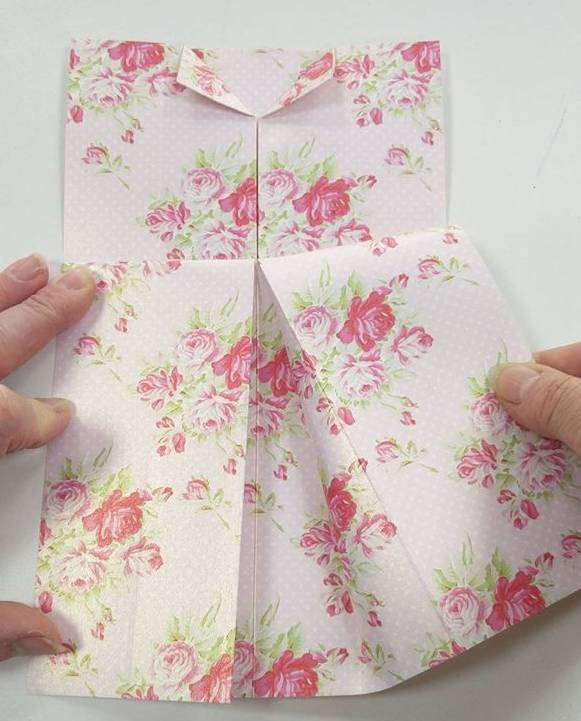
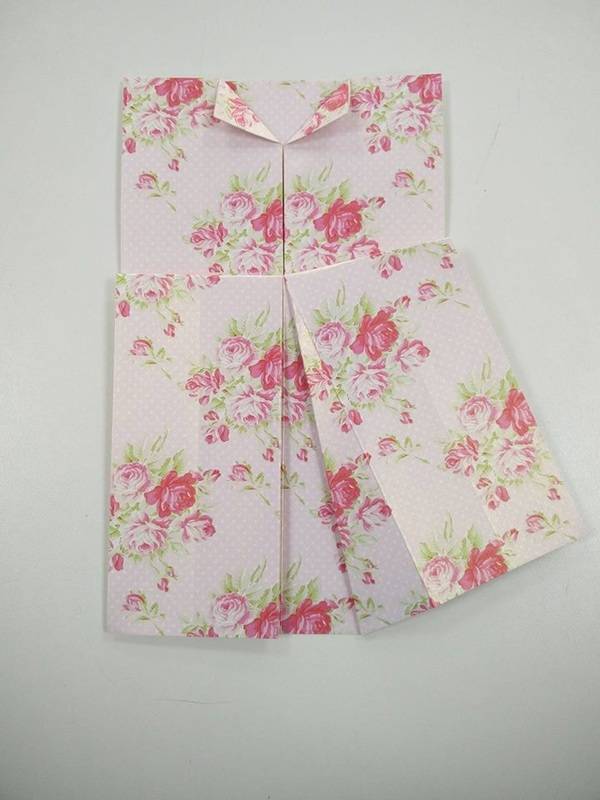
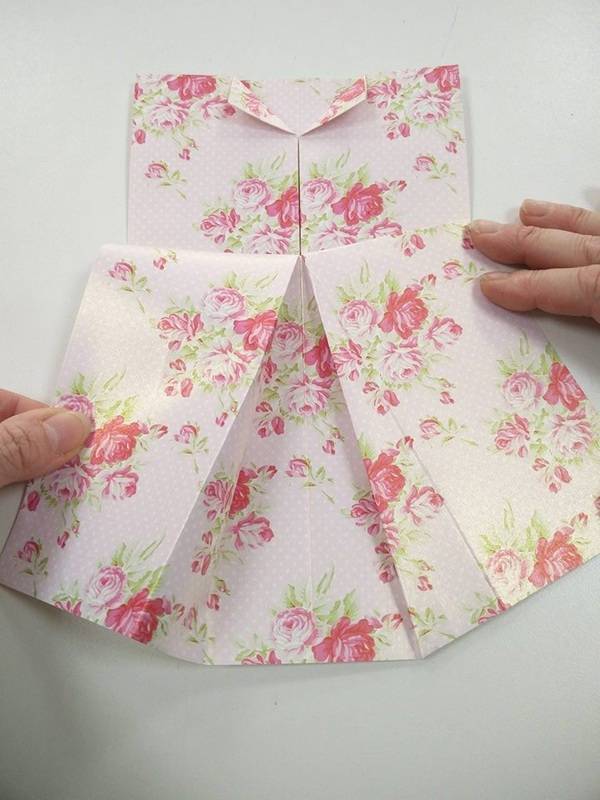
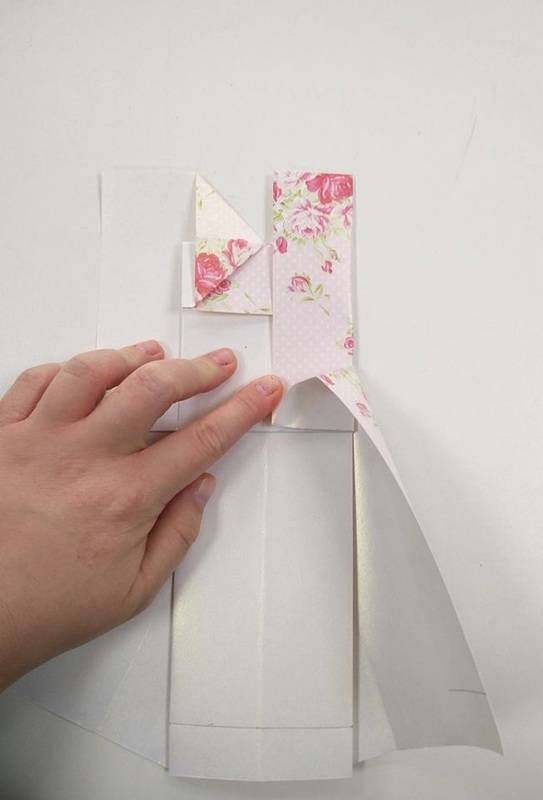
Flip the paper over, so you have the patterned side facing up toward you again. You’re now going to make the collar.
Fold down the top two corners to create the collar.


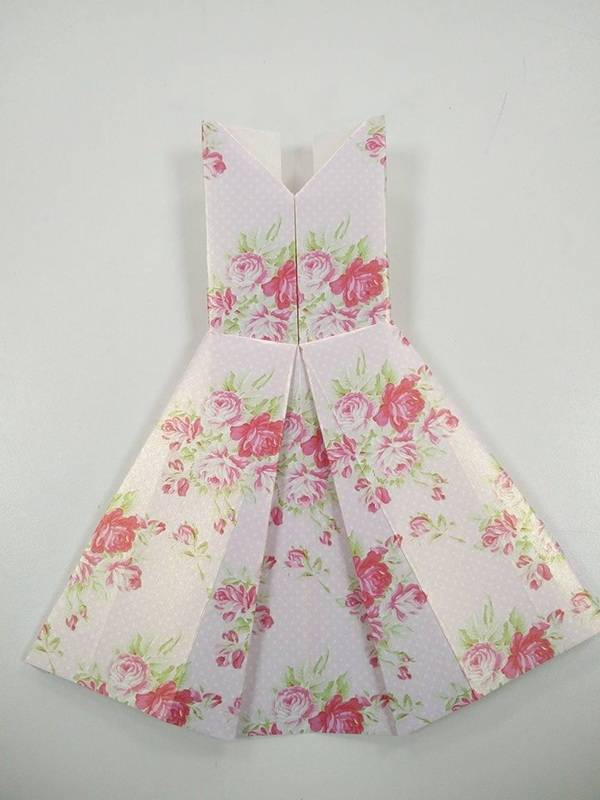
The next step is making the pleat of the dress. To do this, pull the waistband on one side out to the side, hold it down with your finger, then make a line down the center and push out.
Repeat this on the other side too.

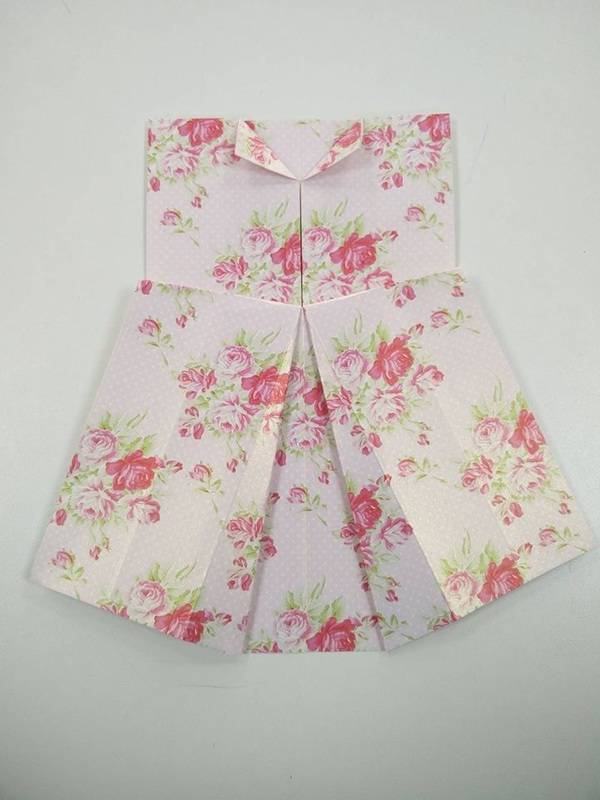
Flip over again so the plain side is facing you again.
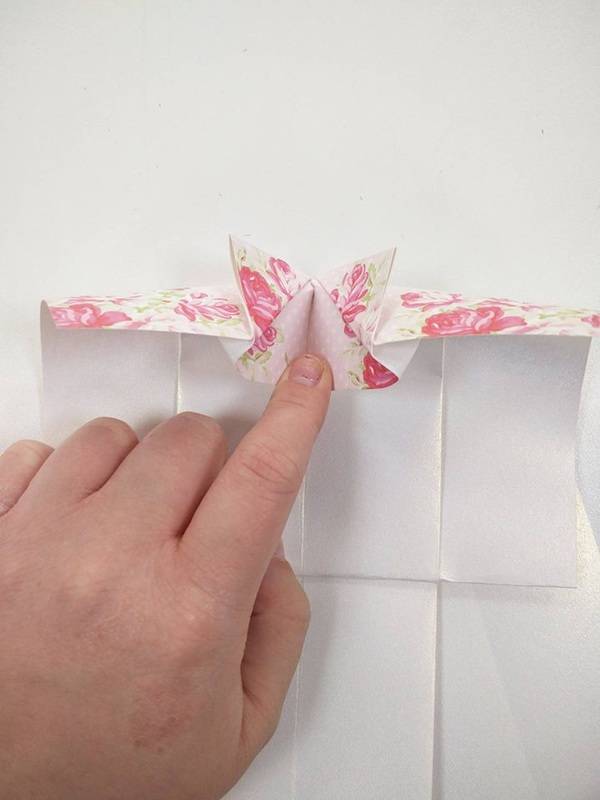
You’re going to make the V-neck at the top of the dress. This can be quite tricky, so do take care not to tear the paper.
Pull the top back with one finger gently, only to where the collar meets.Crease down the two sides, so you have an almost square shape at the top.
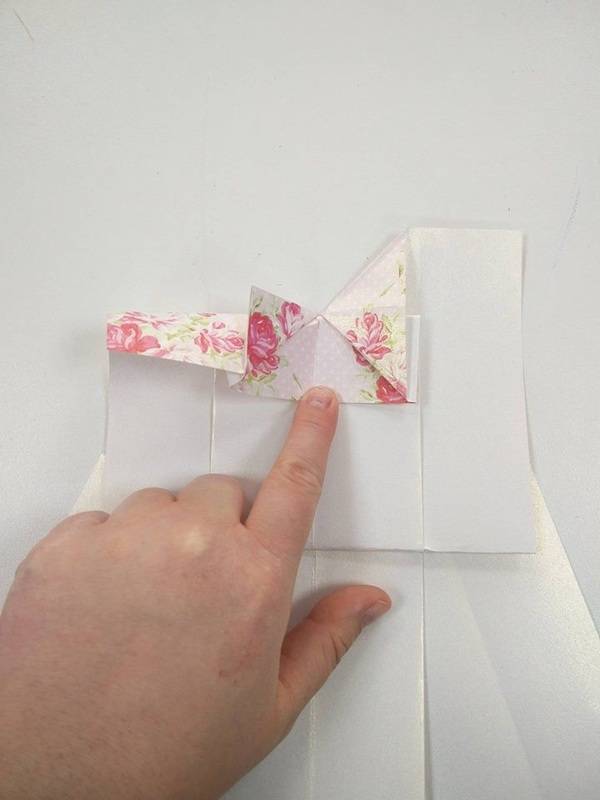
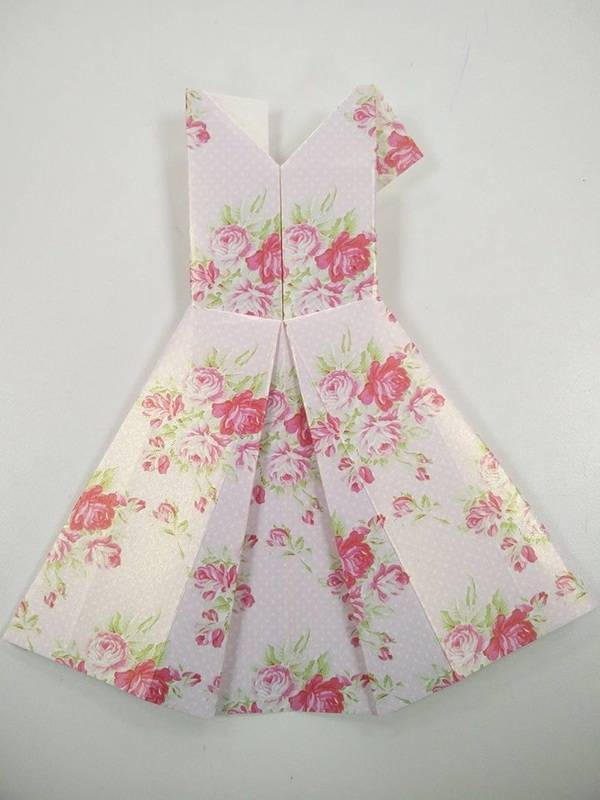
Next, you want to fold over the side piece all the way down.
Then you’re going to create the angle for dress, by folding down the side of the skirt too.
Repeat on the other side.
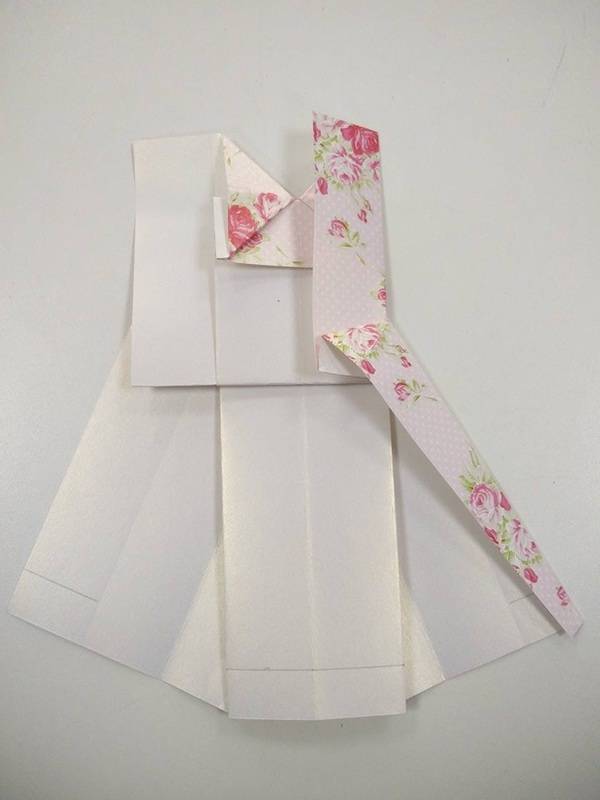
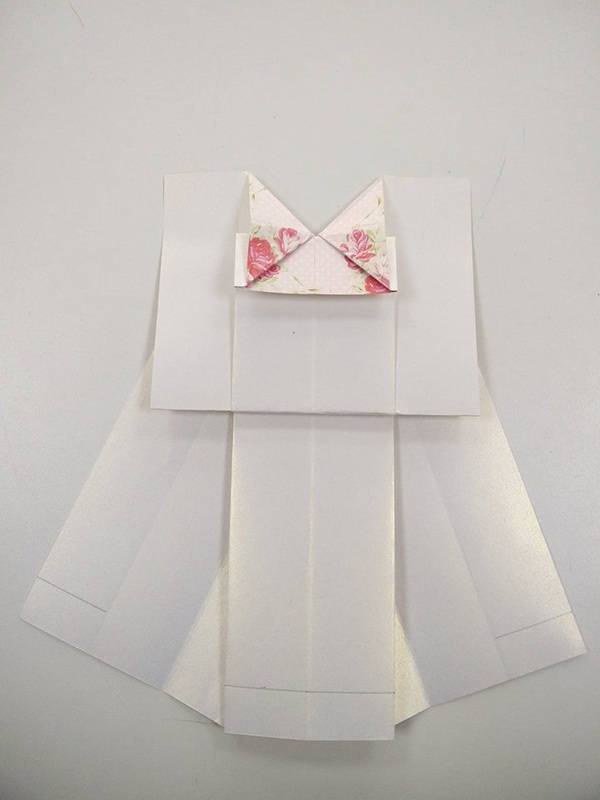
Flip the paper over again, now you have the pattern side facing up and you can see the dress is forming nicely.
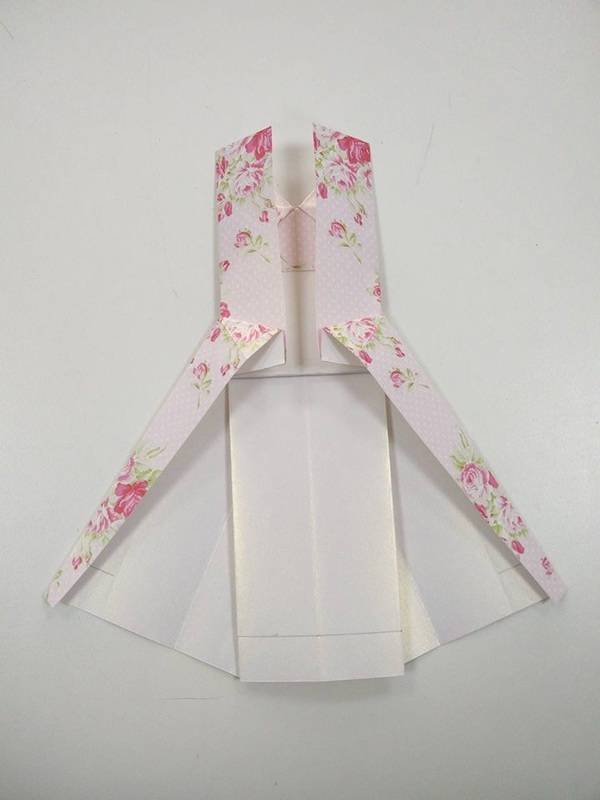
To make the little capped sleeve, you just fold the overhang at the top back on itself.
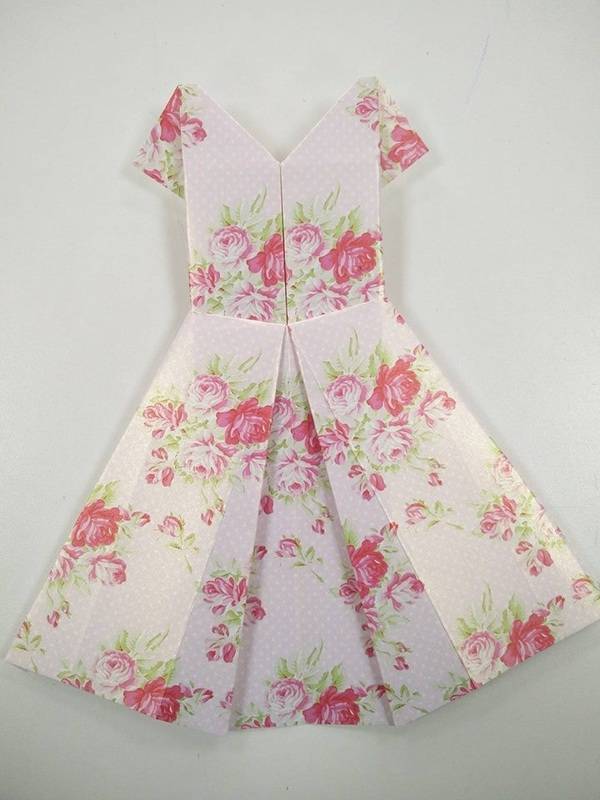
You can finish here, or you can trim the bottom of the skirt using the scalloped edge scissors, as I did.

We hope you enjoyed this little tutorial and (as always :-)) we’d love to see any that you have made too, so feel free to send those to us via social media or our email address karendelahunty@outlook.co.uk