Posted on

Woven Friendship Bracelets

This month we have been busy making some hand woven bracelets. These are perfect for a thoughtful gift for your closest of friends or family.

Alternatively you could make yourself a nice new accessory to wear with your own personal touch.

These are very cheap to make however take a bit of time but once you get the hang of it, you soon start seeing the bracelet come together.

What you need

  • 3 different coloured Cotton embroidery threads
  • A strip of Sellotape
  • A pair of Scissors

Before you start you will need to cut two strands of each colour thread at 25 inches/64cm long. (e.g 2 strands both measuring at 25”,(65cm) of red cotton thread, 2 strand at 25″(65cm) of blue cotton and another 2 strands of green cotton thread the same length at 25″(65cm).

For the demonstration I have used Red, blue and green tapestry wool, as it is a little bit bigger so easy to understand.

Arrange the threads as alternate colours. For example start with Red, Green, Blue then mirror it back, Blue, Green, Red. Like pictured below.

Place a strip of sellotape across the threads onto a hard surface. Make sure you leave at least 8cm above the sellotape at the top, to allow for tying your bracelet together at the end

​Follow the video below for the steps of making this bracelet.

If you have any questions about making the bracelets you can pop into the shop at 80 Warwick Road, CV8 1HL- Tel: 01926 859892 and we’d be happy to help you.

Our opening hours are

Monday: Closed, Tuesday - Saturday: 10:00 AM — 5:00 PM, Sunday: Closed
.

All the supplies used to make these woven bracelets are available to buy at Karen Delahunty Sewing & Knitting Centre.

Hope you all enjoyed this and have fun creating these lovely hand made bracelets for your friends and family.

Posted on

How to do a Tailor Tack

Tailor Tacks are loose, looped, hand sewn stitches that are common in most sewing patterns. They are used for marking specific points on your fabric.
For example you will see markings on dress making patterns to indicate where your darts are to be sewn or where the pockets should be placed on a garment.
These markings must be transferred from the pattern to the fabric. Its a way of thread marking through the pattern pieces and the fabric all in one go to achieve accuracy. This is especially needed to ensure that your darts are positioned symmetrically on both sides of your garment.

So here is a step by step tutorial on how to sew a Tailor Tack.

You will need a hand sewing needle and a thread of a contrasting colour to your fabric.

Keep the paper pattern piece attached to your fabric pieces that you have cut out.
You will be sewing the tailor tack through all layers. (The pattern paper is still attached).
The pattern will indicate where a tailor tack is needed by circles that look like these in the photo. Each circle is numbered. That number represents a garment size. You will sew through one of these circles. Choose the one that matches the pattern size you have cut out.

Thread a needle with a strand of thread make it double thread. Make sure its a contrasting colour to your fabric so it creates a clear, obvious marking. (Don’t worry you will take these out eventually, so you won’t see it.) Do not knot the end. Start by making a small simple single stitch. Using the circle on the pattern as a guide, push your needle through the circle and into the fabric. Push it to the underneath, then bring it back up again to complete the stitch, as shown in the picture below.

Pull the needle and thread through to leave a reasonable thread tail.
Go back into the same hole/ area and take the needle and thread down and through to the underside of fabric ,making sure to leave a loose loop of thread showing on the top surface.

From the underside bring the needle and thread back up and though the hole/area again. Gently pull the needle through the fabric to bring the thread to the top surface. Make sure you leave a loose loop on the underside of the fabric.
Cut the thread from the needle, but be sure to leave a little tail of thread first.

Carefully remove the paper pattern, taking care to ease the tailor tack threads off the tissue paper so it doesn’t tear the pattern too much.
The tailor tacks will still be attached to the two layers of fabric.
Gently pull the 2 layers of fabric apart until you get to the tailor tacks. Continue to pull the fabric apart so you can see the threads. Snip through the middle of these threads. The tailor tack is now cut into two halves.

Make sure you leave enough thread on both the top and underneath side of the fabric when you cut through the tailor tack. You will have loops of thread on one side of the fabric and cut ends on the other.
You should now be left with 2 thread marks that are in exactly the same symmetrically placed, on the both the left, and right hand, side of the fabric.

And that’s it!
You now have Tiny little thread markings on both sides of the fabric.
Along with your pattern instructions, you can use these markings to create things like darts, align pockets. mark out your buttonhole placements etc. When you no longer need them, you just simply pull them out. They’re very loose threads so it’s easy to do.
Tailor Tacks are a very simple, usefulness and well known technique, that will improve your sewing significantly.

We hope you enjoyed this tutorial. Happy ‘Tailoring’

Posted on

Join us for Sew Saturday on 21st October 2017

​Come and join in the fun on Sew Saturday 21st October 2017 & celebrate your local independent sewing shop.

We will be open from 10am-5pm on the day.

There will be lots going on… we will be running mini taster sewing session throughout the day, we’ll have goody bags for anyone who spends £30.00 & over. I must admit these  bags are limited so you might want to get in early.

There will be free cake in the shop to celebrate so pop in and say Hi to our girls and have a bite to eat, even if you’re not buying anything!

There will be some special offers on our fabrics and wool for that day only and we will tell you more about that nearer the time.

As for the mini taster sewing workshops they are available to book as of now. Last years workshops were extremely popular, SEW lets tell you about our workshops & how to book:

There are morning sessions where you can pay £5.00 per person & learn how to make a zipped pouch bag and enjoy a slice of cake with a cup of tea or coffee. All equipment and material are included. These session last for 45minutes.

These session will be running on the following times:

10am-10:45 – 4 spaces currently available and open to all abilities.
11am- 11:45am – 4 spaces currently available
12noon-12:45pm – 4 spaces currently available

In the afternoon we will be running learn to make mini bunting workshops.

These sessions will also last for 45 minutes, you will make a 1metre of mini bunting with approx 6/7 flags to take away with you. Enjoy a slice of cake and a cuppa while you sew. All equipment and materials are provided just bring yourself and maybe a friend along and enjoy so sewing fun.

The afternoon sessions will run from:

2pm – 2:45pm – 2 spaces currently available
3pm – 3:45pm – 4 spaces available

All of our taster sewing session will need to be booked in advance. If you would like to join us you can book your place by calling 01926 859 892.
Alternatively you can pop into our shop on 80 Warwick Road, Kenilworth and book your place there.

We will keep adding more update information about this event to our facebook events page and we will post here as we get nearer the time.

We look forward to seeing you all and hope that many of you can stop by celebrate Sew Saturday with us.

Thanks

Karen & Team.

Posted on

Sew Saturdays Daisy the Dachshund pin cushion

As sew Saturday flies round the corner on the 21st of October, this week we have made the Sew Saturdays mascot Daisy the Dachshund to celebrate the countdown to the day. This project is perfect for those few scraps of fabric lying around the house which will be the perfect amount to make Daisy the Dachshund. It will also ensure your pins will be kept safe and you wont have to hunt around for those stray pins anymore!

What you will need

  • The Daisy dachshund template which you will need to download and print it off.
  • Cotton fabric approx 20cm X 20cm ( Use a cotton print with a colourful patter to make it more interesting)
  • Coloured felt of your choice
  • Toy stuffing
  • Ribbon
  • Fabric scissors
  • Thread to match your fabric
  • Two small buttons for the eyes (or you can just embroider the eyes with thread as another option)

Lets get started

First fold your piece of cotton in half, with right sides together. (I have already cut out my dachshund template) ready to then pin to the layers of fabric. Once you have pinned the template to the fabric you will need to add 5mm seam allowance round the outside of the template. For this step I used a tape measure to measure 5mm and a clover liner chalk pen to mark the 5mm at points. I then roughly joined these points and then cut it out.

If you choose to embroider the eyes on the dachshund do this now, however if you want to use buttons for the eyes this can be done later. If you are a more advanced sewer you could do a tailor tack with the two pieces of fabric where you want the eyes to be positioned, this is just so the eyes will be positioned in the same place on either side of the dog. If you want to learn how to do a tailor tack Click here to take you to our blog post on how to do a tailor tack.

The next step is sewing the two fabric dog pieces together. Pin the pieces together to stop them from moving. You will want the right sides of the fabric together and using a sewing machine (I’m using a Bernina B350) and just a basic straight stitch, start on the Dachshunds tummy and sew along your 5 mm seam allowance line you drew earlier. Sew all the way round until you almost meet where you started and make sure you leave a gap to put the stuffing in later. Again if you are more advanced sewer reverse over your stitch at the start and end for strength so that it doesn’t easily rip open when you are turning and stuffing it.

Clip and trim the seam allowance down, I used pinking shears to do this which makes this step quicker and easier. Make sure to really clip the corners before you turn the dachshund right side out.

It should now look something like this.

Fill the Dachshund with the toy stuffing. Tip: use a knitting needle to push the stuffing to the ends of the limbs. ​

After you have stuffed the Dachshund fold in the raw edges where you left your gap and hand sew the gap closed.

Pin the ear template pieces to your piece of felt and cut out two ear shapes from felt. Hand sew the ears to each side of the Dachshunds head. Make sure you use a matching thread to the colour of the felt so the thread is not visible. Then the final step is tying the ribbon around the Dachshunds neck in a bow. There you have your Daisy the Dachshund pin cushion.


Thank you to Sew Magazine for the pattern to make Daisy the Dachshund.

As always all the equipment used in this project are available to buy in store at Karen Delahunty Sewing and knitting Centre. Remember, if you come in on Sew Saturday which is the 21st of October and spend £30 with us you will receive a free gift bag full of exciting goodies, which includes a free Daisy the Dachshund pin cushion kit!

There will be lots of workshops going on through out the day where you can make your own zip up pouch bag or mini bunting for only £5, so make sure you book your place in advanced and come on down and have a fun filled afternoon celebrating Sew Magazines Sew Saturday!

Posted on

Easy Summer Roses

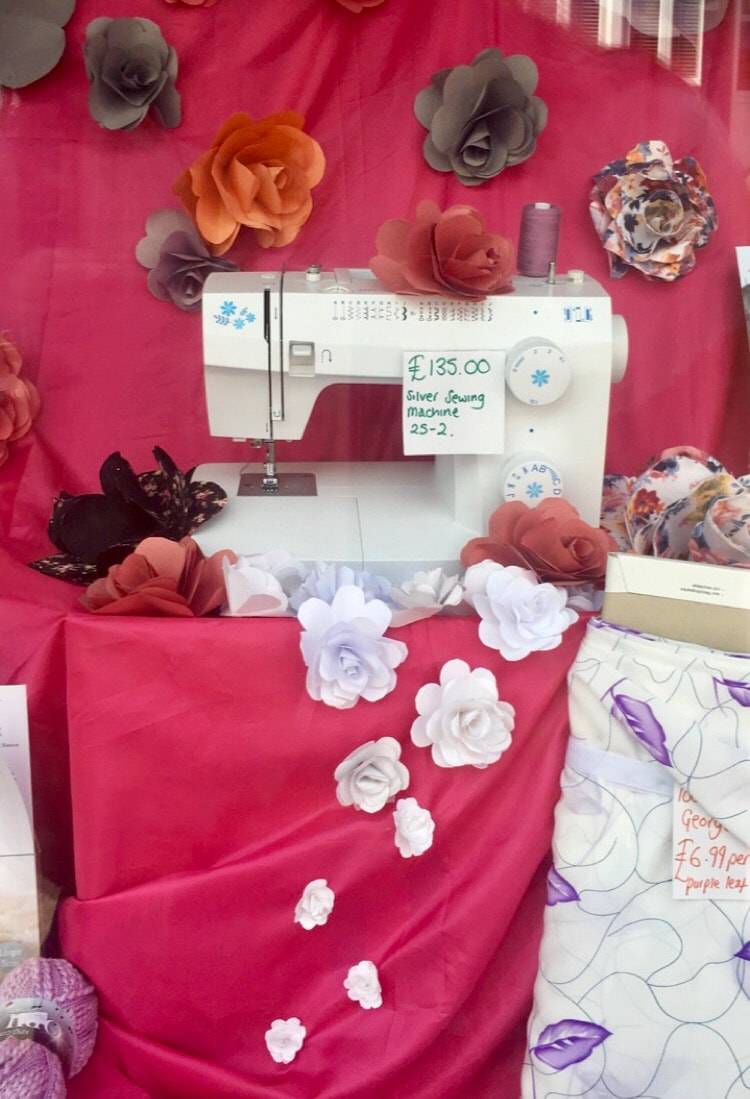
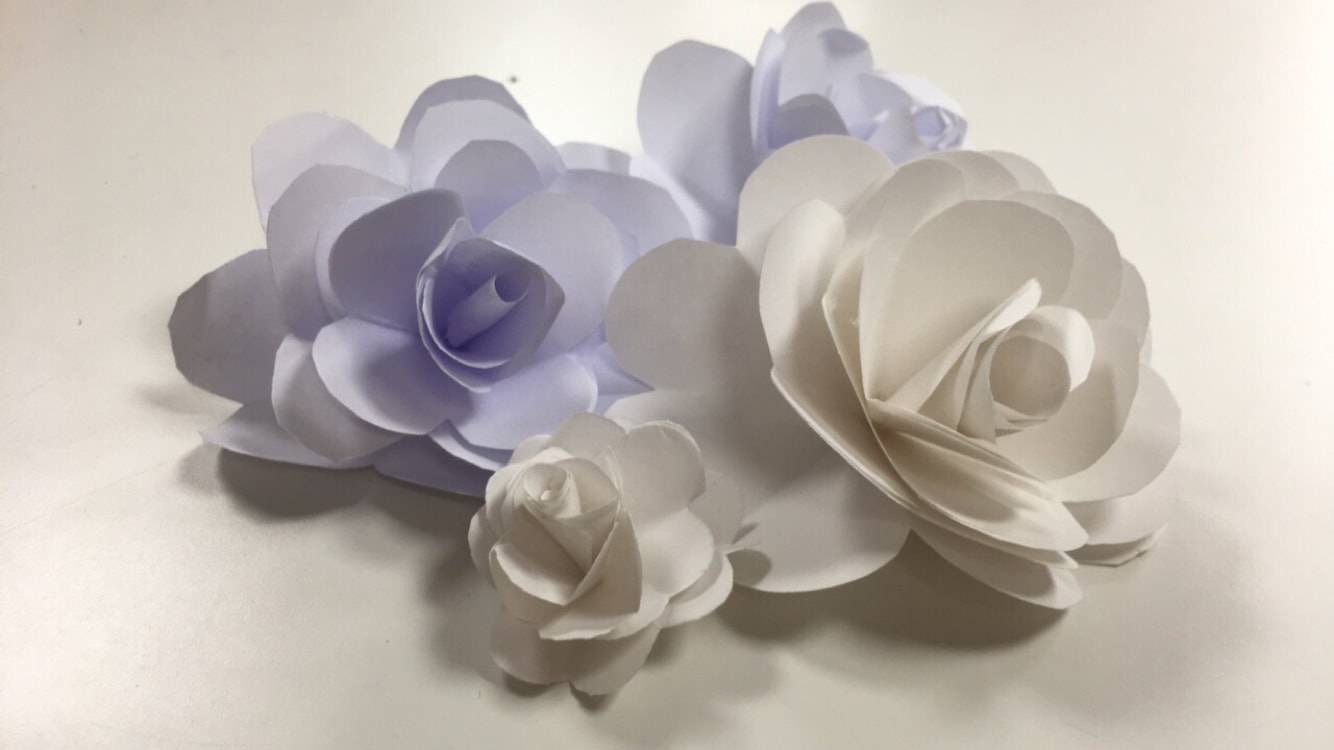
This month’s fun craft project is a beautiful summers rose, perfect for anyone or any age. The roses are quick and easy to make and you’ll soon end up with a whole bunch to wow people, just like we have done for our summer window this year. You can choose to do them in any size, any colour and either out of paper or fabric.
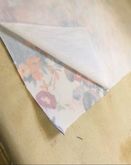
Choosing to make them out of fabric however, will require a sewing machine rather than simply using glue.
So I advise, giving it a go on paper first, it will only take a few minutes. Out of paper they make lovely floral decorations, but made out of fabric they could even be added to a garment or furnishing for that creative touch.

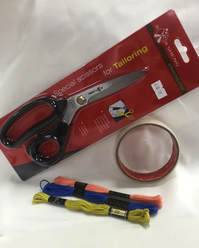
What you will need to make the Rose

Paper Rose

  • Tape measure to measure your squares
  • 4 x paper squares the same size (As an example I have done 14” X 14”)
  • Paper Scissors
  • Glue stick
  • An all purpose glue (I used YUHU all purpose glue)

Fabric Rose

  • Tape measure to measure your squares
  • 4 x Fabric squares the same size
  • 4 x fusible interfacing squares (the same size as the fabric squares)
  • Fabric scissors
  • Matching Thread
  • Sewing machine
  • Sewing needle (for hand sewing)

How to make

If you are making the rose out of fabric you 
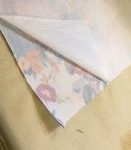
will need to iron the interfacing to the fabric squares beforehand to stiffen the fabric. Make sure the shiny glue side of the interfacing is on the wrong side of the fabric.


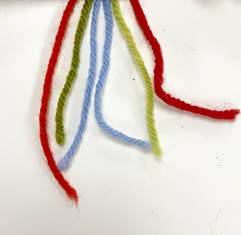
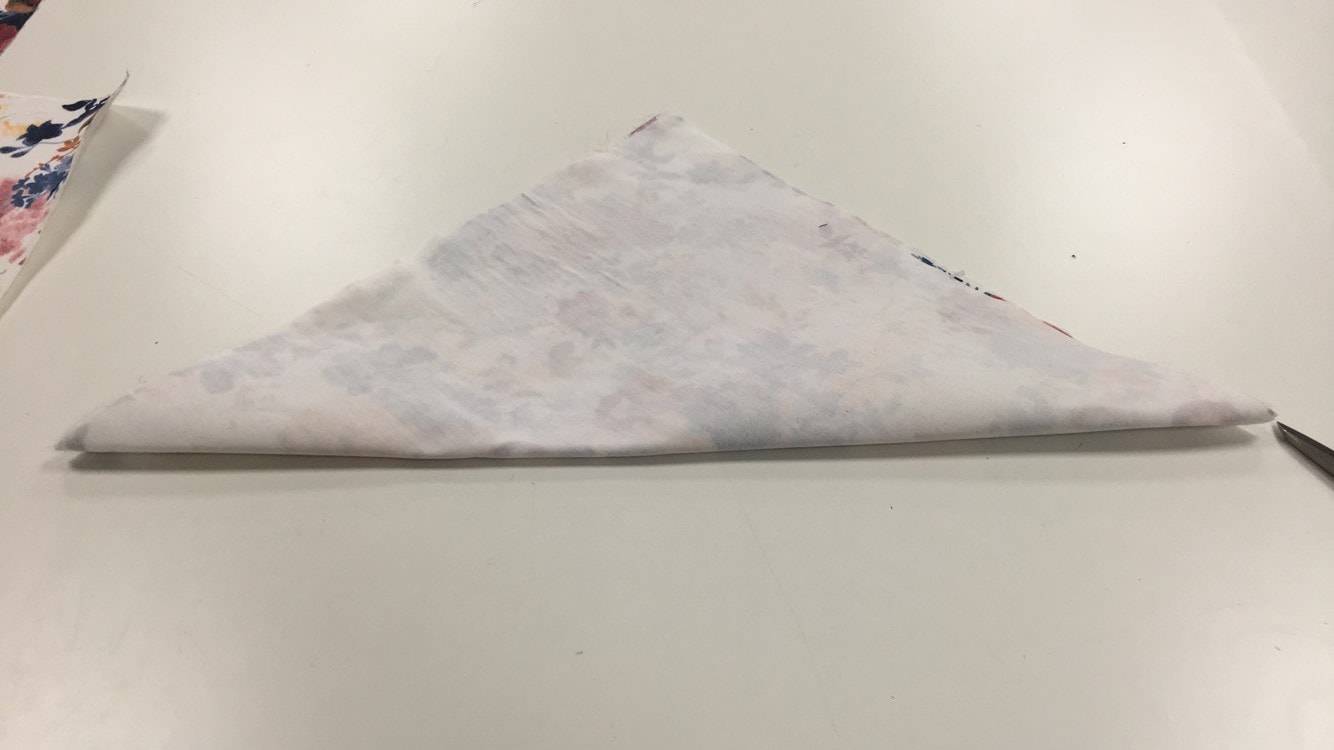
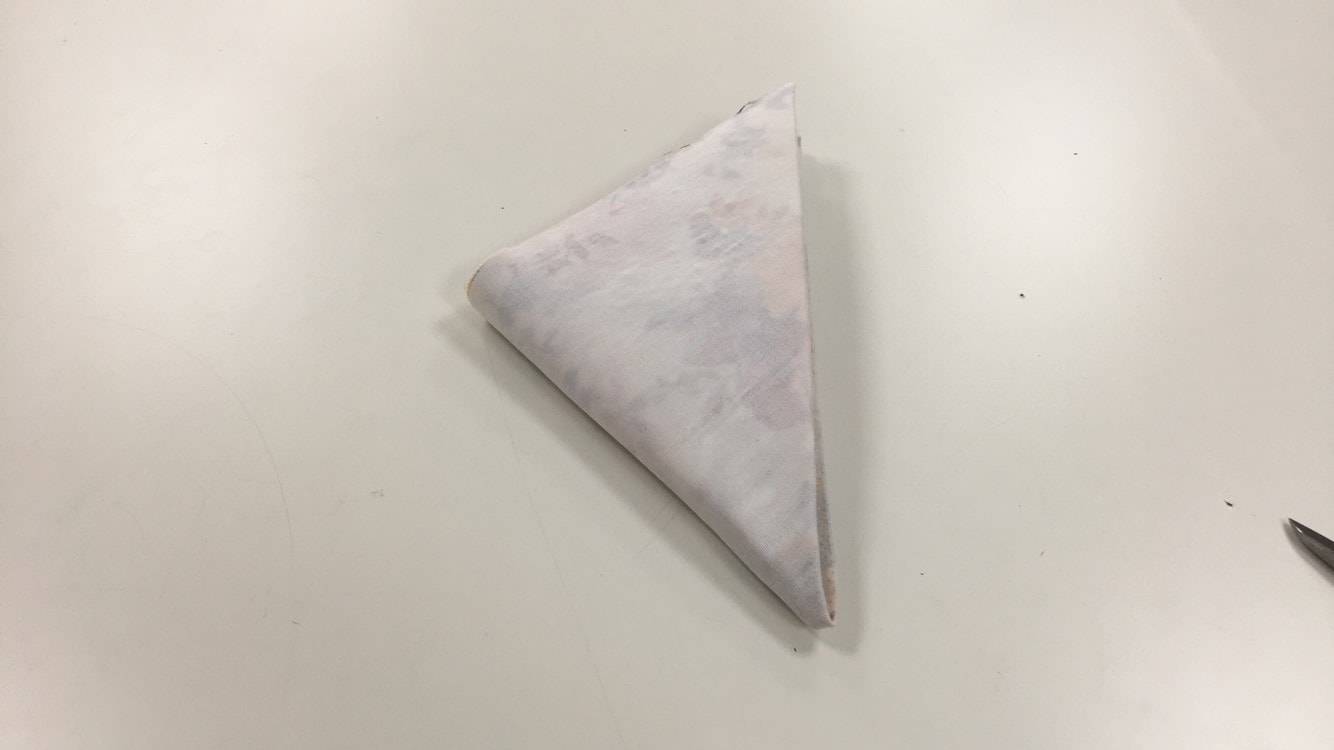
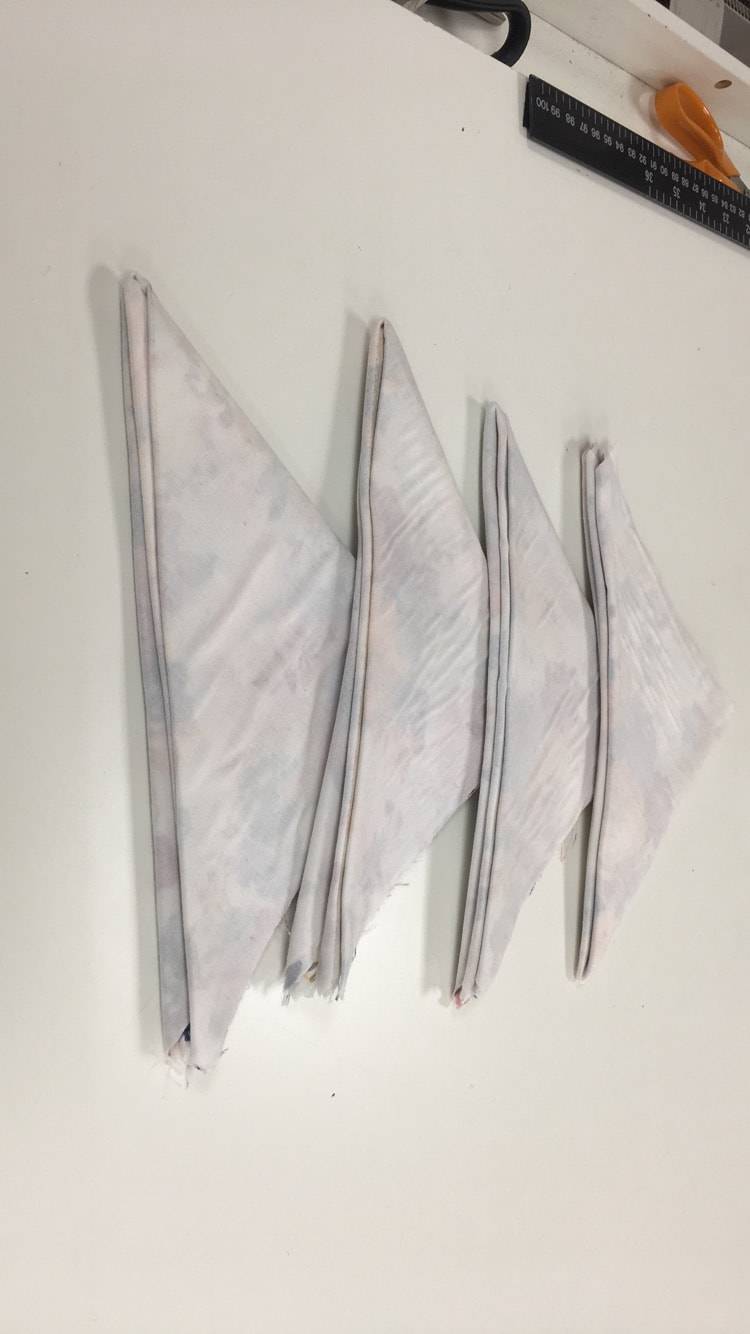
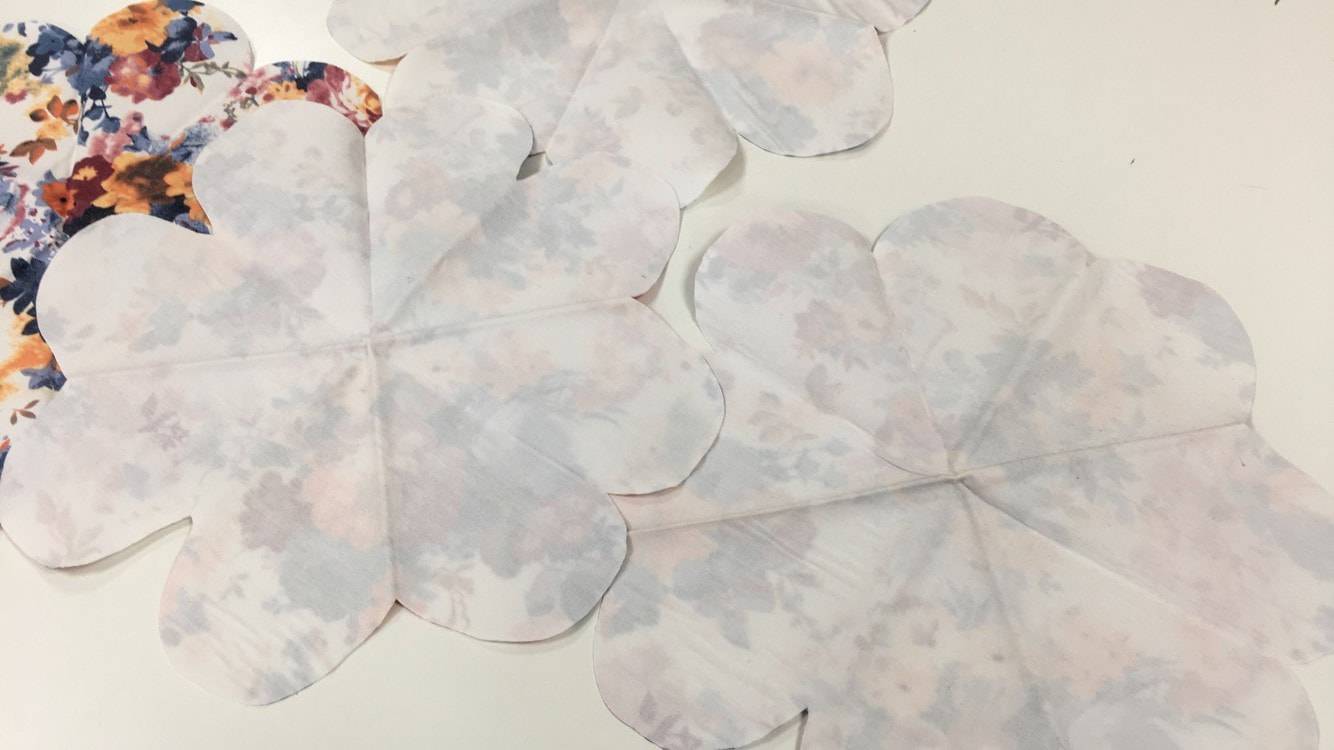
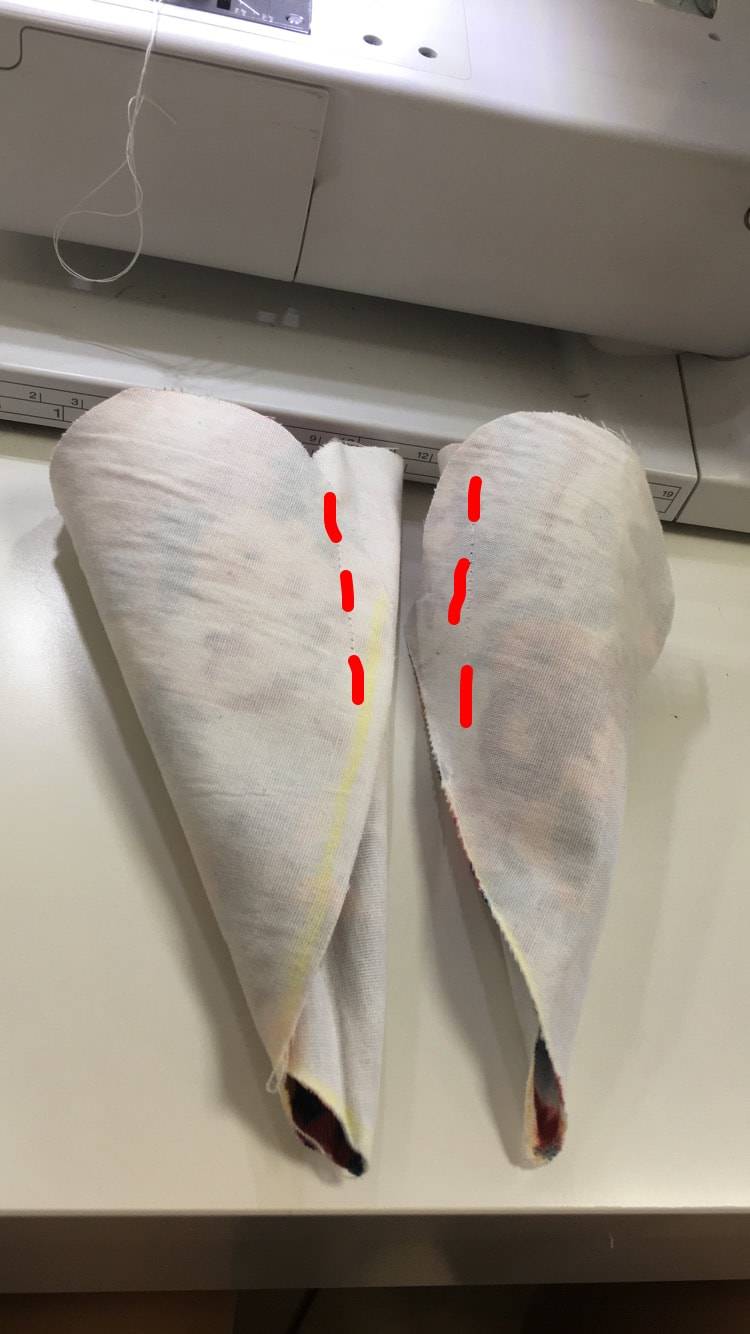
​Take one square and fold it in half to make a triangle repeat 2 more times to make a smaller triangle shape each time. If you are using fabric you may want to press the folded fabric to create a clear fold line and it will help to keep it in place.

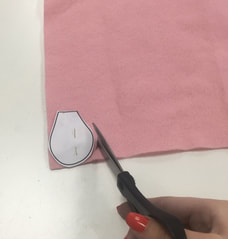
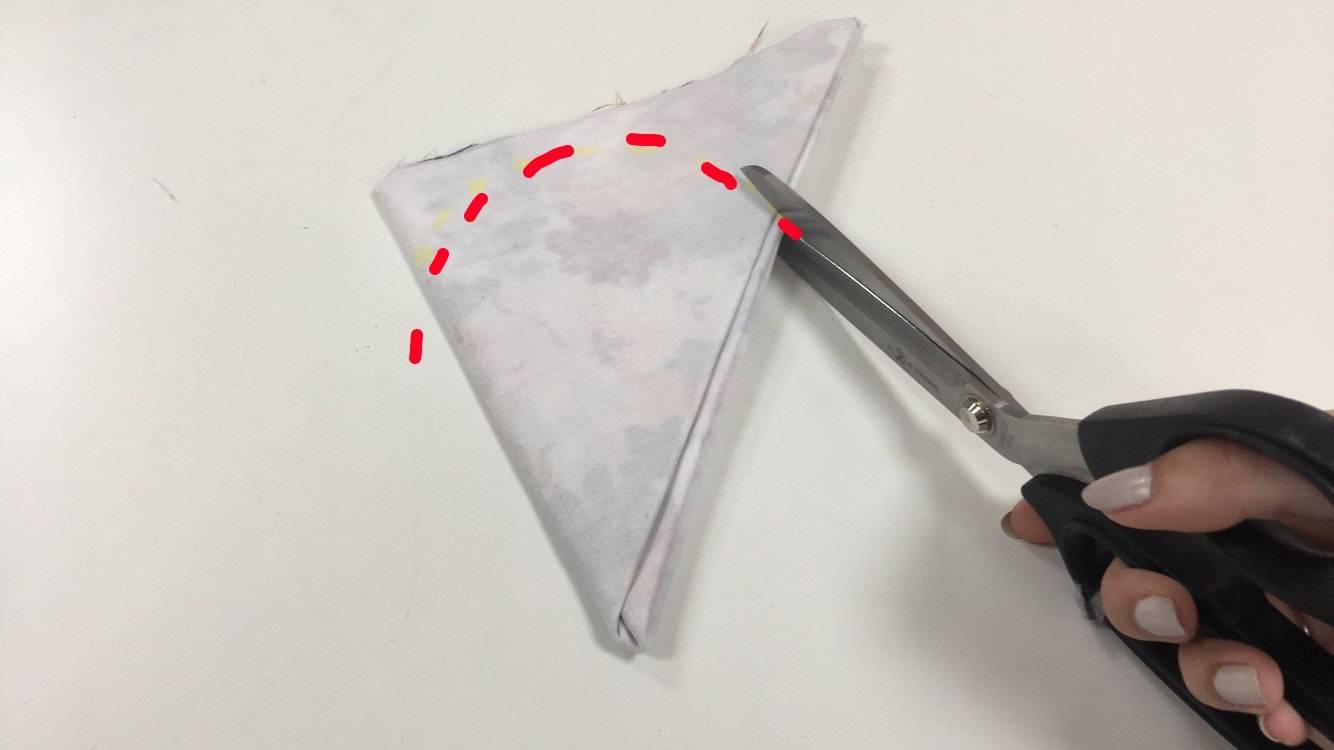
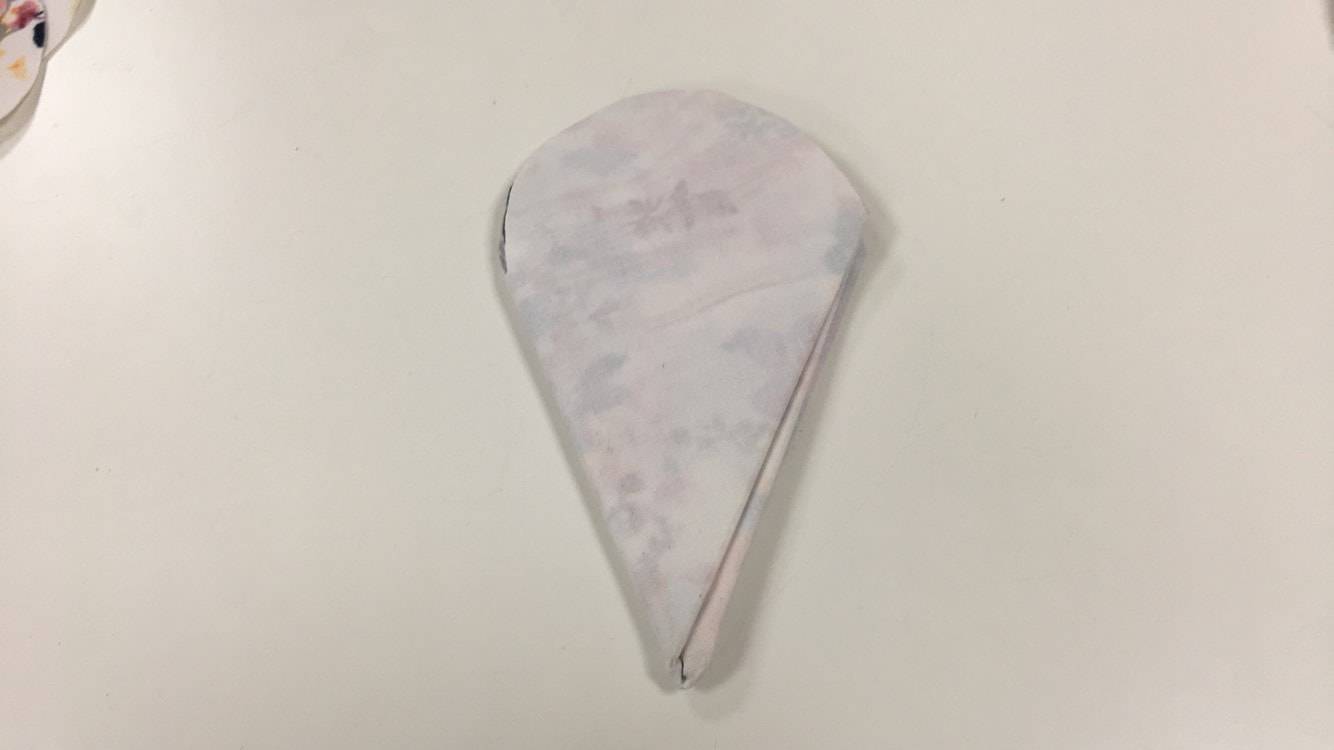
Make sure the fold is at the bottom and cut a rounded petal shape. Repeat this process for the other folded triangles.

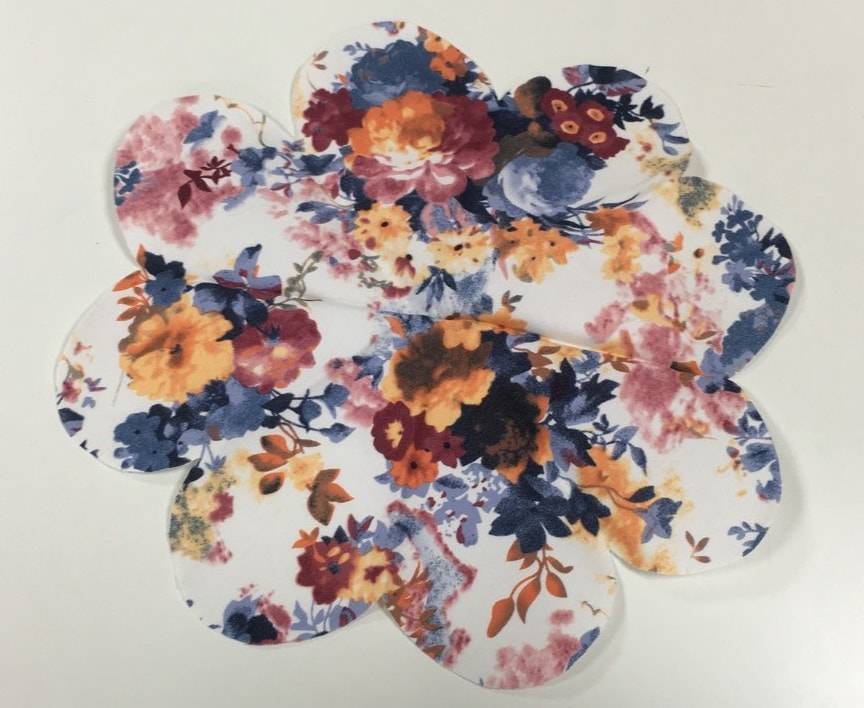
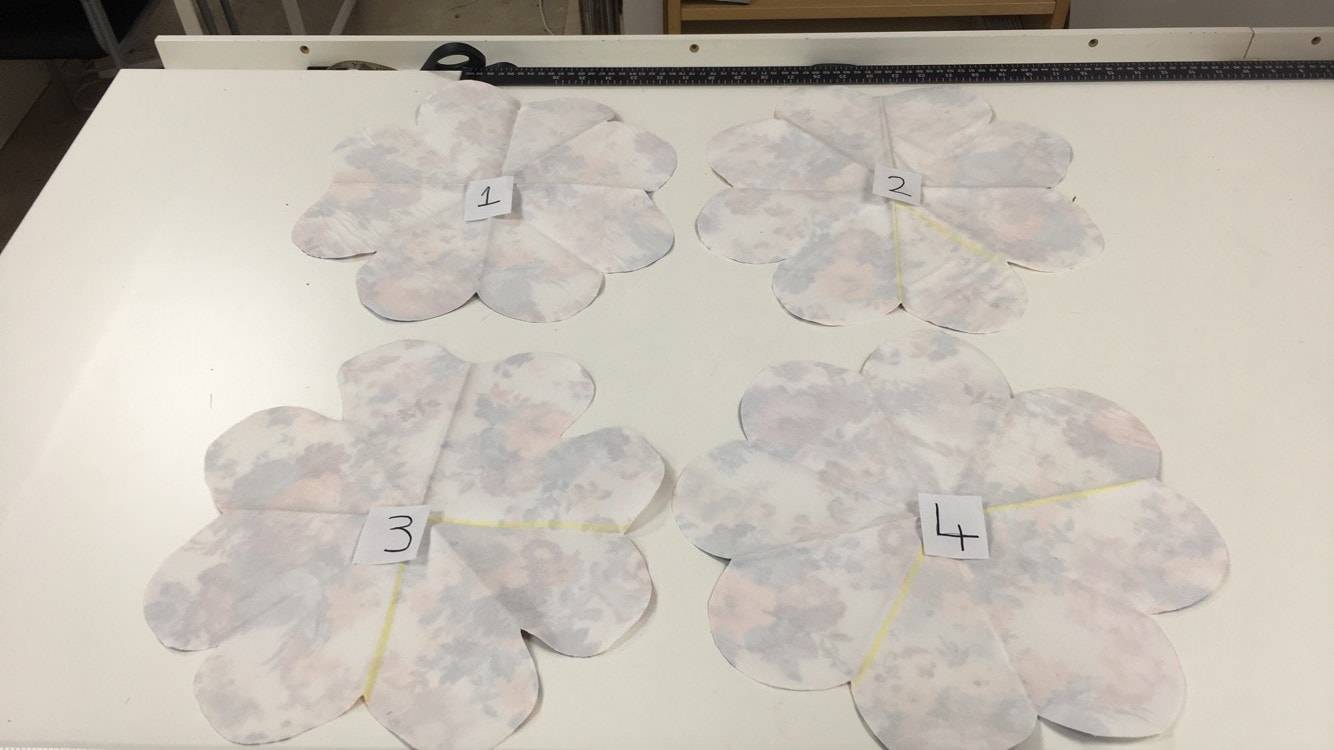
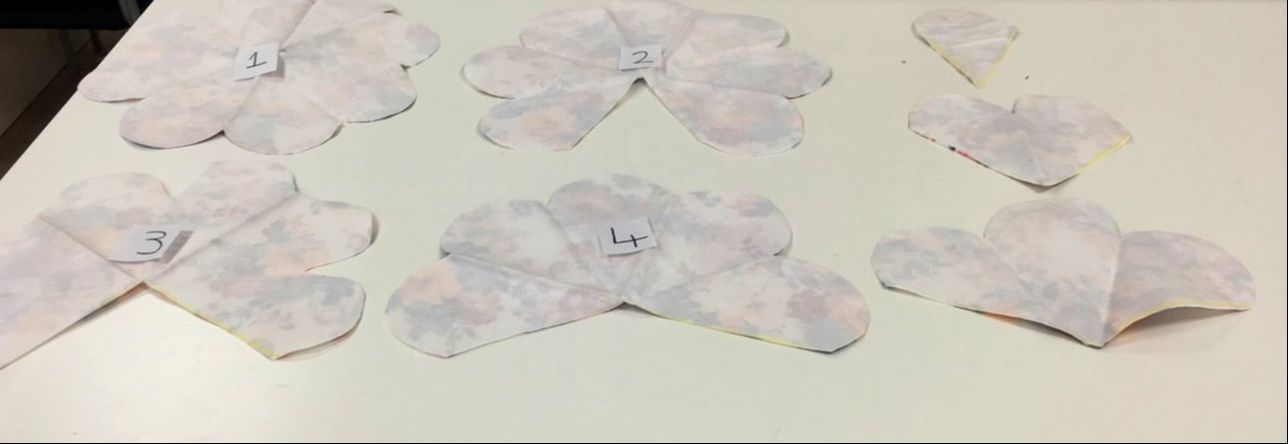
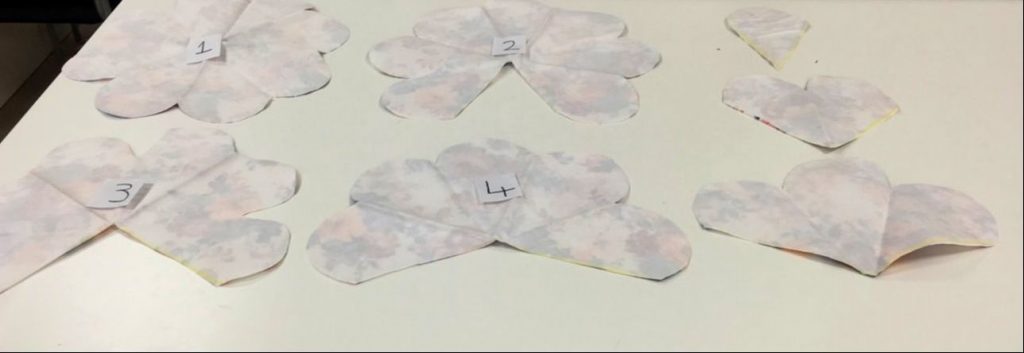
After you have done this to all 4 triangles unfold them all. Lay the 4 floral pieces you have out on a table.

Leave the first (Number 1) original full flower piece to one side.
Take the second one (Number 2) and cut out just 1 of the petals. Use the folds as a guideline.
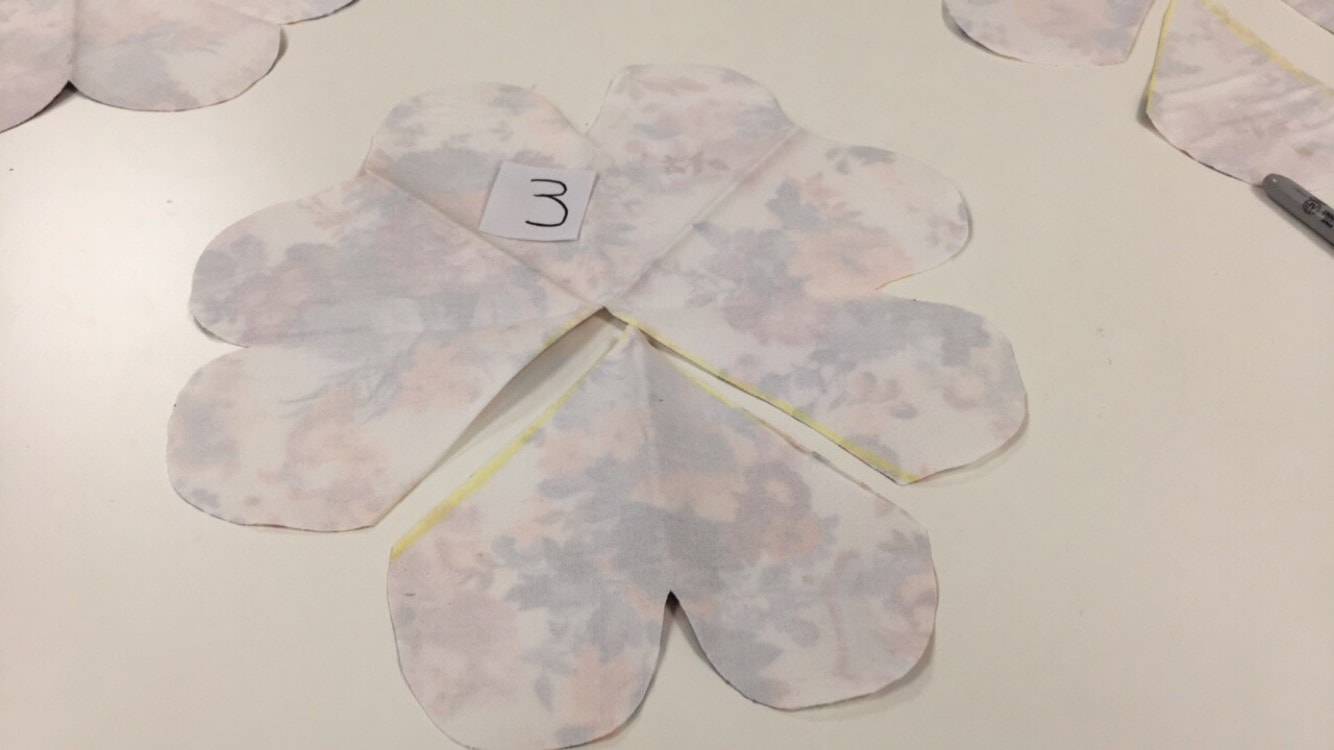
Take the third (Number 3) flower piece and cut 2 petals out.
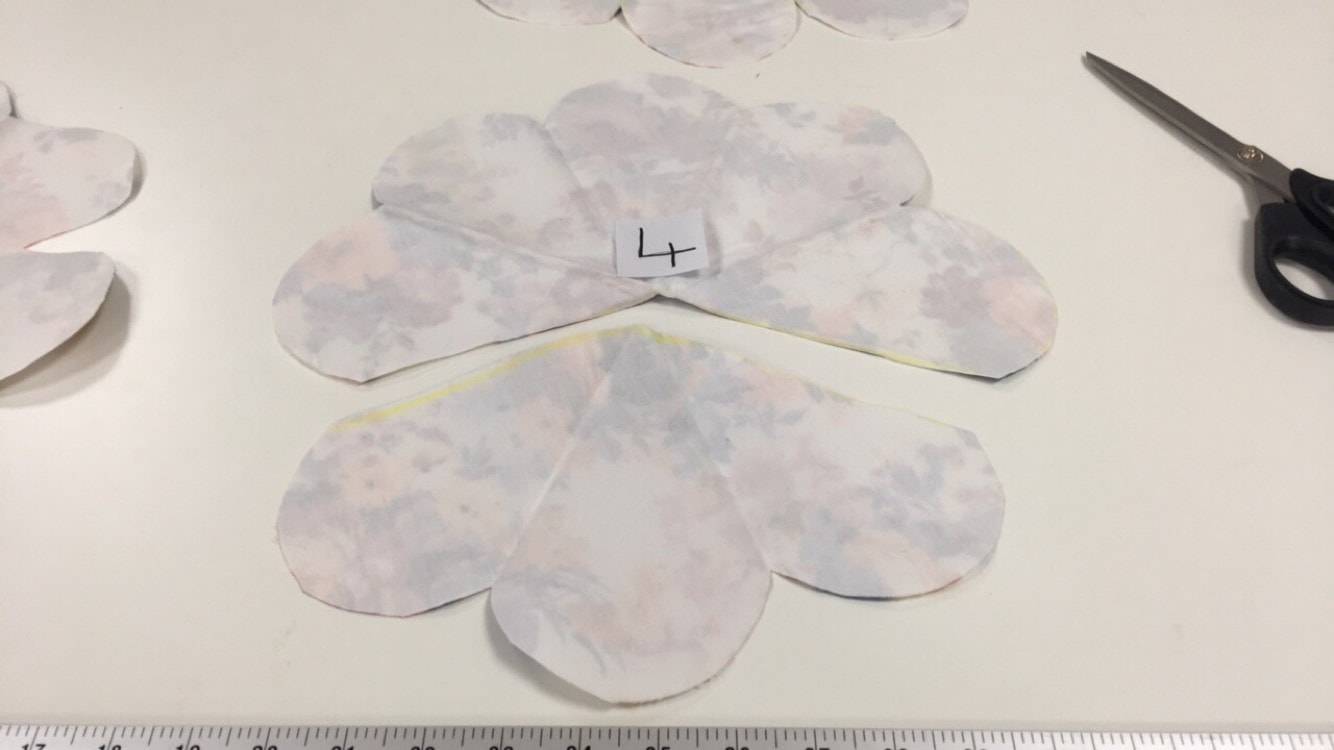
Then take the fourth (Number 4) final flower piece and cut 3 petals out.

You will then have the original pieces and the petal shapes you have just cut out.

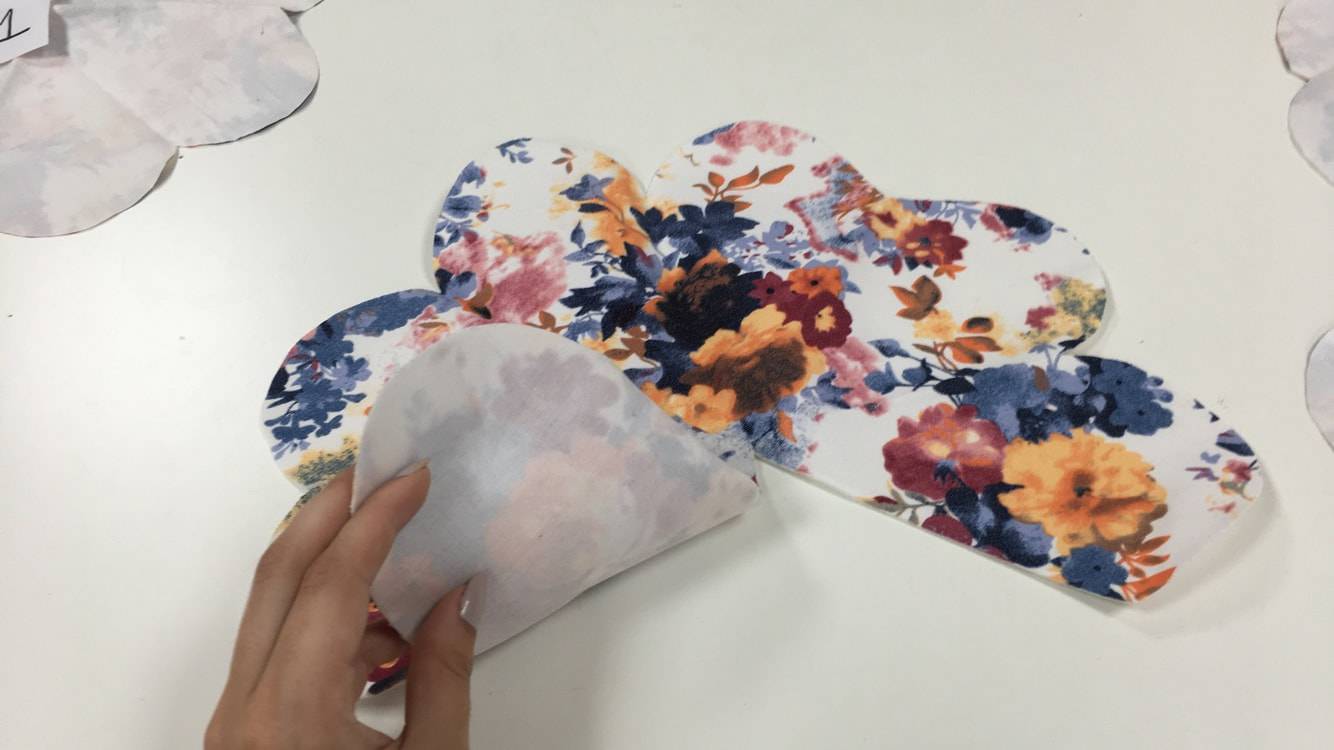
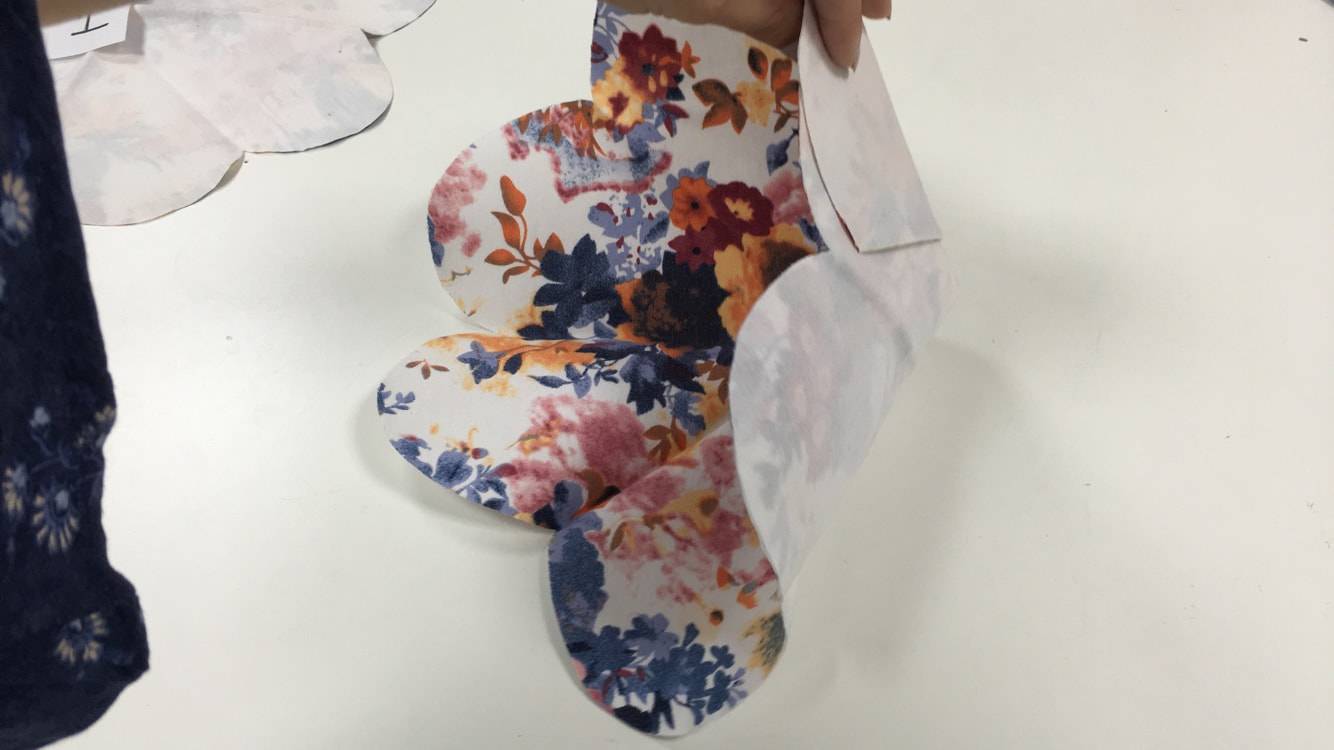
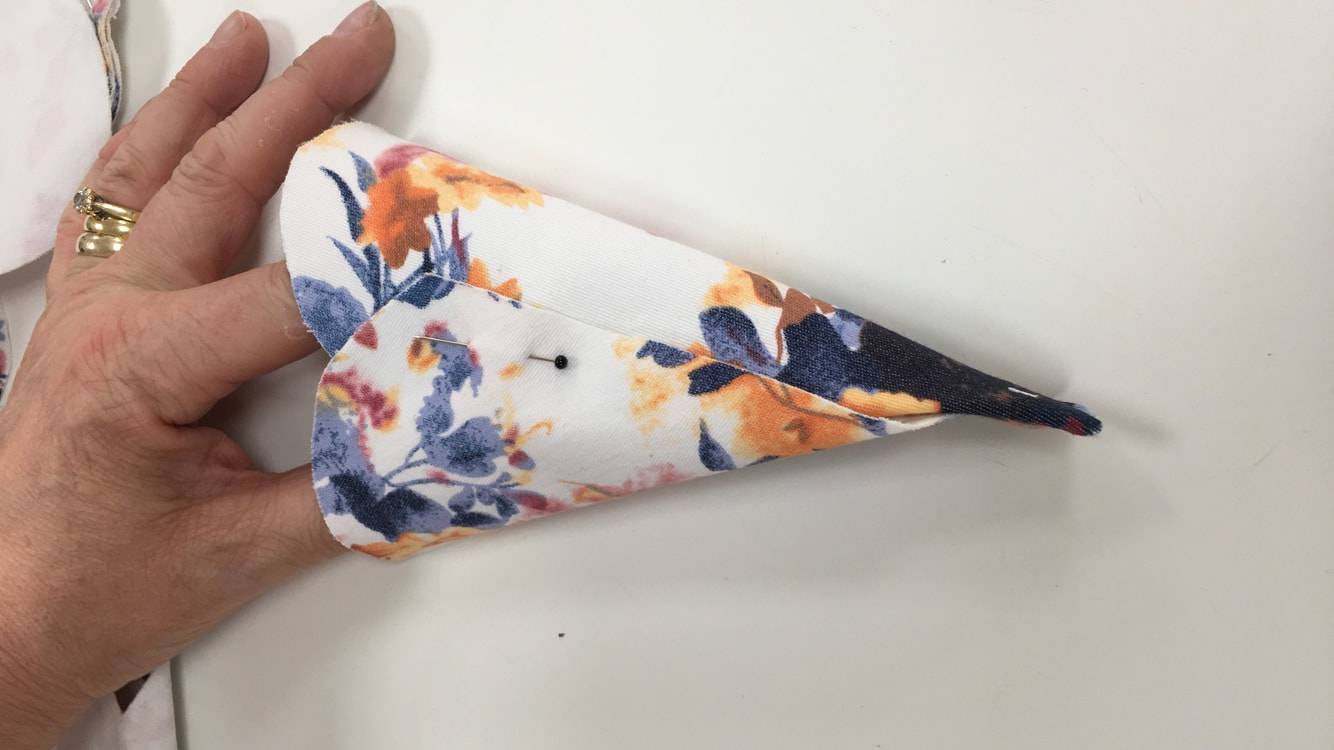
(If you are using fabric for this step you will want the right side facing up)The next step take the second floral piece (Number 2) and overlap the petals together where you have cut.
Take the wrong side of one side of the petal and place it onto the right side of the petal to join it into a 3 Dimensional flower shape.

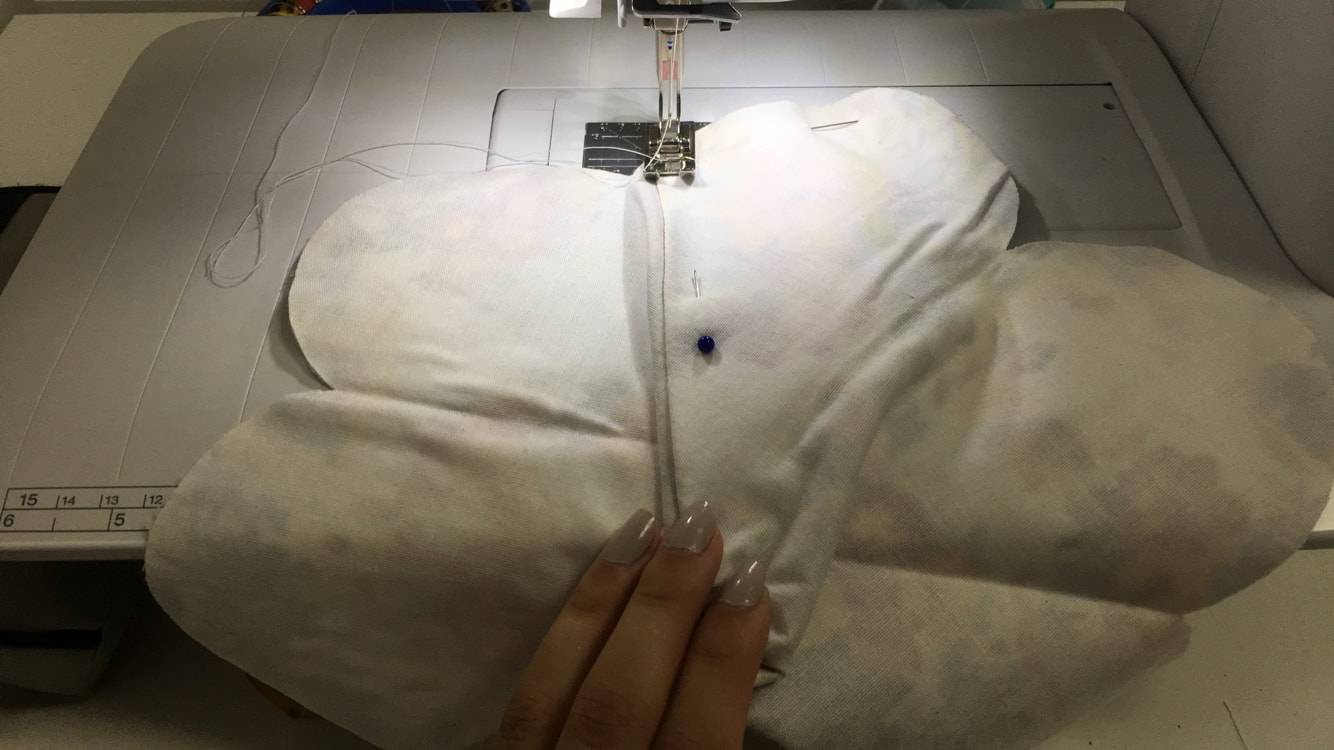
​Glue it in place with the glue stick or if you’re using fabric sew it in place with a sewing machine. Do the same with the other 2 floral pieces (Numbers 3 &4) and do the same with the cut out petals.

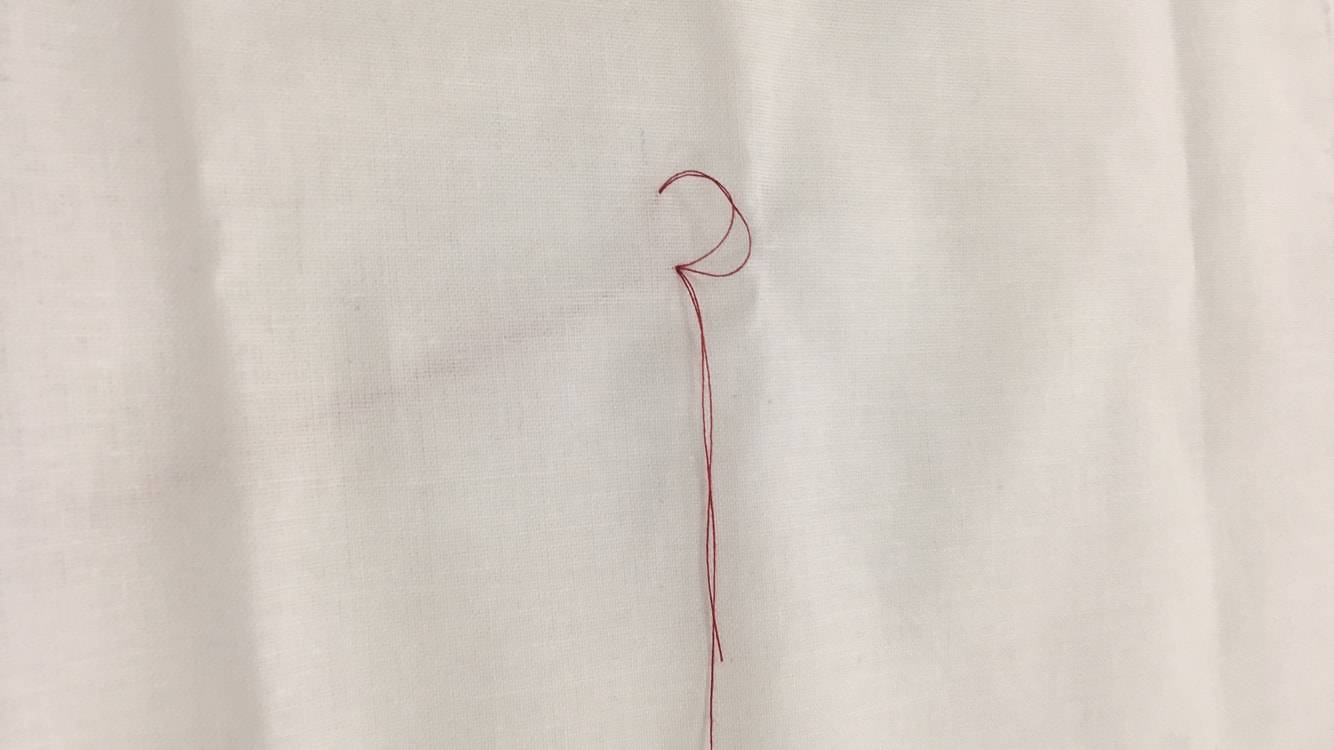
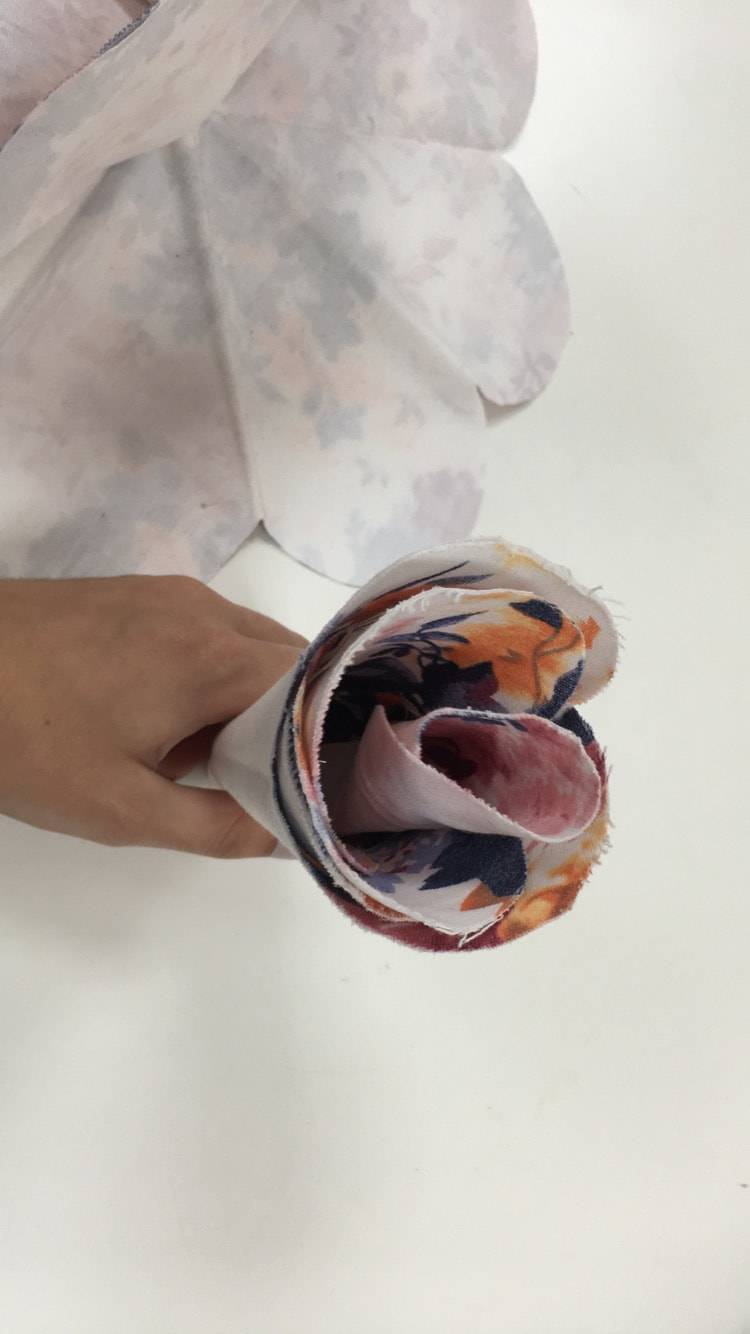
With the singular one petal on its own this is going to be the very centre of the rose, so you will have to roll it. A good tip is using a pencil to roll it round. Glue or sew it in place.

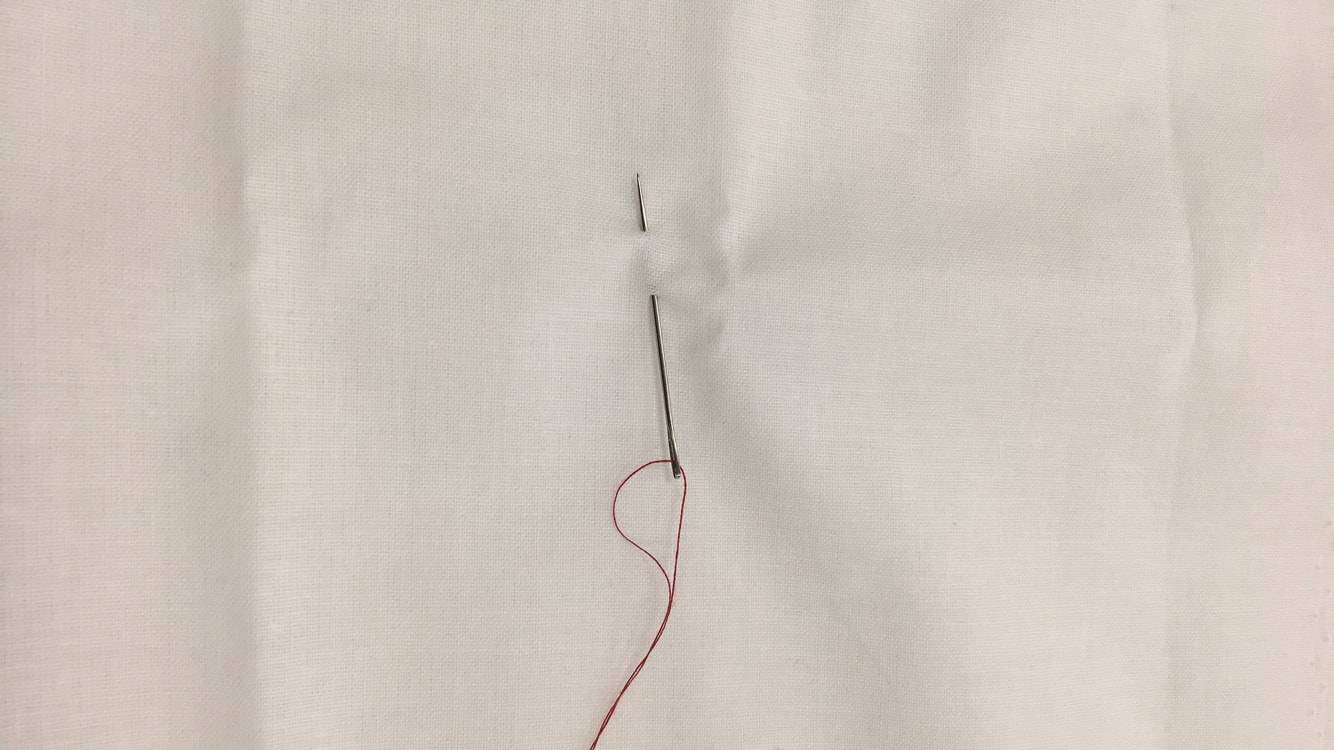
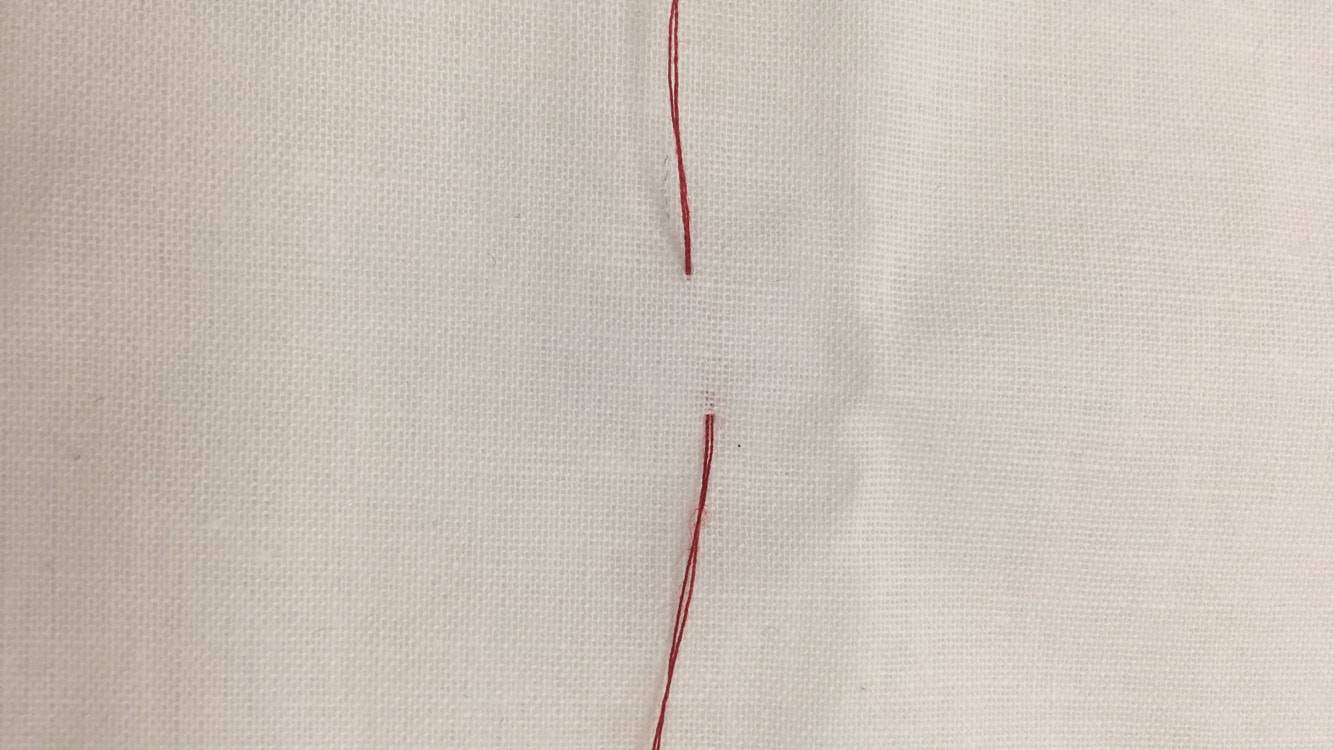
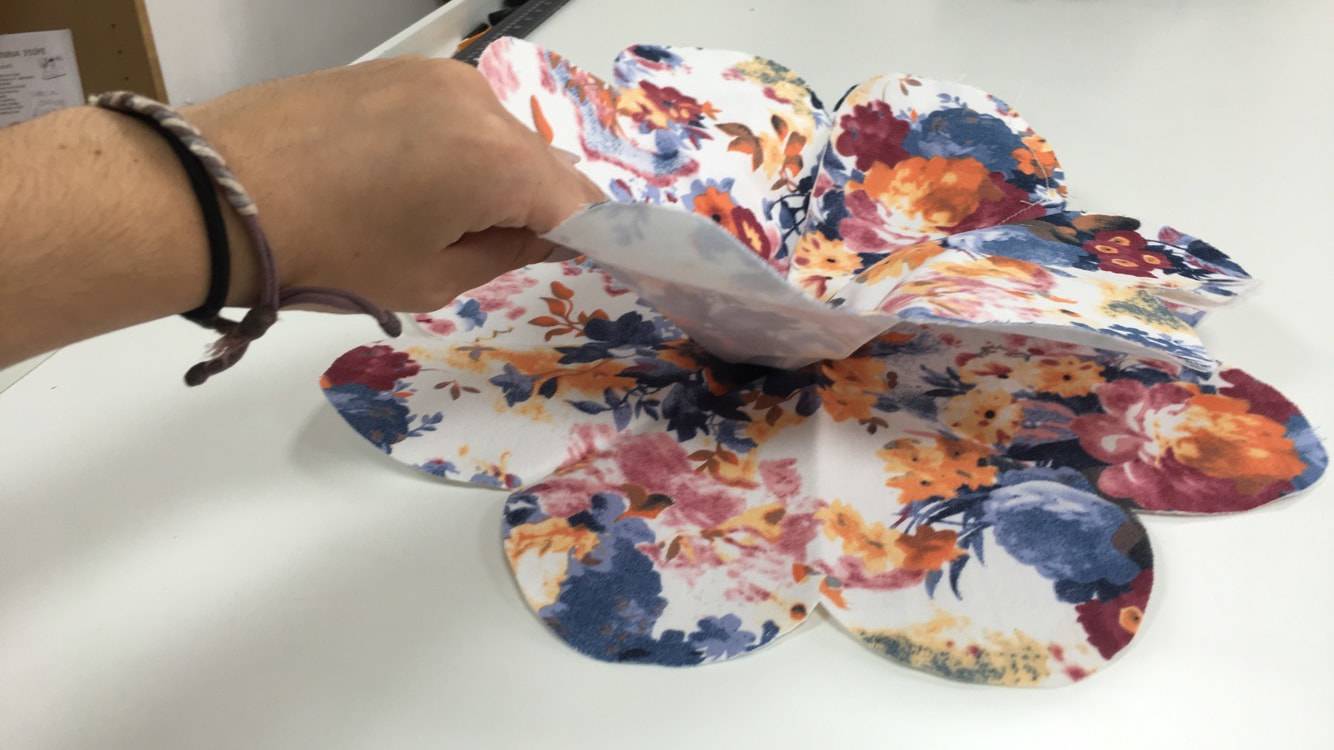
Go back to the original first unfolded piece (Number 1) and place the flower that you cut 1 petal out of (Number 2) on top of the original first piece (Number 1). Glue or sew these pieces together directly in the centre. If sewing you will need to do this by hand.

Then get the next smallest flower piece (Number 3) and do the same: place it in the bigger flower and sew/ Glue in place. Continue doing this with the rest of the flower pieces. Finish by putting the last singular rolled up petal in the middle of the flower. Hand sew or glue in place.

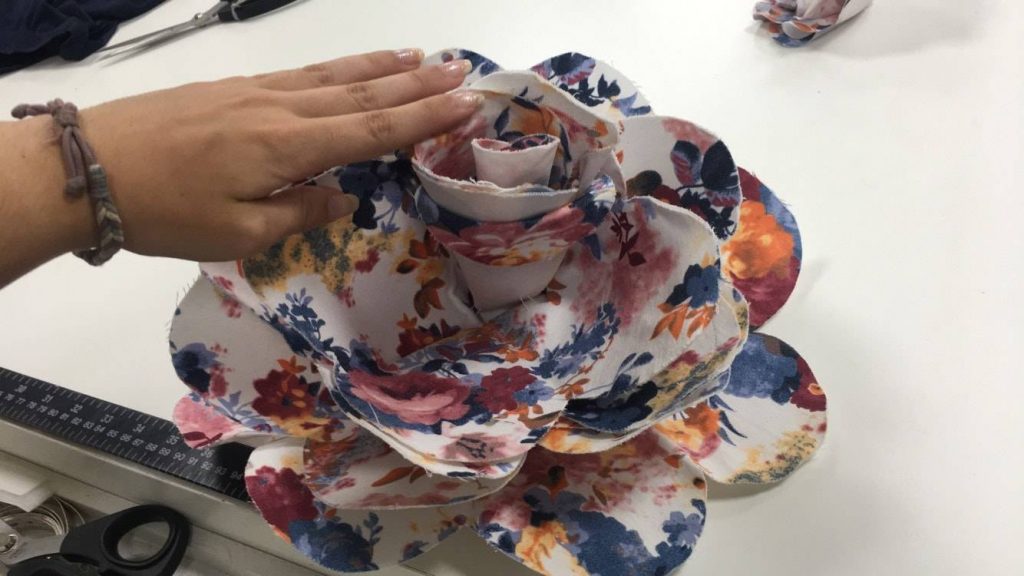
Once you’ve glued/ sewed all your pieces together you should have a pretty Rose. Try playing around mixing different sizes and different colours together to create colourful bunch of Roses.

We’d be happy to answer any questions in store or over the phone at 01926859892, and don’t hesitate to leave a response, we’d love to see all the wonderful roses you’ve made! You could send us your responses via email: Karendelahunty@outlook.co.uk or via facebook.

You can find the supplies used to make this rose in our shop at Karen Delahunty Sewing & Knitting Centre, 80 Warwick Road, Kenilworth, CV81HL.