Posted on Leave a comment

Crafty Valentines Heart Card

This week Sarah has been getting in the crafty spirit by creating a lovely heart card. This special hand made card would make the perfect gift for loved one for Valentines Day. 

Equipment you will need:

  • A piece of card or paper (we used A5 cream craft paper)
  • 1 skein of hand embroidery thread 
  • A pair of scissors
  • A pencil
  • A sharp thick needle (we used a large sharp tapestry needle) 
  • A blunt thick needle ( we used a large knitters needle)
  • Optional: thimble and heart cookie cutter
    Most of the above equipment can be purchased at Karen Delahunty Sewing & Knitting Centre. 

Lets Get Started...

Step 1: Fold your piece of paper or card in half.
Step 2: Using a cookie cutter or free-hand draw a heart shape in the middle of the folded card.
Step 3: Using a pair of scissors cut out the heart shape out. You should end up with something like this >>

Step 4: With a sharp needle create a perforated outer edge just outside of the heart outline. You should end up with the card looking like this>>>

Tip: If using card you may wish to use a thimble for this part.

Step 5: Using a blunt needle; thread the needle with your hand embroidery thread and make a knot at the end. 

Tip: If you don’t have a blunt needle you can continue with the sharp needle you were using before just be mindful not to catch yourself on it.

Step 6: Pick any hole to start with. Using your needle and thread sew through a hole from back to front. This means all the knots and sewing up at the end will be on the inside of the card and not on display. 

Step 7: Once you have sewn your thread through the first hole aim to sew through the most opposite hole to the first one you have chosen. Continue to work your way around the heart going from opposite hole to opposite. You should start to get something looking like this >>>

Tip: There is no correct way of sewing the heart. The aim is to have the thread cross at different points. In the image opposite most of my threads are going diagonally – but you can do it however you like, sew horizontal or totally random the decision is yours.

As you work your way around sewing all the holes you should start to get something similar to the image opposite>
You can sew through the holes you create more than once if you desire to give a more opaque look or just sew through them the once for a more see through weave. 

Step 8: Once you are happy with how your heart looks and have finished sewing make sure you end with the needle on the inside of the your card. Make a secure knot and cut off any loose ends.

Step 9: This step is optional. If you wish you can join up the outer edge by sewing the dots together.

Step 10: All that’s left to do is write a personal message to a loved one inside your card and deliver it to that special person in your life. 

Please send us a picture of your crafty heart cards you have made!
Facebook: @KarenDelahuntySewingandKnittingCentre
Instagram: @karen_delahunty
Twitter:  @Karendelahunty


Enjoy creating your own cards, Happy Valentines <3

Posted on

Celebrate our 5th Birthday!

Our Shop is turning 5 years old!
From the 6th November – 10th November we would like to celebrate with you for 5 days of fabulous offers in-store and online.

Instore Offers Only:

Karen will have 5 of her favorite fabrics at a special discount of 20% for the 5 days, just pop by our shop window to see whats on offer.

Any customer that purchases 3 or more sewing patterns from us during the 5 day event will be able to select a fourth sewing pattern FREE of charge from Karen’s handpicked selection.

Online & Instore Offers:

Selected sewing machines will be on special offer for the 5 days and any sewing machine purchased from us during this time will come with 3 FREE threads, a set of pins, a chalk marker, a tape measure and quick unpick courtesy of Karen Delahunty Ltd.

Posted on

The New Bernina 4 Series (Autumn 2018)

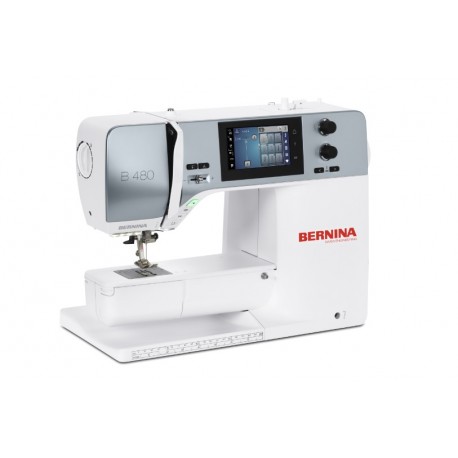
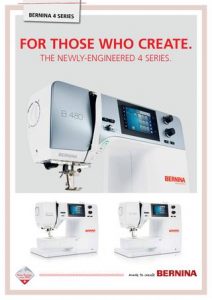
Bernina have launched their new 4 series sewing machines for Autumn 2018. The B480, B475QE and B435 are the three new machines which offer more power, speed and perfection.

Your creativity, your decisions: The B480, B75QE and B435 let you make all the creative decisions. Like choosing the stitch length and width or deciding the needle position. If you want the needle to be down when it stops, you can. All of this is conveniently located at your fingertips on the large, intuitive touch screen.

The 4 series machines have a bigger bobbin that holds up to 70% more thread than standard bobbins, which means fewer stops and starts. The bobbin is located conveniently at the front of the machine so there is no need to remove your project.

Accessories: A variety of Bernina presser feet or soles come standard on the 4 series machines, making it easy to do what you want to do. To keep them handy an accessory case is included. The B480 model comes with a magnetic see-through accessory box. Feet aren’t the only accessory included. There is a slide-on free-arm table that adds spacious support around the needle 4 bobbins and a dust cover complete the smart accessory package.

Stitches and letters: When you want more options a series 4 machine is for you. These machines offer over 150 to 250 decorative stitches and up to 5 alphabets and the B475QE is full of special quilting stitches.

Tension: Every aspect of the stitch, both seen and unseen, is perfected with optimal thread tensioning of the 4 series machine. Achieve permanent control of thread tension once it’s adapted to the thread and fabric. Even when sewing, the thread tension adjusts automatically. And the innovative Bernina hook keeps every stitch consistent and precise.

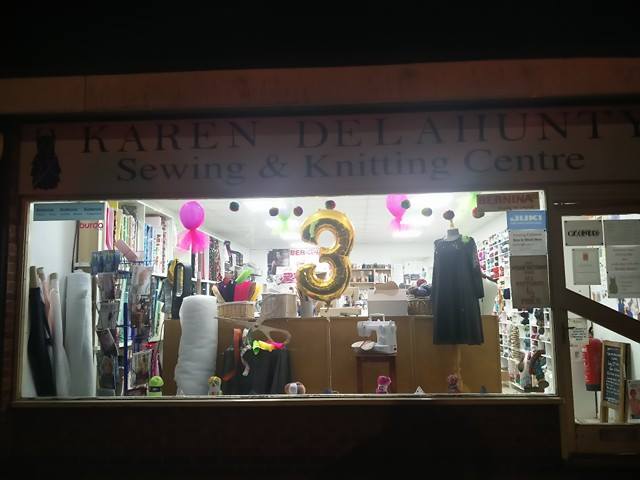
To order your Bernina 4 series machine today: Telephone: 01926 859 892 Order in store at: 80 Warwick Road, Kenilworth, CV8 1HL Purchase online: Here Or click one of the shop buttons below to find out more details and purchase your favorite 4 series.