

If you’re looking for a project that you can start and finish within an afternoon, this simple design by Ruth Oliver will soon become a favourite. These cute little plimsolls will make the ideal footwear for babies who are starting to find their feet. Please follow our video tutorial and if you have any questions pop into our shop 80 Warwick Road, Kenilworth, CV8 1HL or give us a call at 01926 859892. All of the supplies used in this tutorial were bought at Karen Delahunty’s Sewing and Knitting Centre.
Thank you to Sew Magazine for providing us with this lovely pattern you can find this pattern and many other amazing designs here.
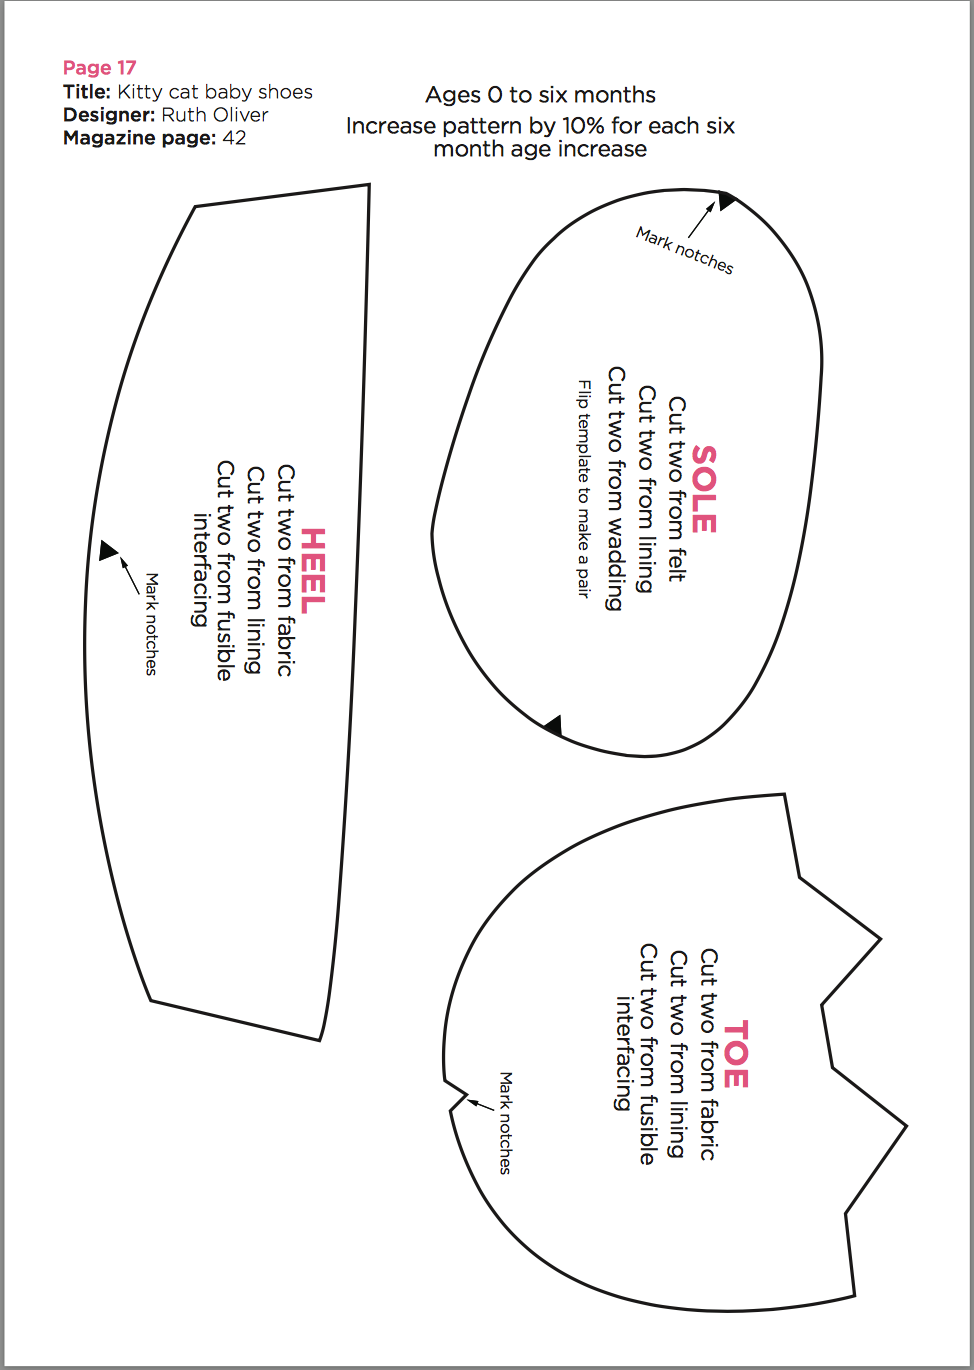
Before you start make sure you have all your pieces cut out. I have already ironed the interfacing onto the heel and toe piece prior to the video.
This pattern is for a size 0-6 months. But you can increase them by 10% to go up another 6 months.
Download the templates above and use them to cut the foot, sole and heel pieces, make sure that for the second shoe you reverse the sole to create both a left and right foot. Adhere the interfacing to the wrong side of fabric outer heel pieces and outer toe pieces.
Pin the lining and outer fabric pieces of one heel, right sides together, and sew along the straight edge with a 5mm seam. Flatten out and press the shorter outer edges in by 5mm, then topstitch to create a hem. Fold the top seam, with wrong sides together, and press. Topstitch 1cm down from the top edge to make a channel and thread a 14cm piece of elastic through it. Stitch securely at each end, then repeat for the other heel.
Pin the outer and lining fabric pieces of one toe, right sides together, and taking particular care around the ears, sew the top edge with a 5mm seam. Clip the corners and turn right side out, press, then topstitch around the ears. Repeat for the other toe. Using coordinating thread, embroider two eyes, a nose and whiskers on each piece, using satin and straight stitches.
Place the felt outer and lining fabric pieces of one sole, wrong sides together, with wadding sandwiched in between. Stitch closely around the edge to secure, and repeat for the other sole.
Pin one toe section to one sole section, right sides together, matching up the notches. Pin a heel section to the sole, aligning the notches and overlapping the toe by 2cm. Sew all around with a 7mm seam, back tacking to secure. Trim the seam with pinking shears and turn right side out. Hand sew the elastic ends of the heel to the inside of the toe piece to secure the opening. Repeat to create the other shoe.
For the bow, cut 5cm x 10cm of fabric on the bias. Fold the long edges to the middle and the two shorter ends to the centre. Pinch to create the shape and hand stitch in place. Sew a small piece of fabric around the centre and attach, as shown on the video.
Again thank you to Sew magazine and the designer of these shoes Ruth Oliver for providing us with these gorgeous shoes. We hope to see your responses.
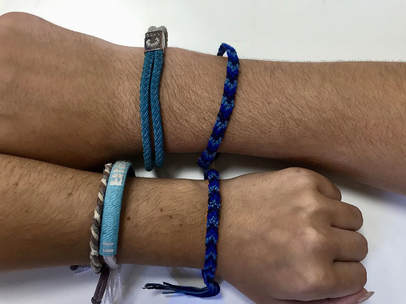
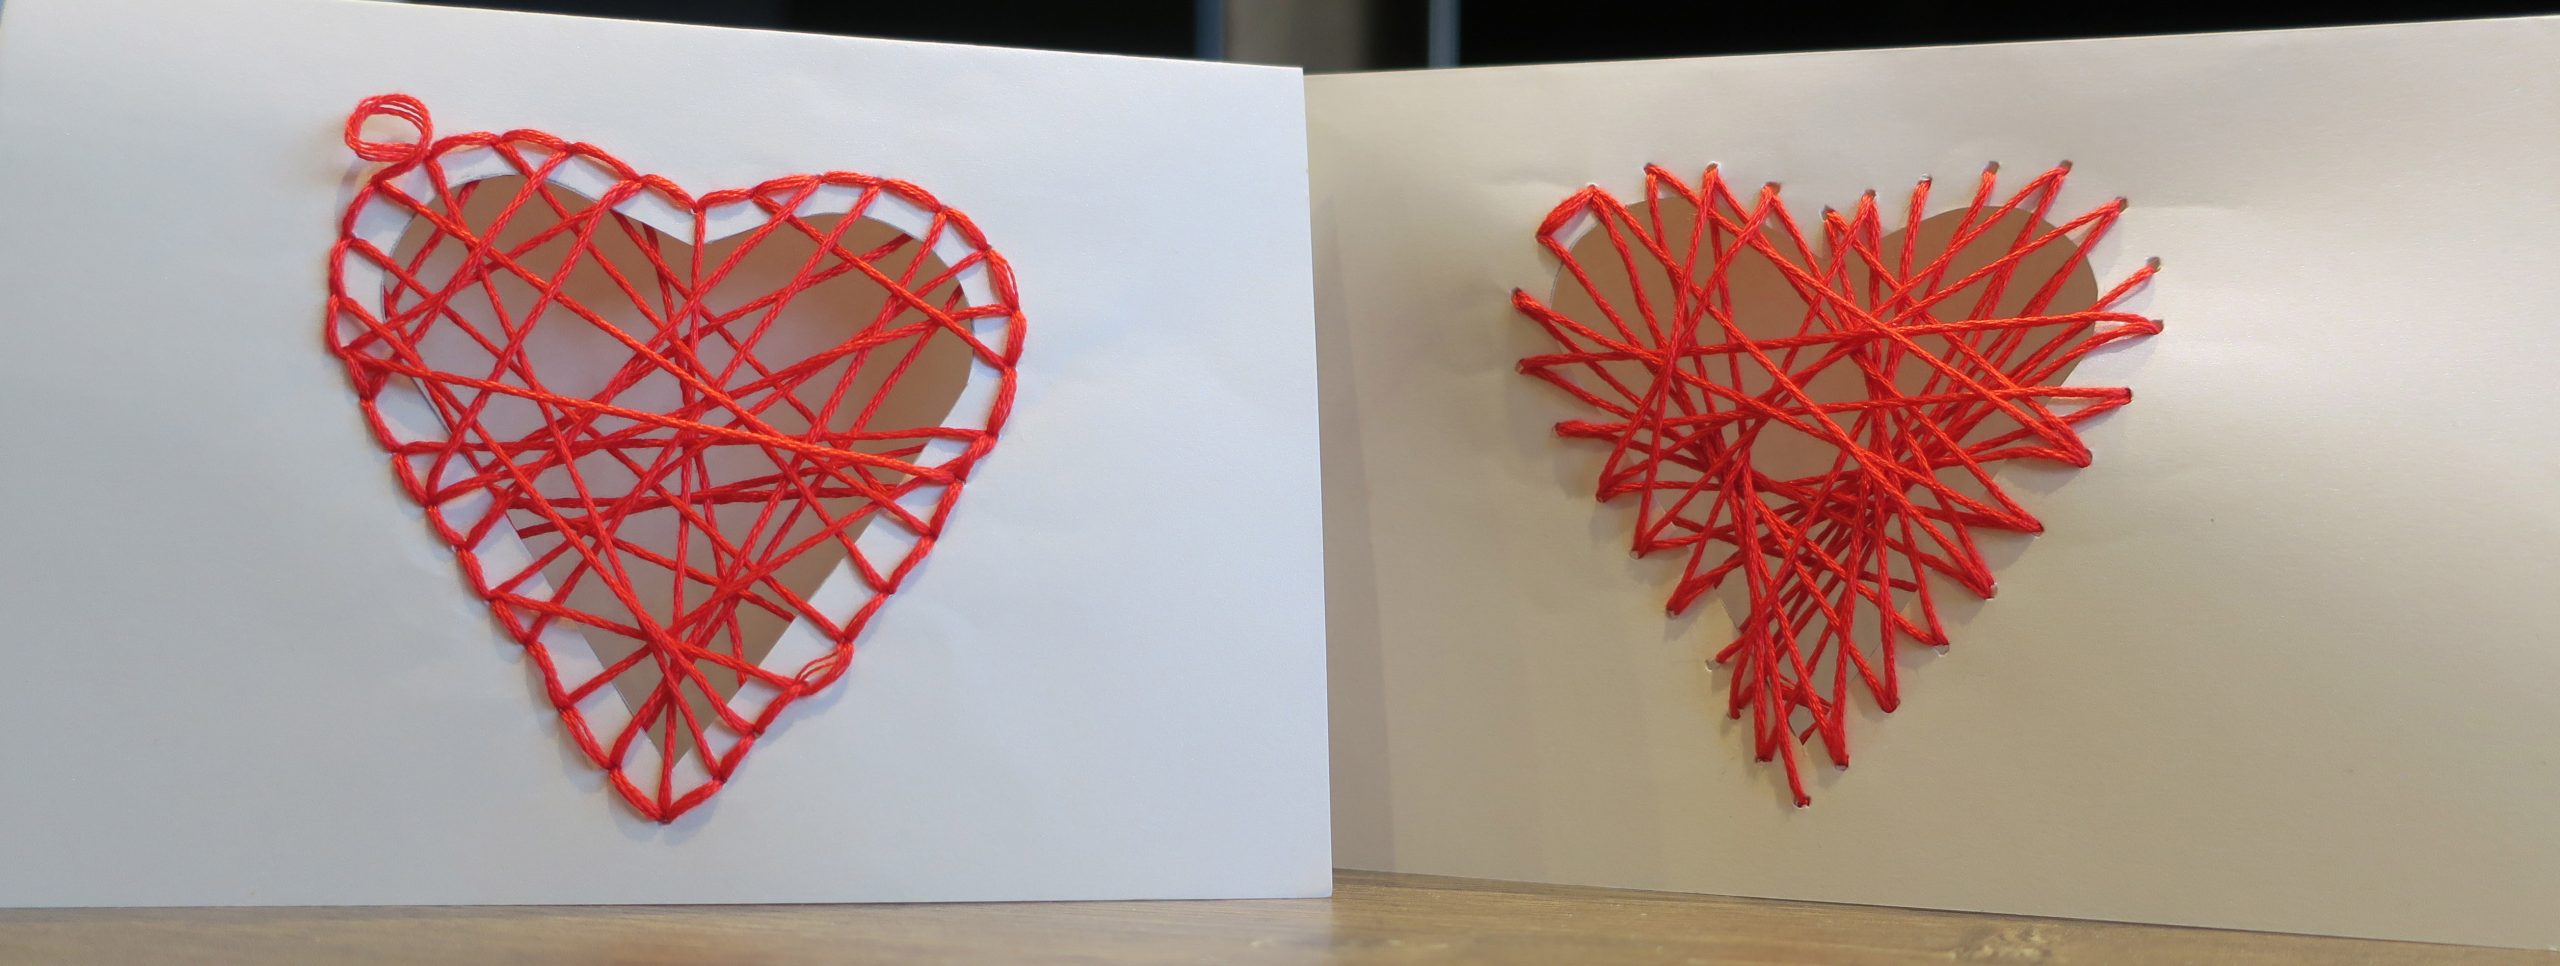
This month we have been busy making some hand woven bracelets. These are perfect for a thoughtful gift for your closest of friends or family.
Alternatively you could make yourself a nice new accessory to wear with your own personal touch.
These are very cheap to make however take a bit of time but once you get the hang of it, you soon start seeing the bracelet come together.
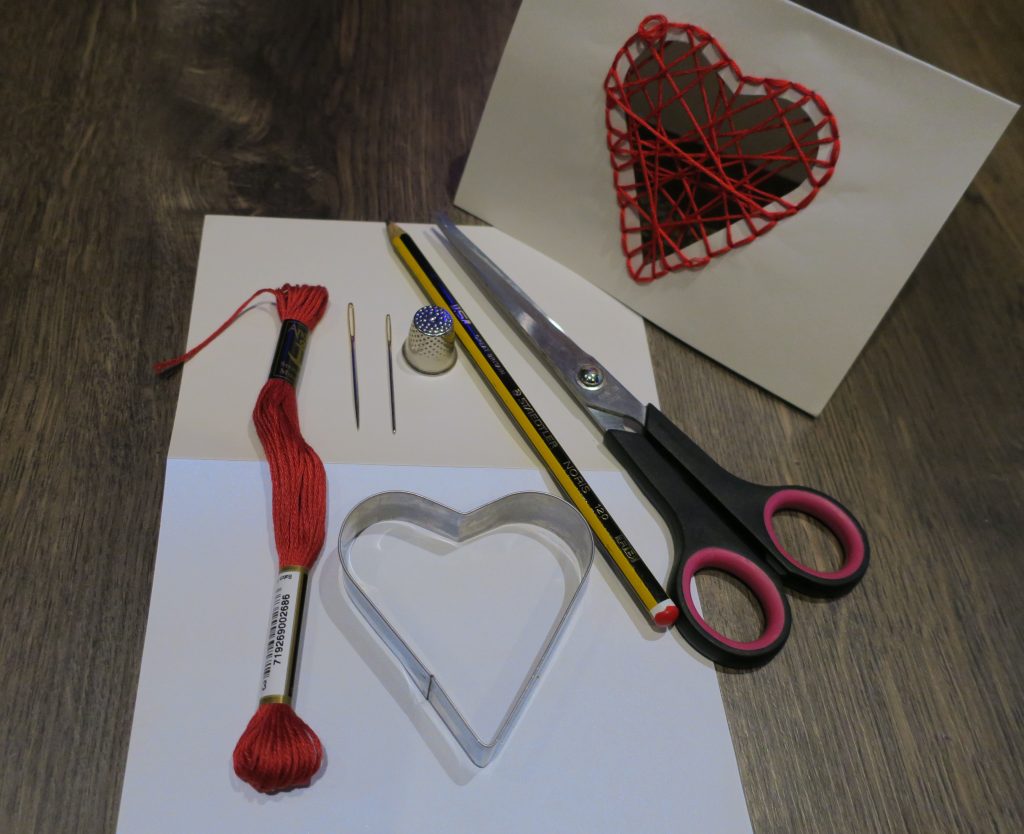
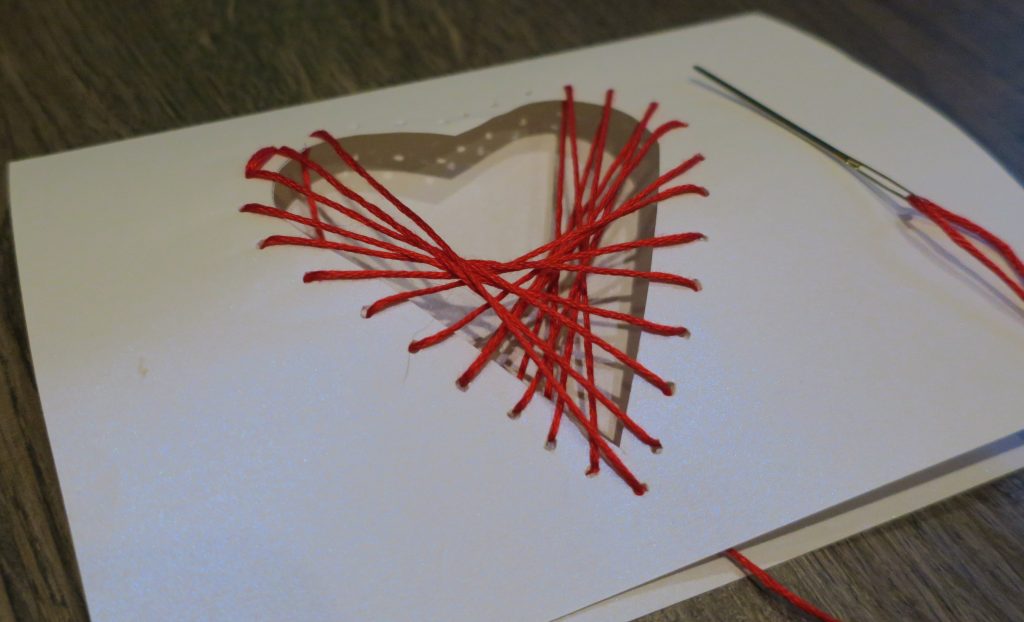
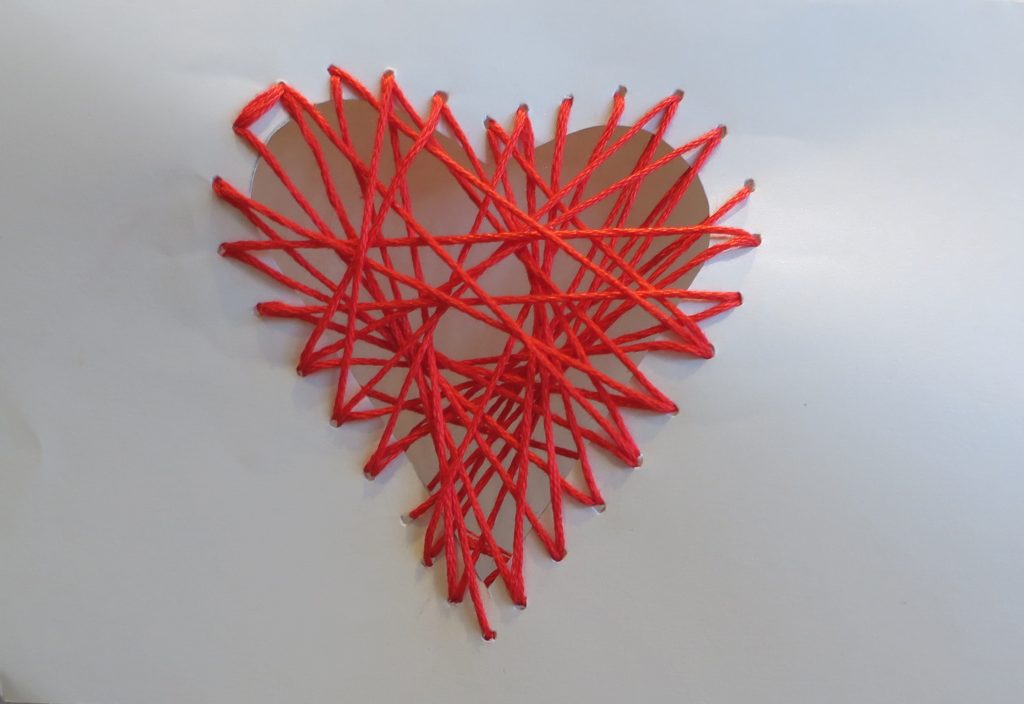
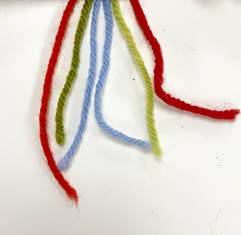
Before you start you will need to cut two strands of each colour thread at 25 inches/64cm long. (e.g 2 strands both measuring at 25”,(65cm) of red cotton thread, 2 strand at 25″(65cm) of blue cotton and another 2 strands of green cotton thread the same length at 25″(65cm).
For the demonstration I have used Red, blue and green tapestry wool, as it is a little bit bigger so easy to understand.
Arrange the threads as alternate colours. For example start with Red, Green, Blue then mirror it back, Blue, Green, Red. Like pictured below.
Place a strip of sellotape across the threads onto a hard surface. Make sure you leave at least 8cm above the sellotape at the top, to allow for tying your bracelet together at the end
Follow the video below for the steps of making this bracelet.
If you have any questions about making the bracelets you can pop into the shop at 80 Warwick Road, CV8 1HL- Tel: 01926 859892 and we’d be happy to help you.
Our opening hours are
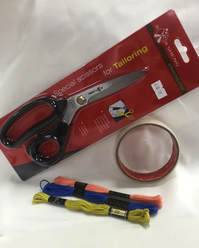
All the supplies used to make these woven bracelets are available to buy at Karen Delahunty Sewing & Knitting Centre.
Hope you all enjoyed this and have fun creating these lovely hand made bracelets for your friends and family.
Tailor Tacks are loose, looped, hand sewn stitches that are common in most sewing patterns. They are used for marking specific points on your fabric.
For example you will see markings on dress making patterns to indicate where your darts are to be sewn or where the pockets should be placed on a garment.
These markings must be transferred from the pattern to the fabric. Its a way of thread marking through the pattern pieces and the fabric all in one go to achieve accuracy. This is especially needed to ensure that your darts are positioned symmetrically on both sides of your garment.
So here is a step by step tutorial on how to sew a Tailor Tack.
You will need a hand sewing needle and a thread of a contrasting colour to your fabric.
 Keep the paper pattern piece attached to your fabric pieces that you have cut out.
You will be sewing the tailor tack through all layers. (The pattern paper is still attached).
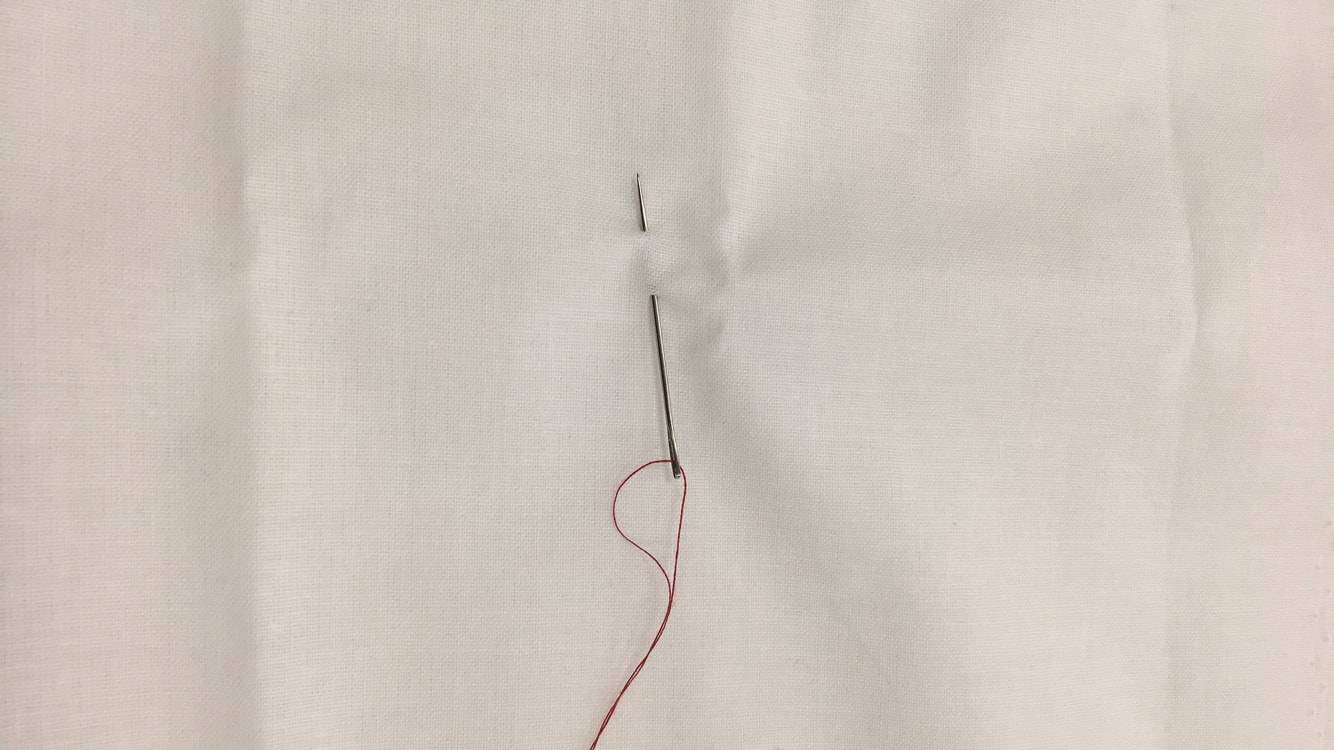
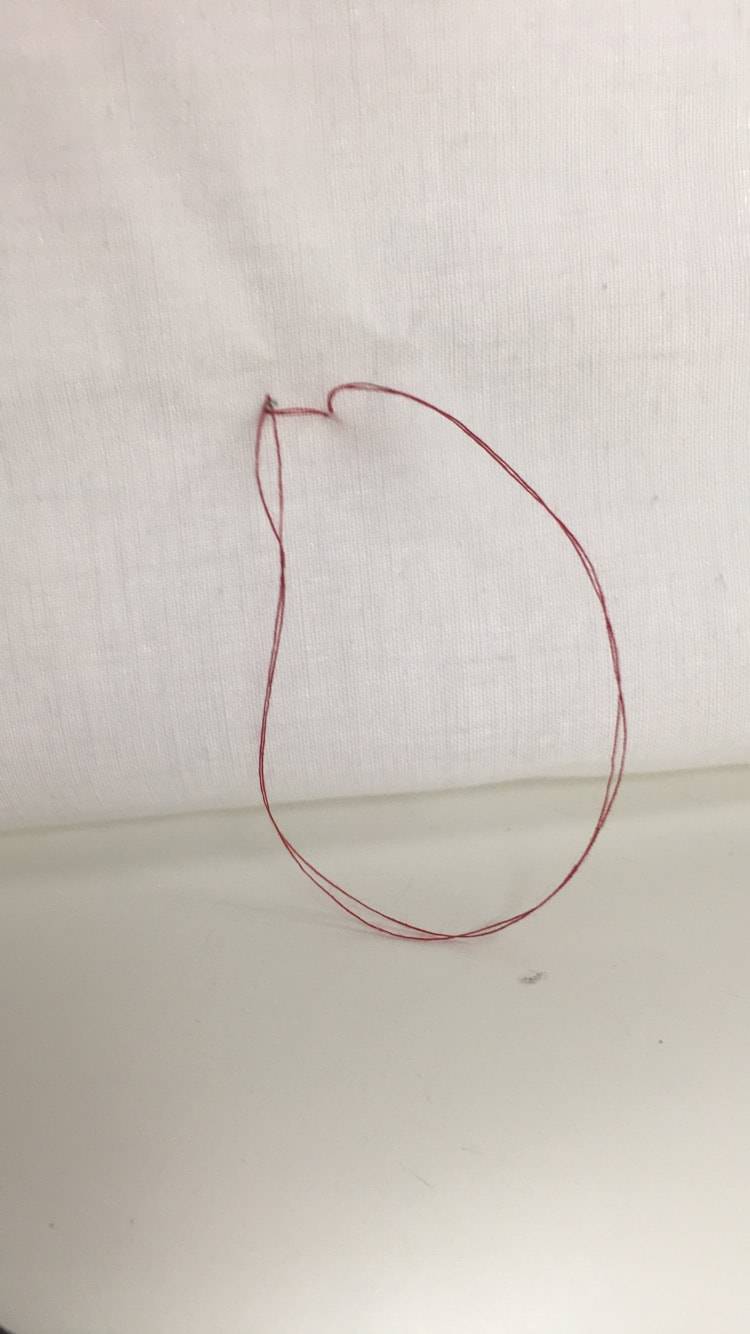
The pattern will indicate where a tailor tack is needed by circles that look like these in the photo. Each circle is numbered. That number represents a garment size. You will sew through one of these circles. Choose the one that matches the pattern size you have cut out.
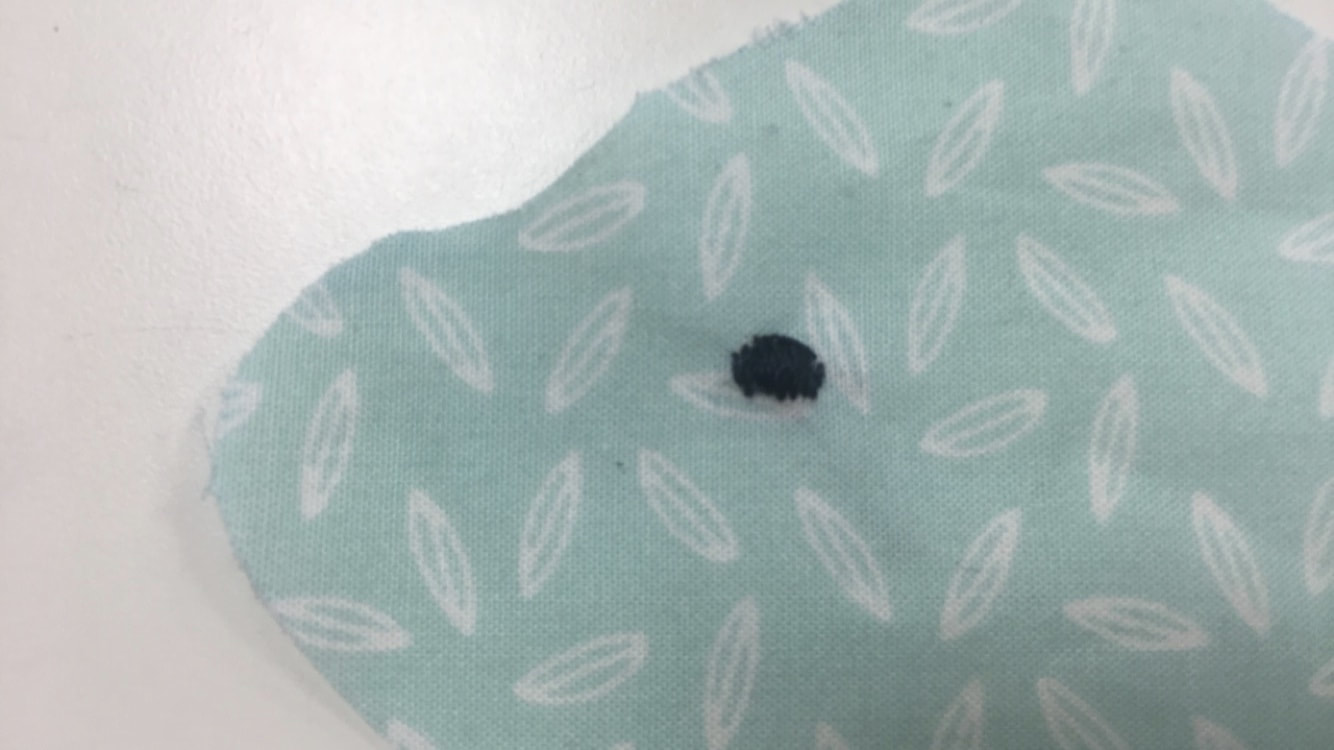
Thread a needle with a strand of thread make it double thread. Make sure its a contrasting colour to your fabric so it creates a clear, obvious marking. (Don’t worry you will take these out eventually, so you won’t see it.) Do not knot the end. Start by making a small simple single stitch. Using the circle on the pattern as a guide, push your needle through the circle and into the fabric. Push it to the underneath, then bring it back up again to complete the stitch, as shown in the picture below.
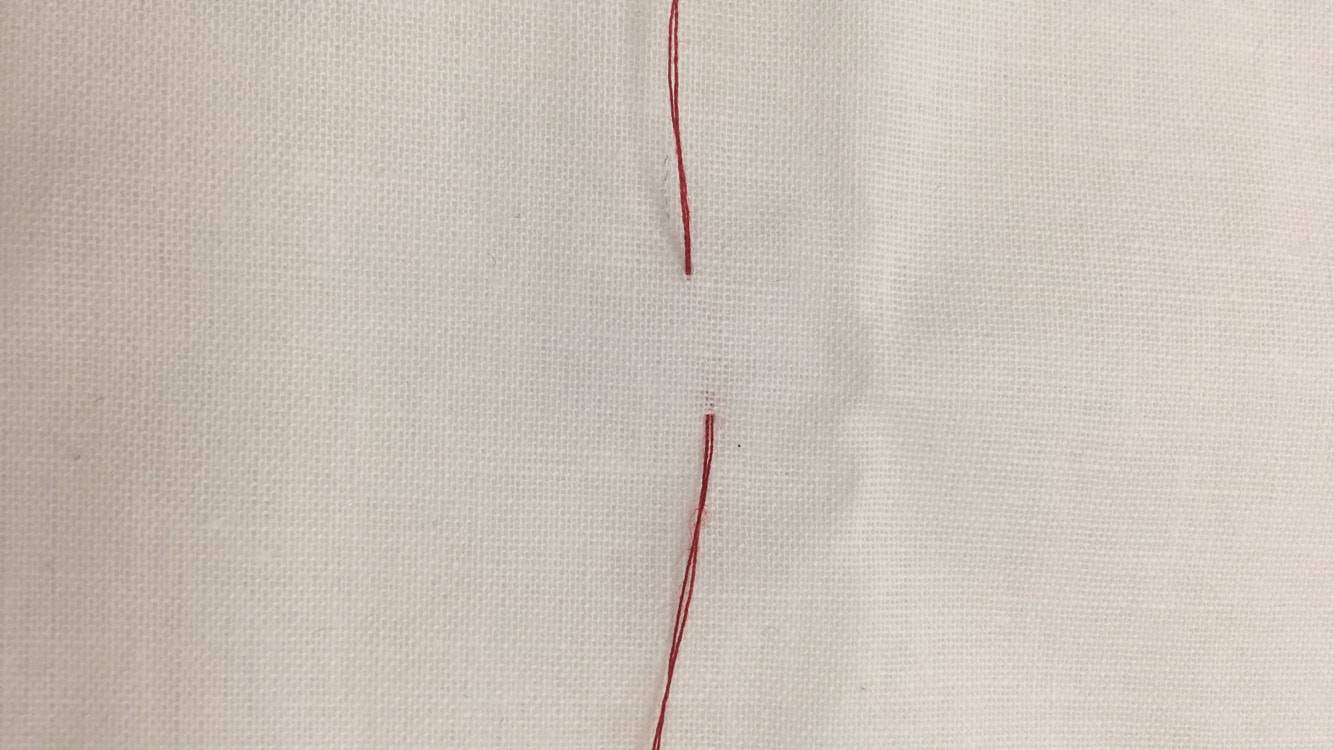
Pull the needle and thread through to leave a reasonable thread tail.
Go back into the same hole/ area and take the needle and thread down and through to the underside of fabric ,making sure to leave a loose loop of thread showing on the top surface.

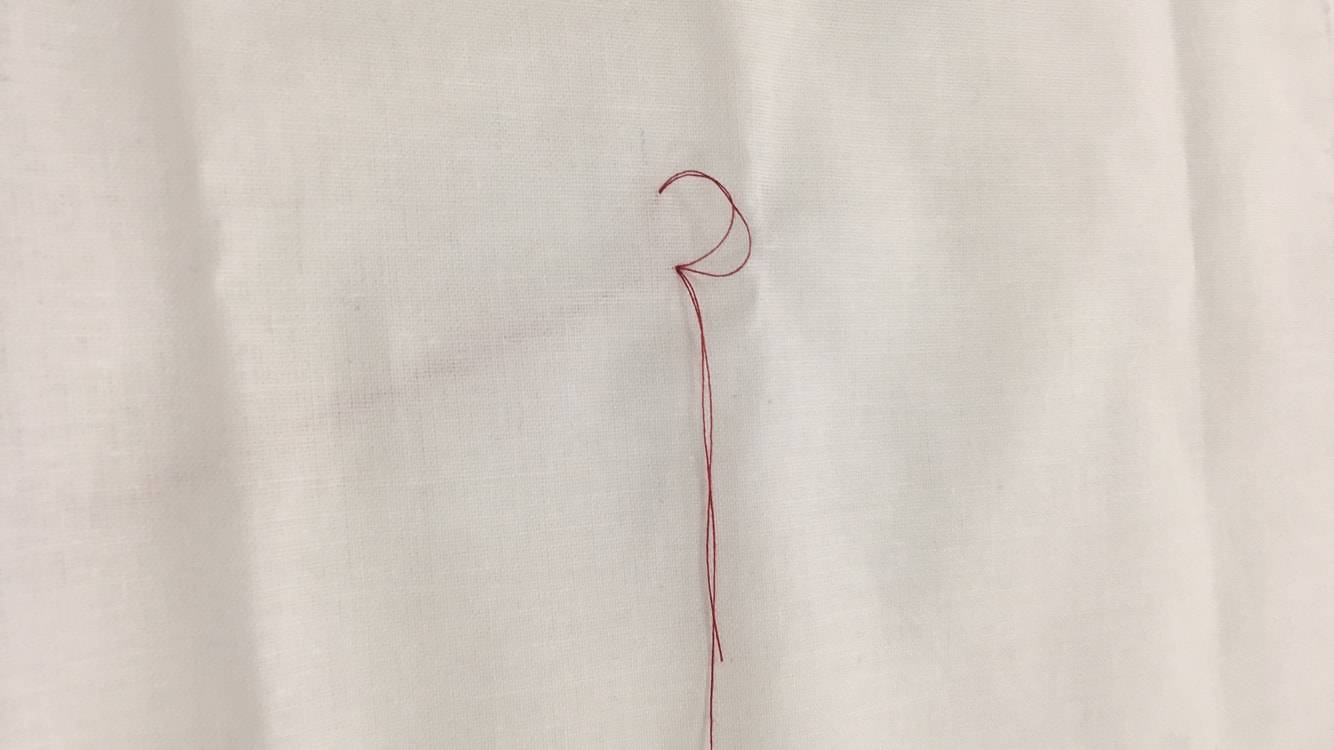
From the underside bring the needle and thread back up and though the hole/area again. Gently pull the needle through the fabric to bring the thread to the top surface. Make sure you leave a loose loop on the underside of the fabric.
Cut the thread from the needle, but be sure to leave a little tail of thread first.
Carefully remove the paper pattern, taking care to ease the tailor tack threads off the tissue paper so it doesn’t tear the pattern too much.
The tailor tacks will still be attached to the two layers of fabric.
Gently pull the 2 layers of fabric apart until you get to the tailor tacks. Continue to pull the fabric apart so you can see the threads. Snip through the middle of these threads. The tailor tack is now cut into two halves.
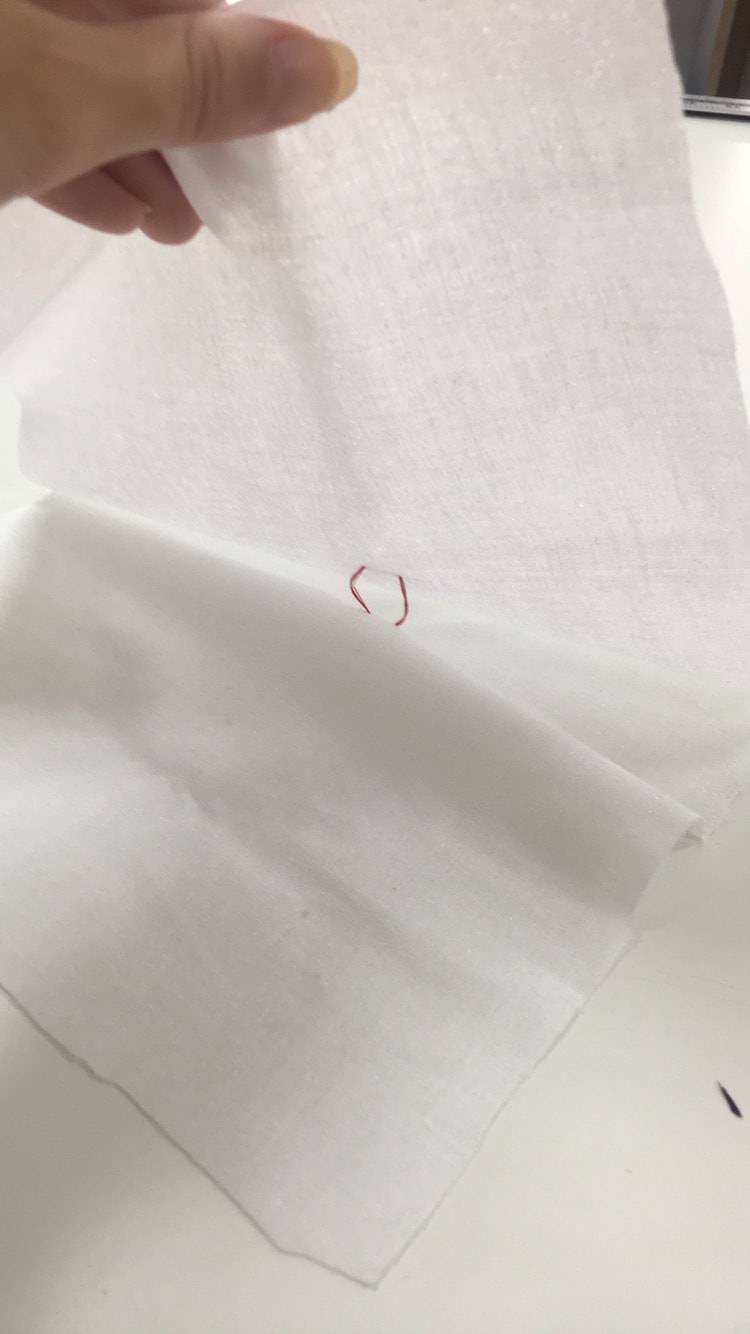
Make sure you leave enough thread on both the top and underneath side of the fabric when you cut through the tailor tack. You will have loops of thread on one side of the fabric and cut ends on the other.
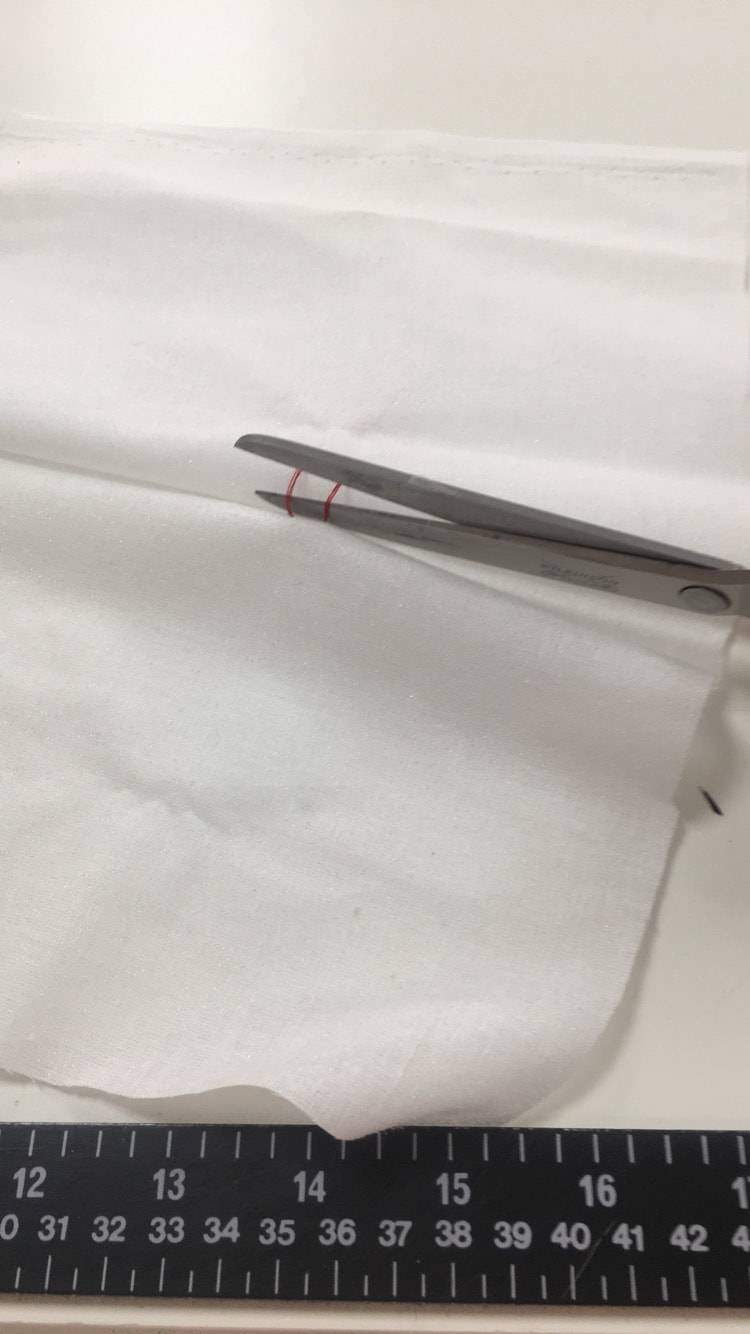
You should now be left with 2 thread marks that are in exactly the same symmetrically placed, on the both the left, and right hand, side of the fabric.

And that’s it!
You now have Tiny little thread markings on both sides of the fabric.
Along with your pattern instructions, you can use these markings to create things like darts, align pockets. mark out your buttonhole placements etc. When you no longer need them, you just simply pull them out. They’re very loose threads so it’s easy to do.
Tailor Tacks are a very simple, usefulness and well known technique, that will improve your sewing significantly.
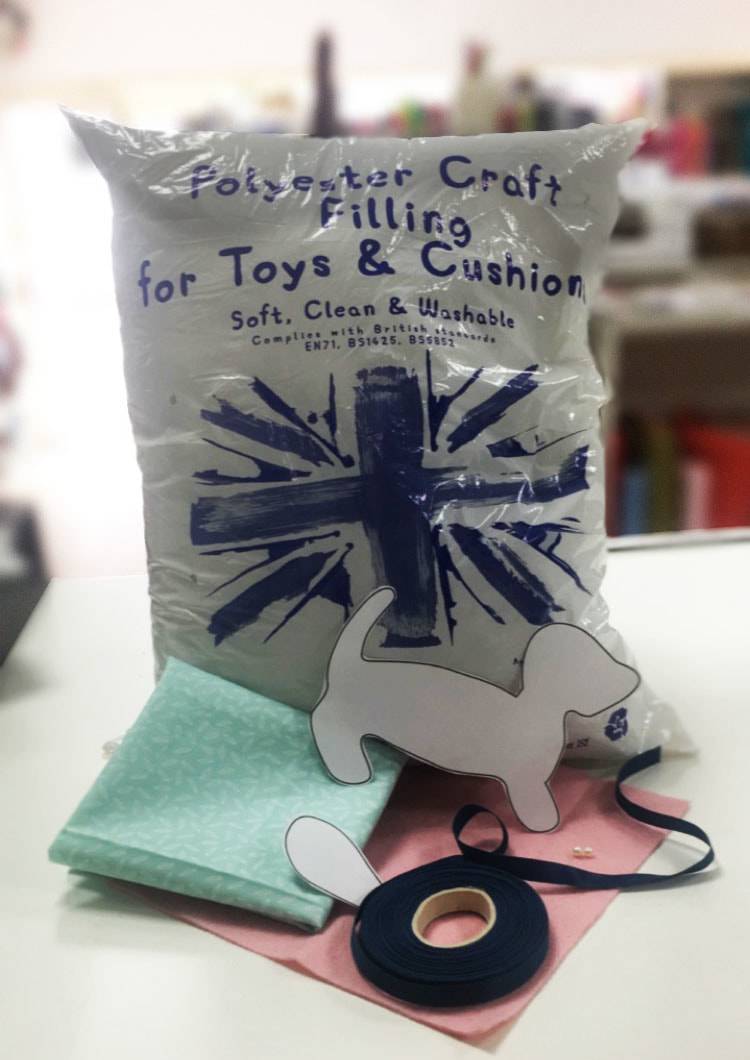
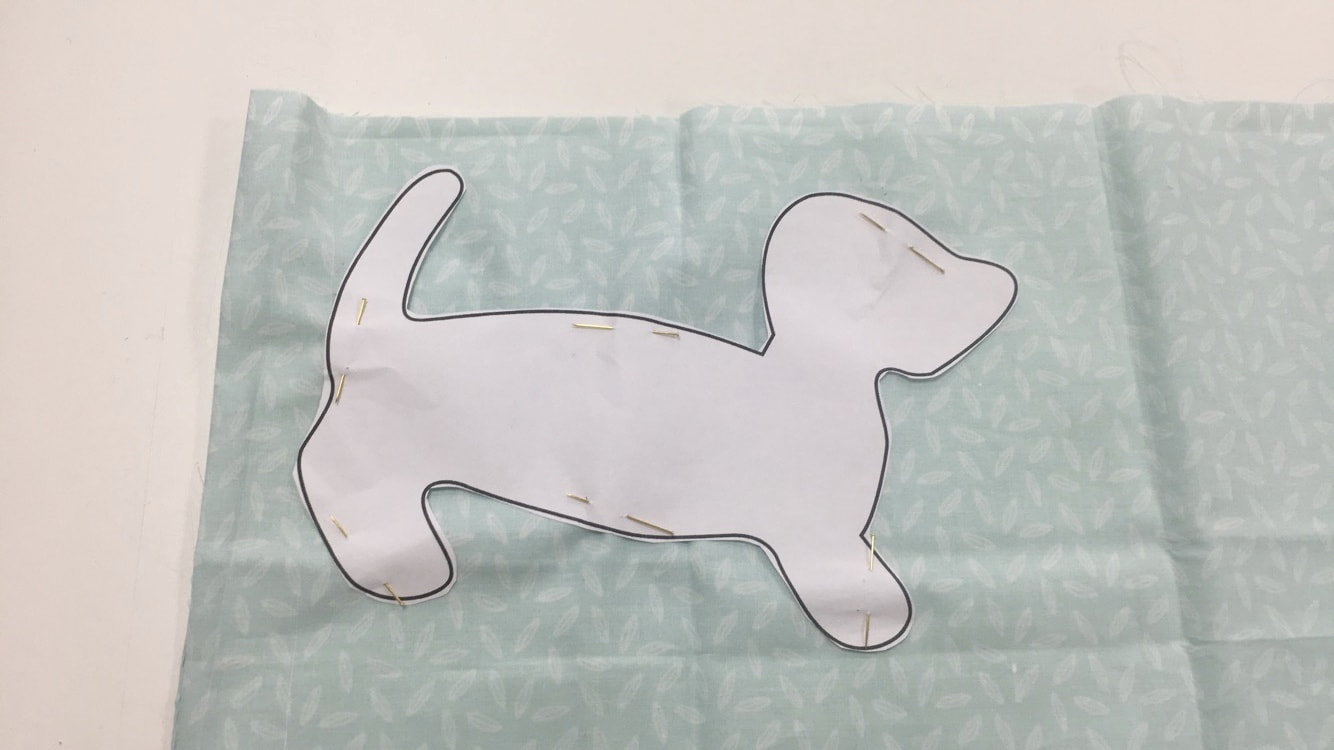
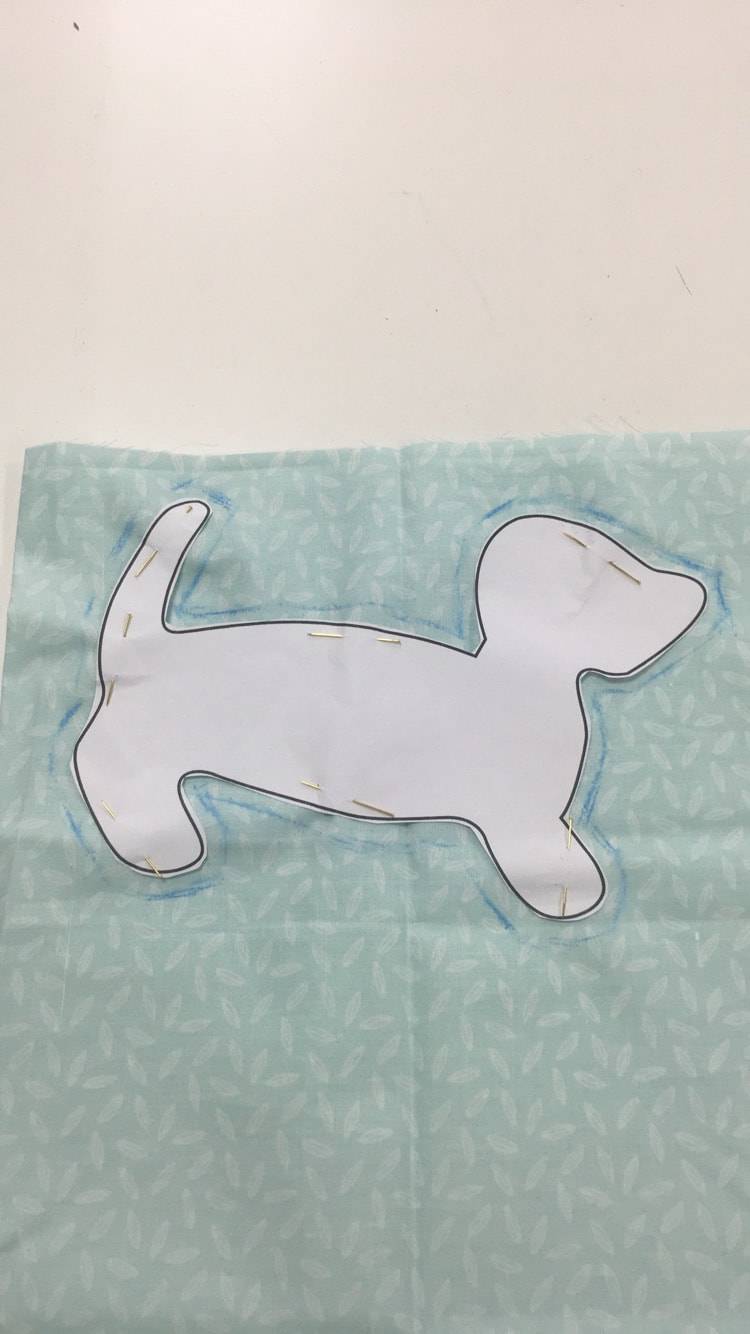
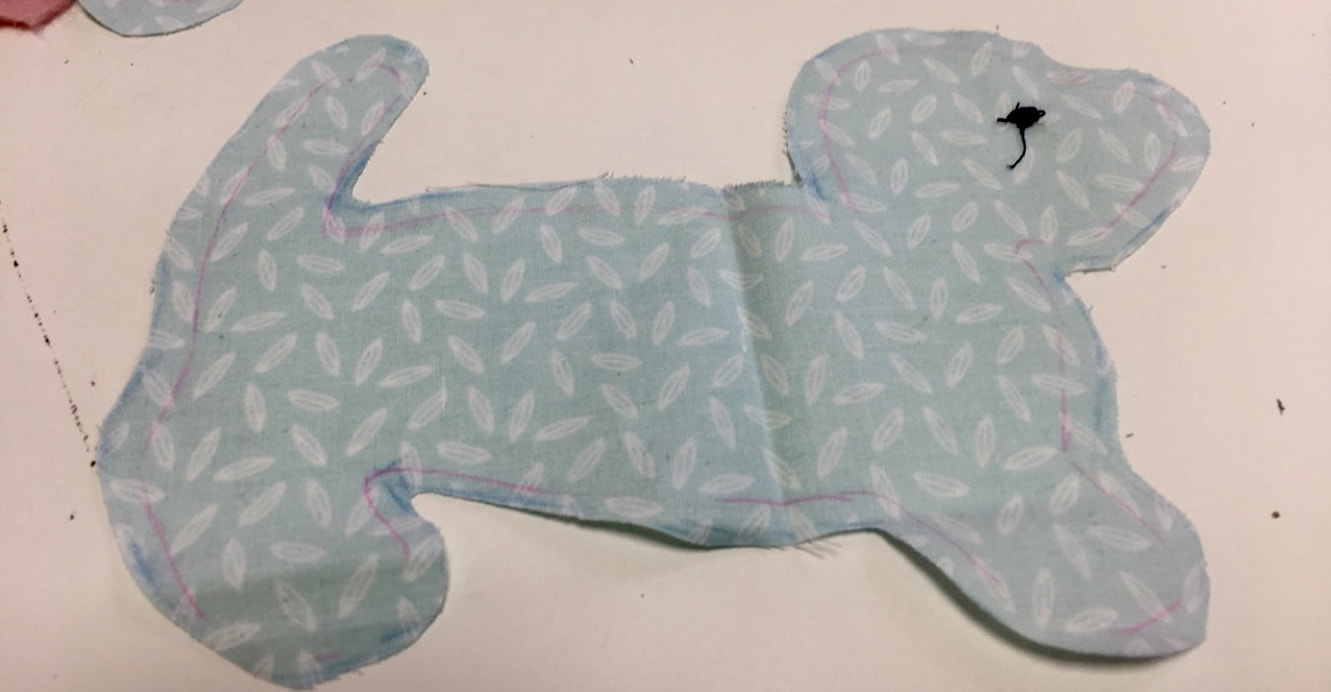
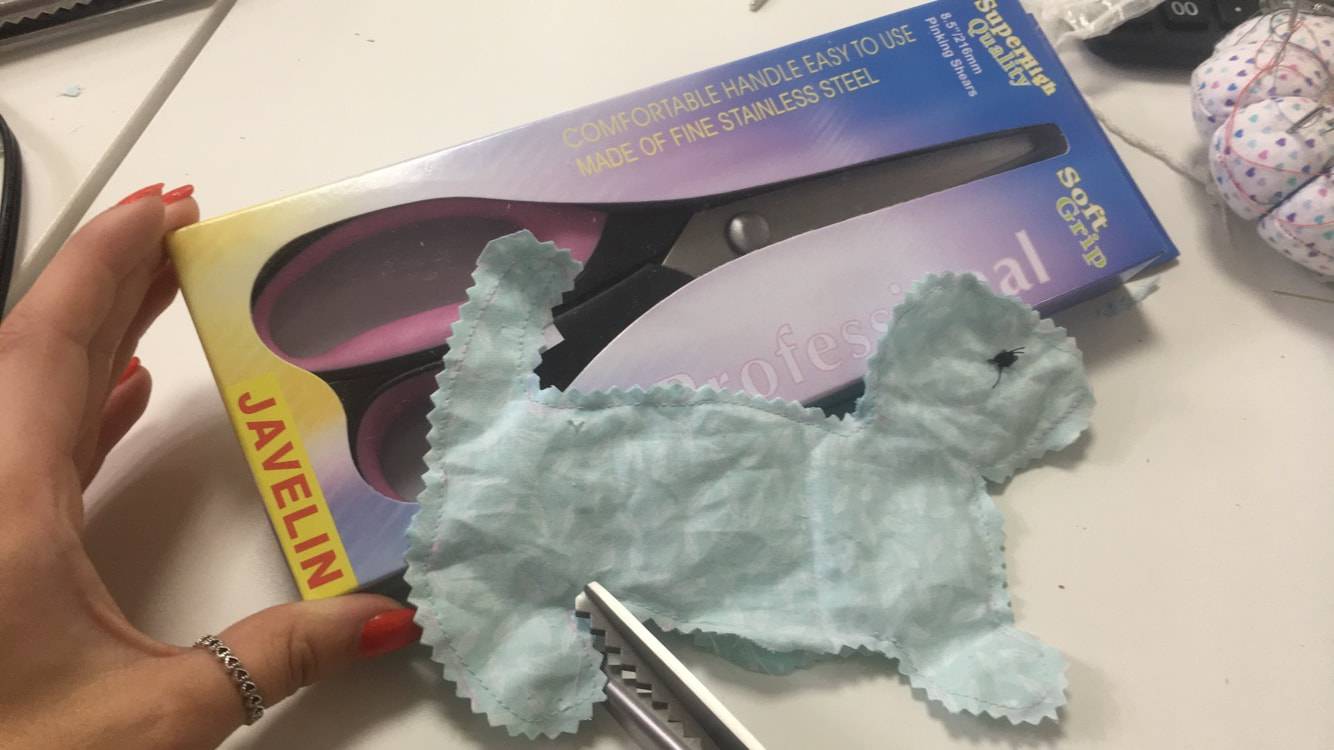
First fold your piece of cotton in half, with right sides together. (I have already cut out my dachshund template) ready to then pin to the layers of fabric. Once you have pinned the template to the fabric you will need to add 5mm seam allowance round the outside of the template. For this step I used a tape measure to measure 5mm and a clover liner chalk pen to mark the 5mm at points. I then roughly joined these points and then cut it out.


If you choose to embroider the eyes on the dachshund do this now, however if you want to use buttons for the eyes this can be done later. If you are a more advanced sewer you could do a tailor tack with the two pieces of fabric where you want the eyes to be positioned, this is just so the eyes will be positioned in the same place on either side of the dog. If you want to learn how to do a tailor tack Click here to take you to our blog post on how to do a tailor tack.
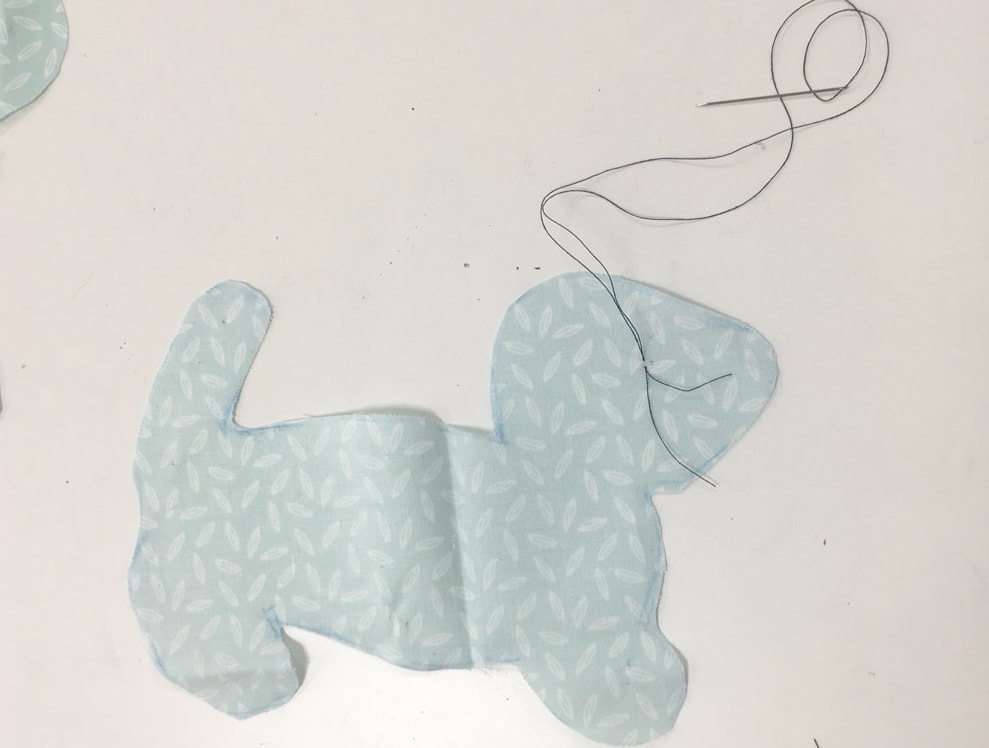


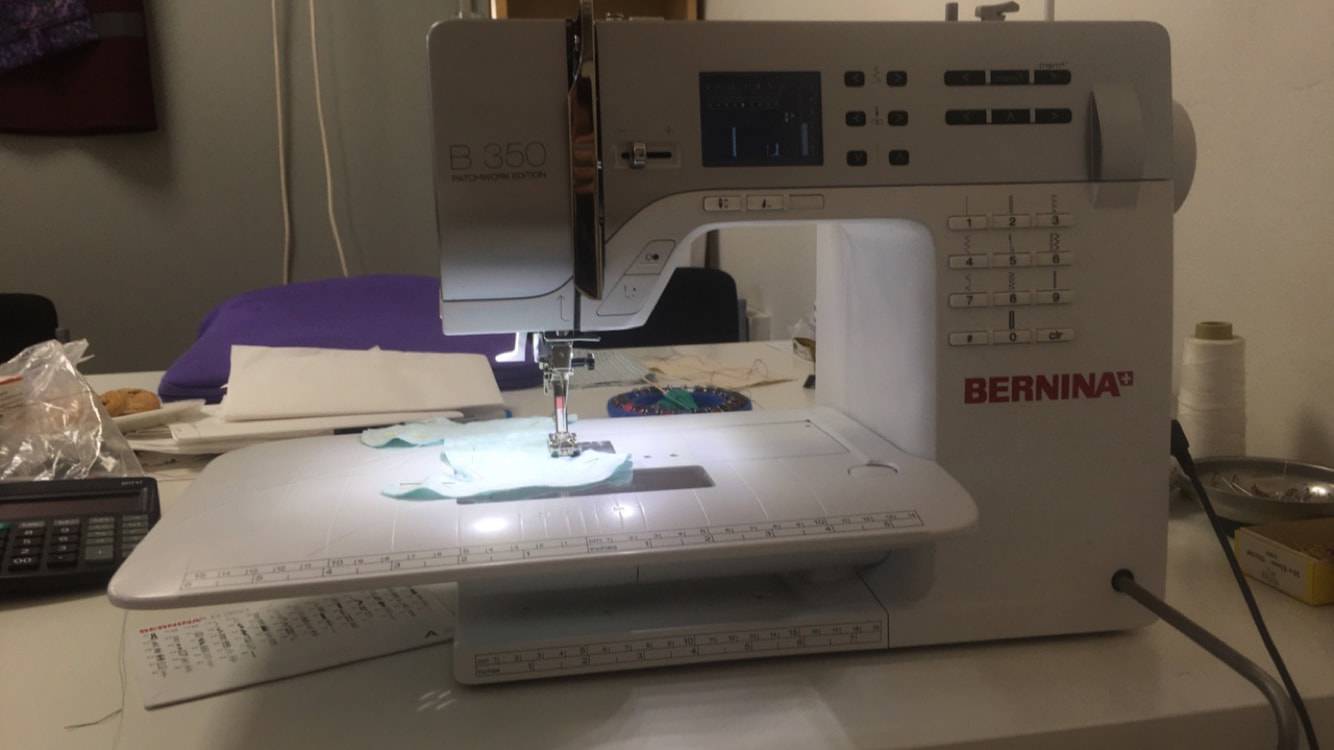
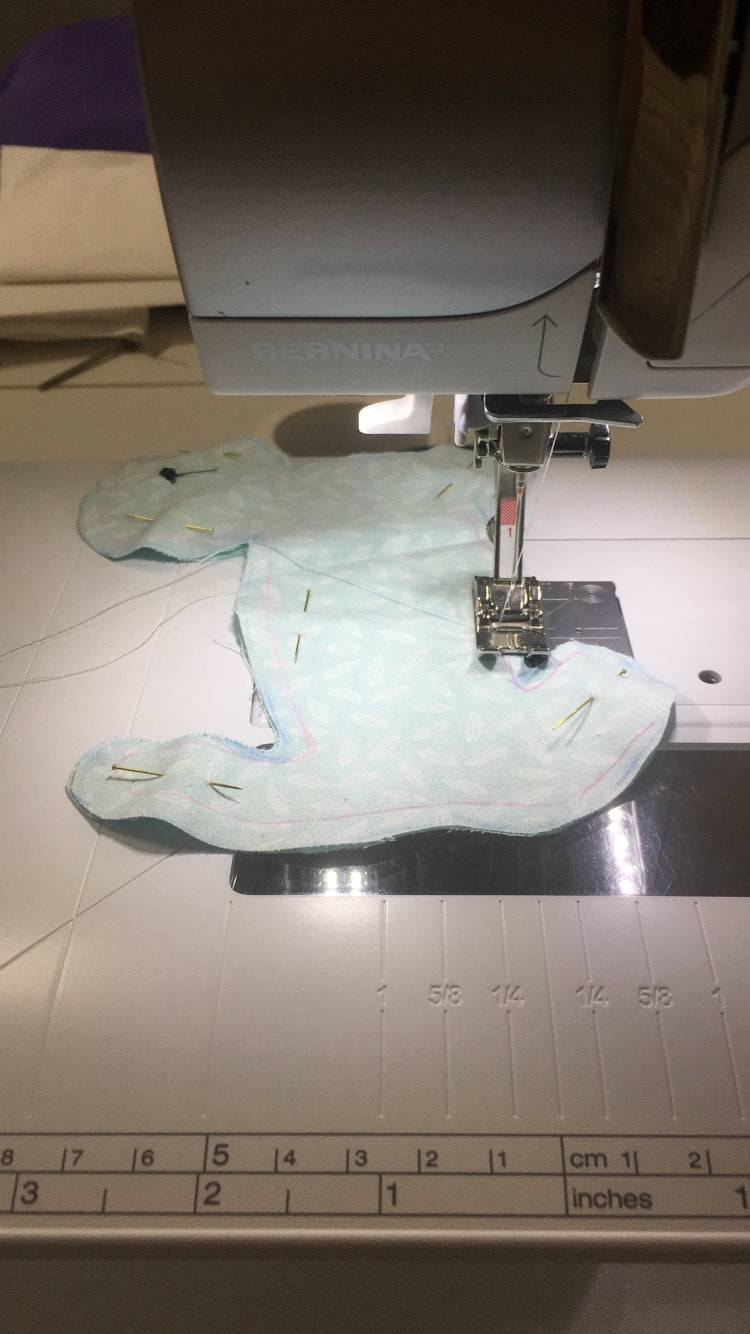
The next step is sewing the two fabric dog pieces together. Pin the pieces together to stop them from moving. You will want the right sides of the fabric together and using a sewing machine (I’m using a Bernina B350) and just a basic straight stitch, start on the Dachshunds tummy and sew along your 5 mm seam allowance line you drew earlier. Sew all the way round until you almost meet where you started and make sure you leave a gap to put the stuffing in later. Again if you are more advanced sewer reverse over your stitch at the start and end for strength so that it doesn’t easily rip open when you are turning and stuffing it.
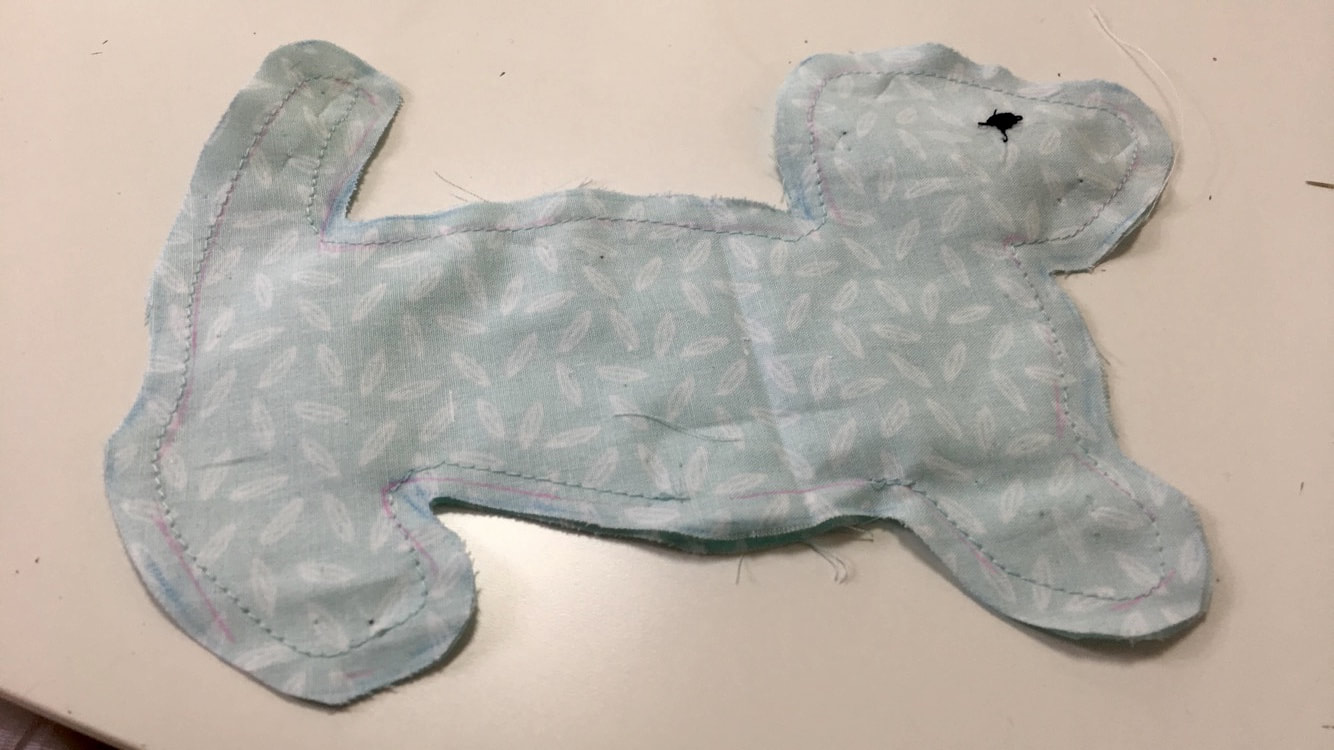
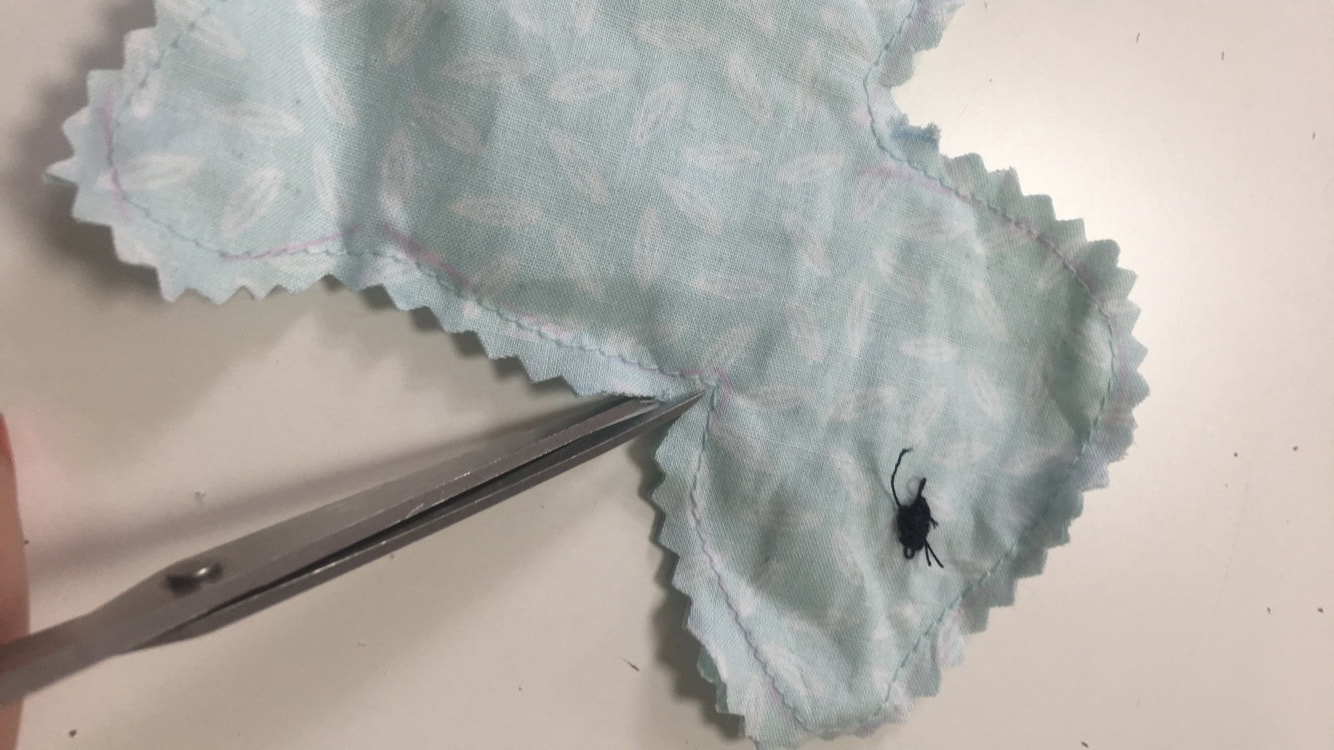
Clip and trim the seam allowance down, I used pinking shears to do this which makes this step quicker and easier. Make sure to really clip the corners before you turn the dachshund right side out.
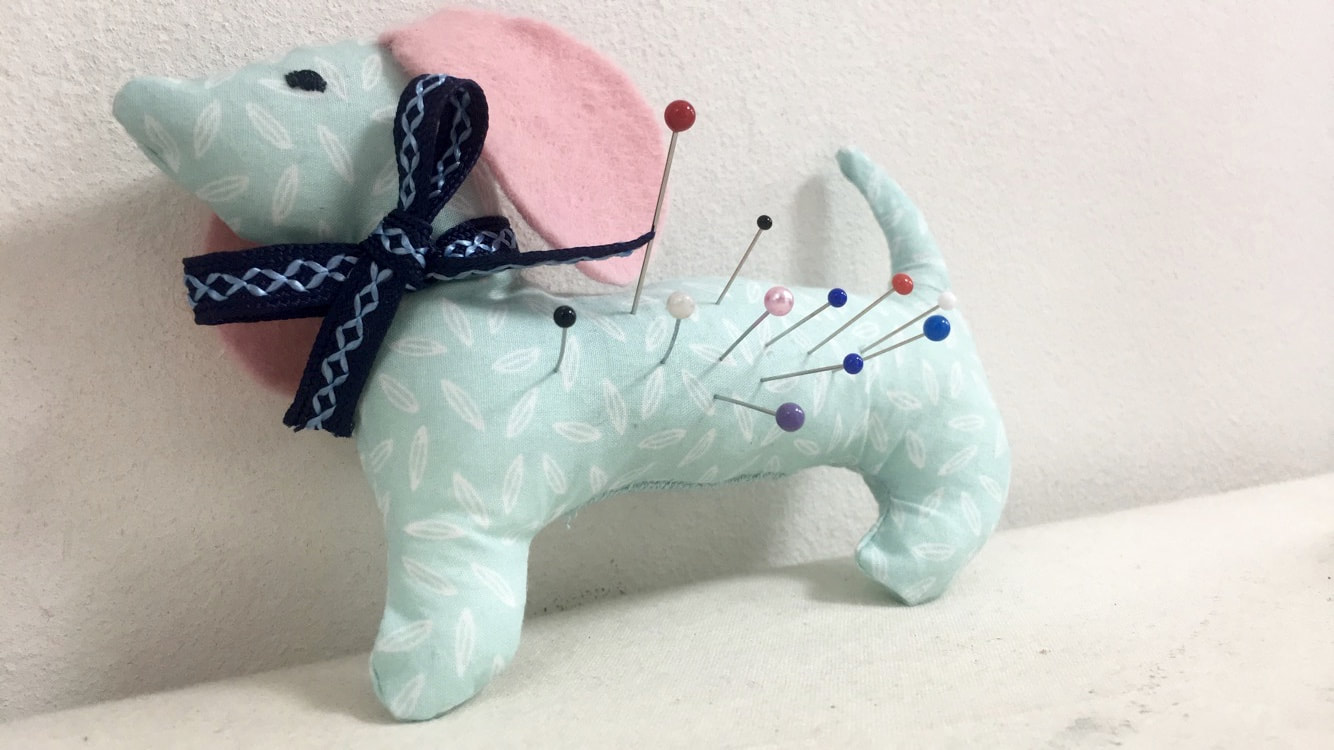
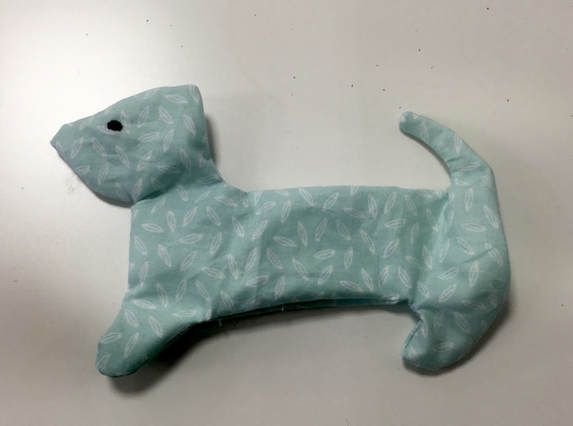
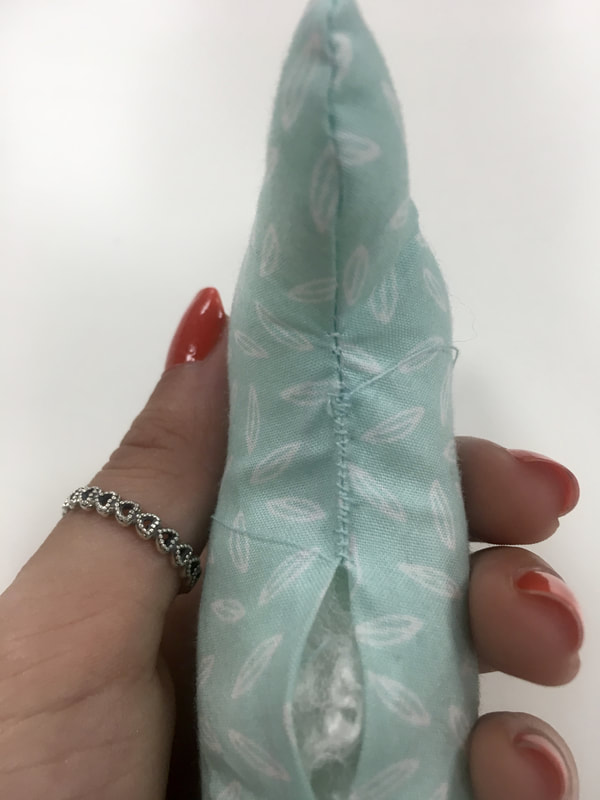
It should now look something like this.
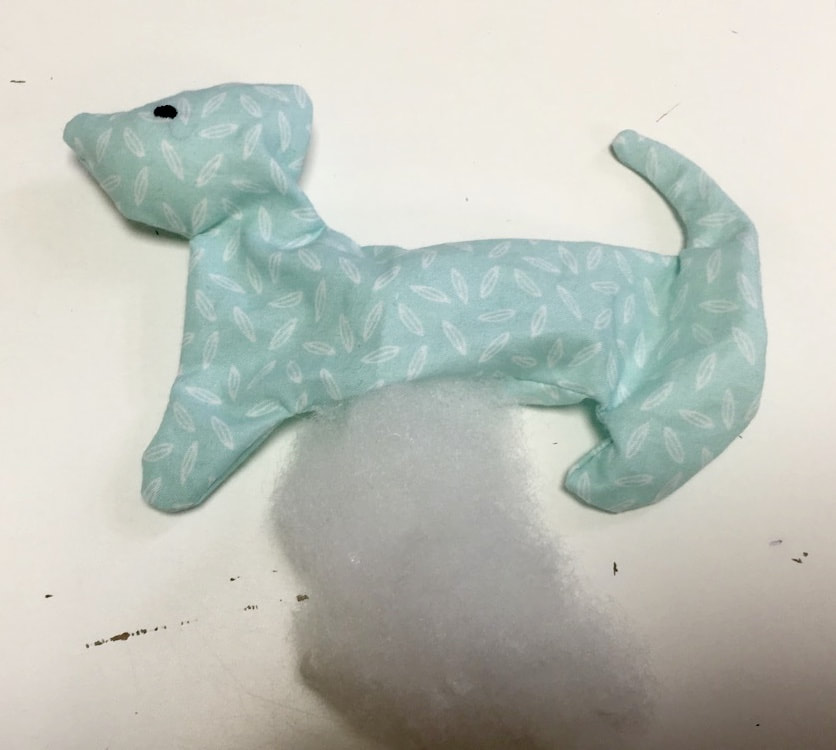
Fill the Dachshund with the toy stuffing. Tip: use a knitting needle to push the stuffing to the ends of the limbs.

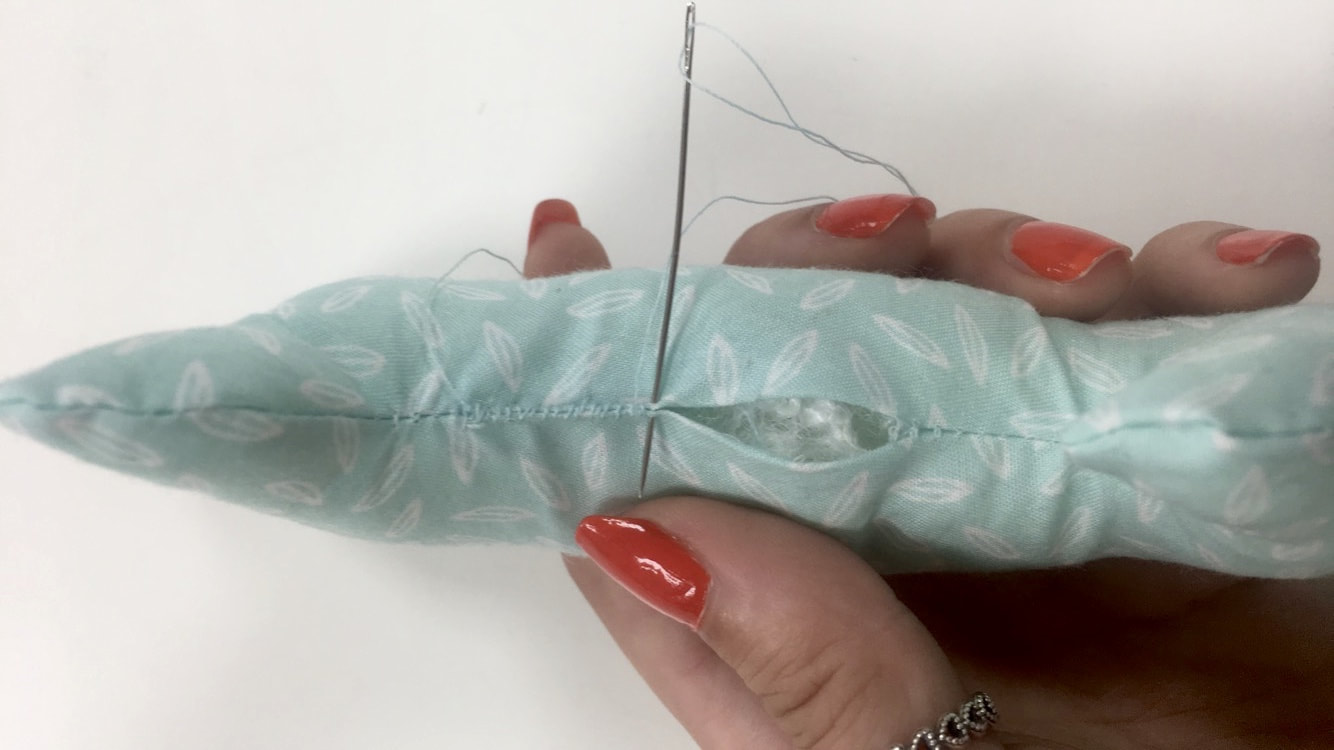
After you have stuffed the Dachshund fold in the raw edges where you left your gap and hand sew the gap closed.
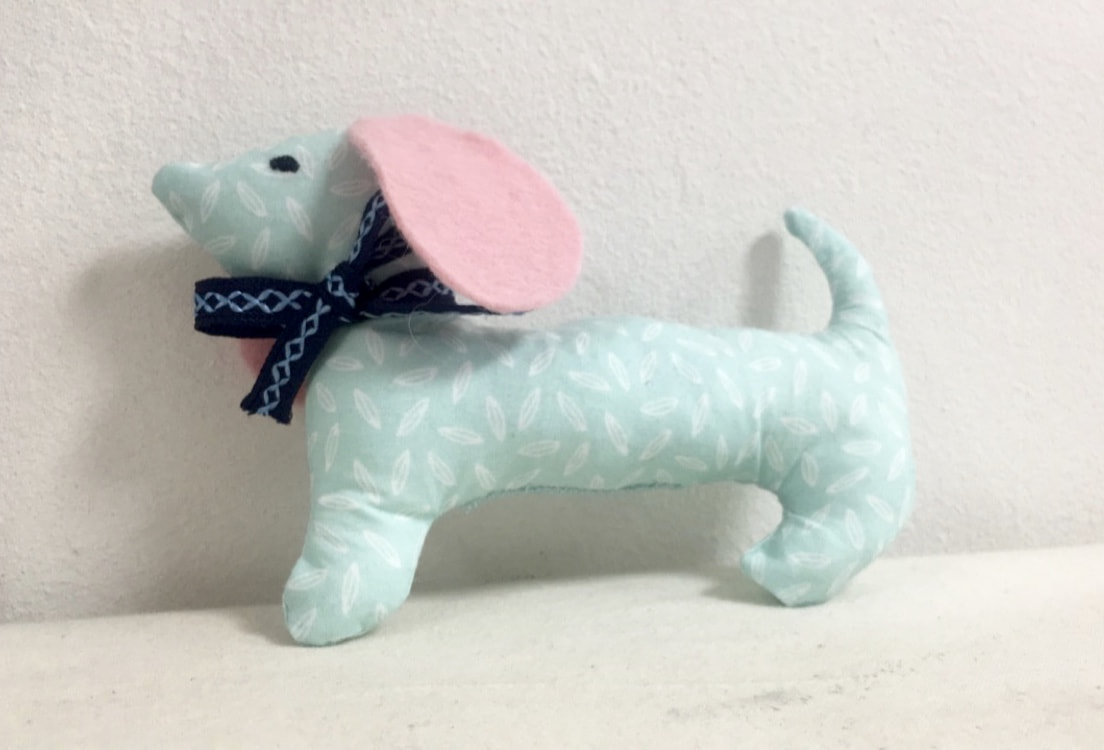
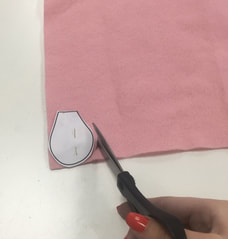 Pin the ear template pieces to your piece of felt and cut out two ear shapes from felt. Hand sew the ears to each side of the Dachshunds head. Make sure you use a matching thread to the colour of the felt so the thread is not visible. Then the final step is tying the ribbon around the Dachshunds neck in a bow. There you have your Daisy the Dachshund pin cushion.
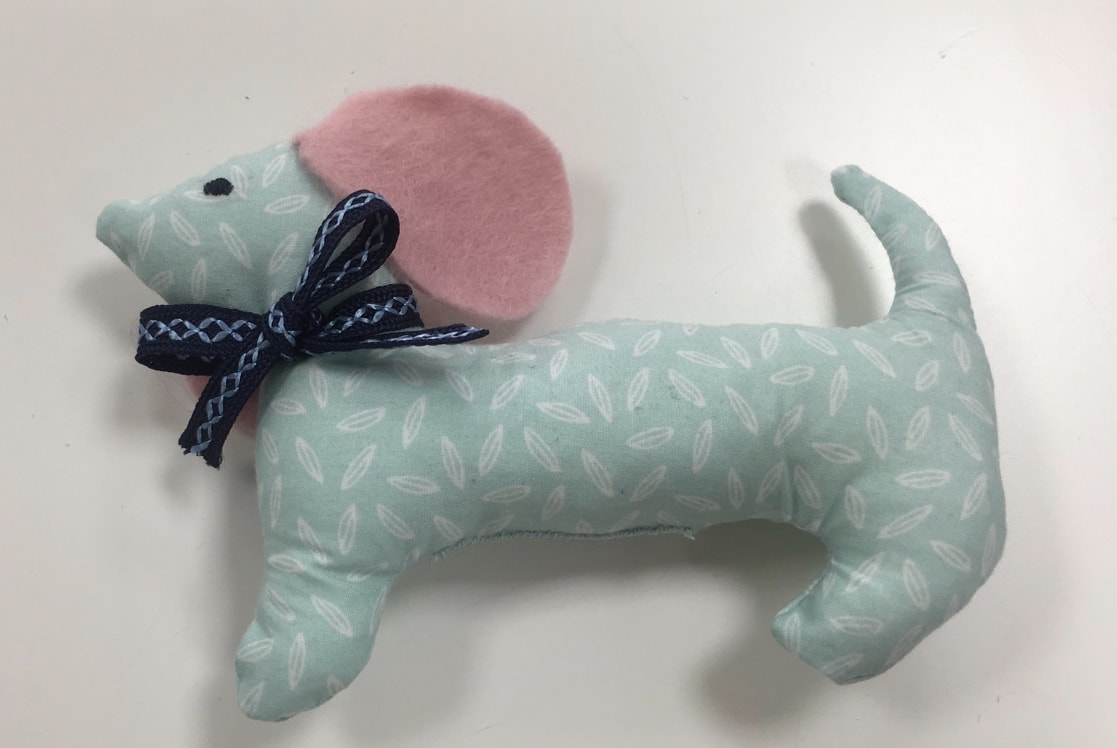
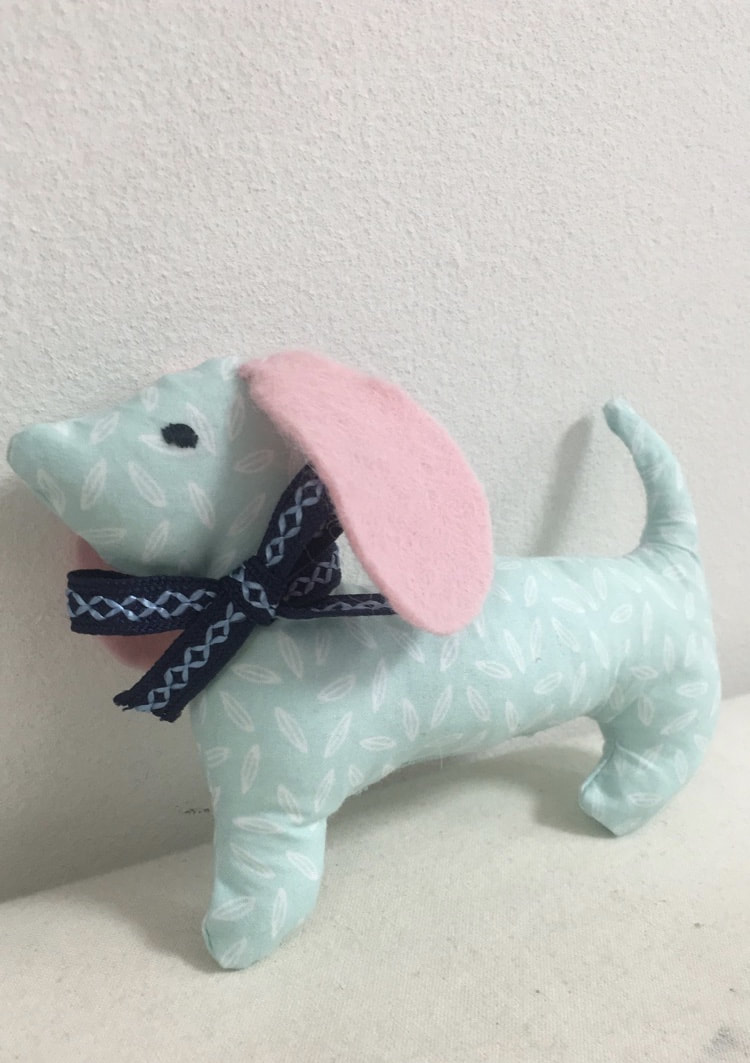
Thank you to Sew Magazine for the pattern to make Daisy the Dachshund.
As always all the equipment used in this project are available to buy in store at Karen Delahunty Sewing and knitting Centre. Remember, if you come in on Sew Saturday which is the 21st of October and spend £30 with us you will receive a free gift bag full of exciting goodies, which includes a free Daisy the Dachshund pin cushion kit!
There will be lots of workshops going on through out the day where you can make your own zip up pouch bag or mini bunting for only £5, so make sure you book your place in advanced and come on down and have a fun filled afternoon celebrating Sew Magazines Sew Saturday!